This page was last updated on February 17, 2020.
- Processes: Mobile First Design
- Tools: Figma, Github, Github Projects, Chrome/Firefox Developer Tools
- Technologies: React, Material Design, Material-UI, JSON, CSS, APIs
The Project
cross.team was asked to design a new front-end for a container shipping order management and dispatching application.
My Role
- performed limited project management duties
- performed limitied product management tasks, including collecting feature requirements from key stakeholder
- worked on Information Architecture, including assessing application’s overall navigation
- collaborated with developers to understand and map existing backend APIs in graphQL schema
- Visual Design
- documented APIs
- mentored Junior Designer
Case Study
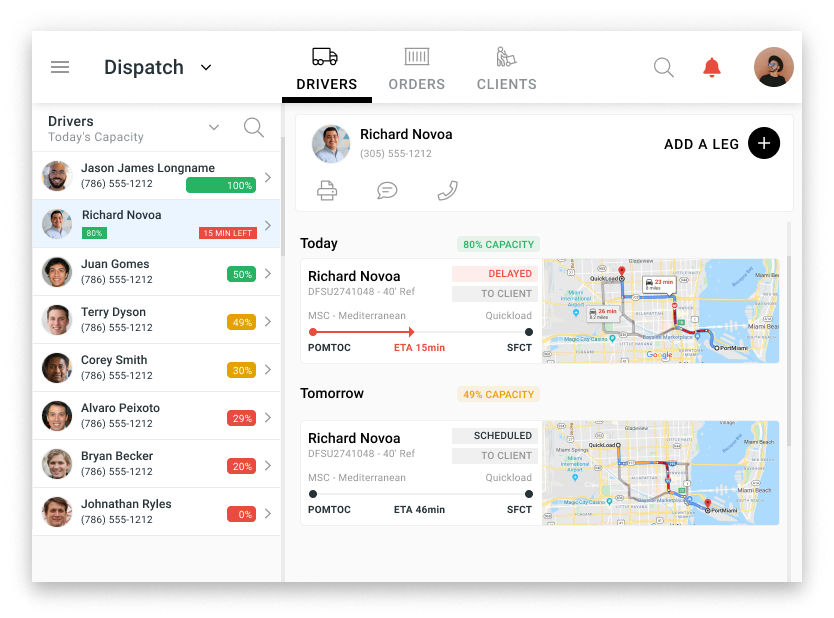
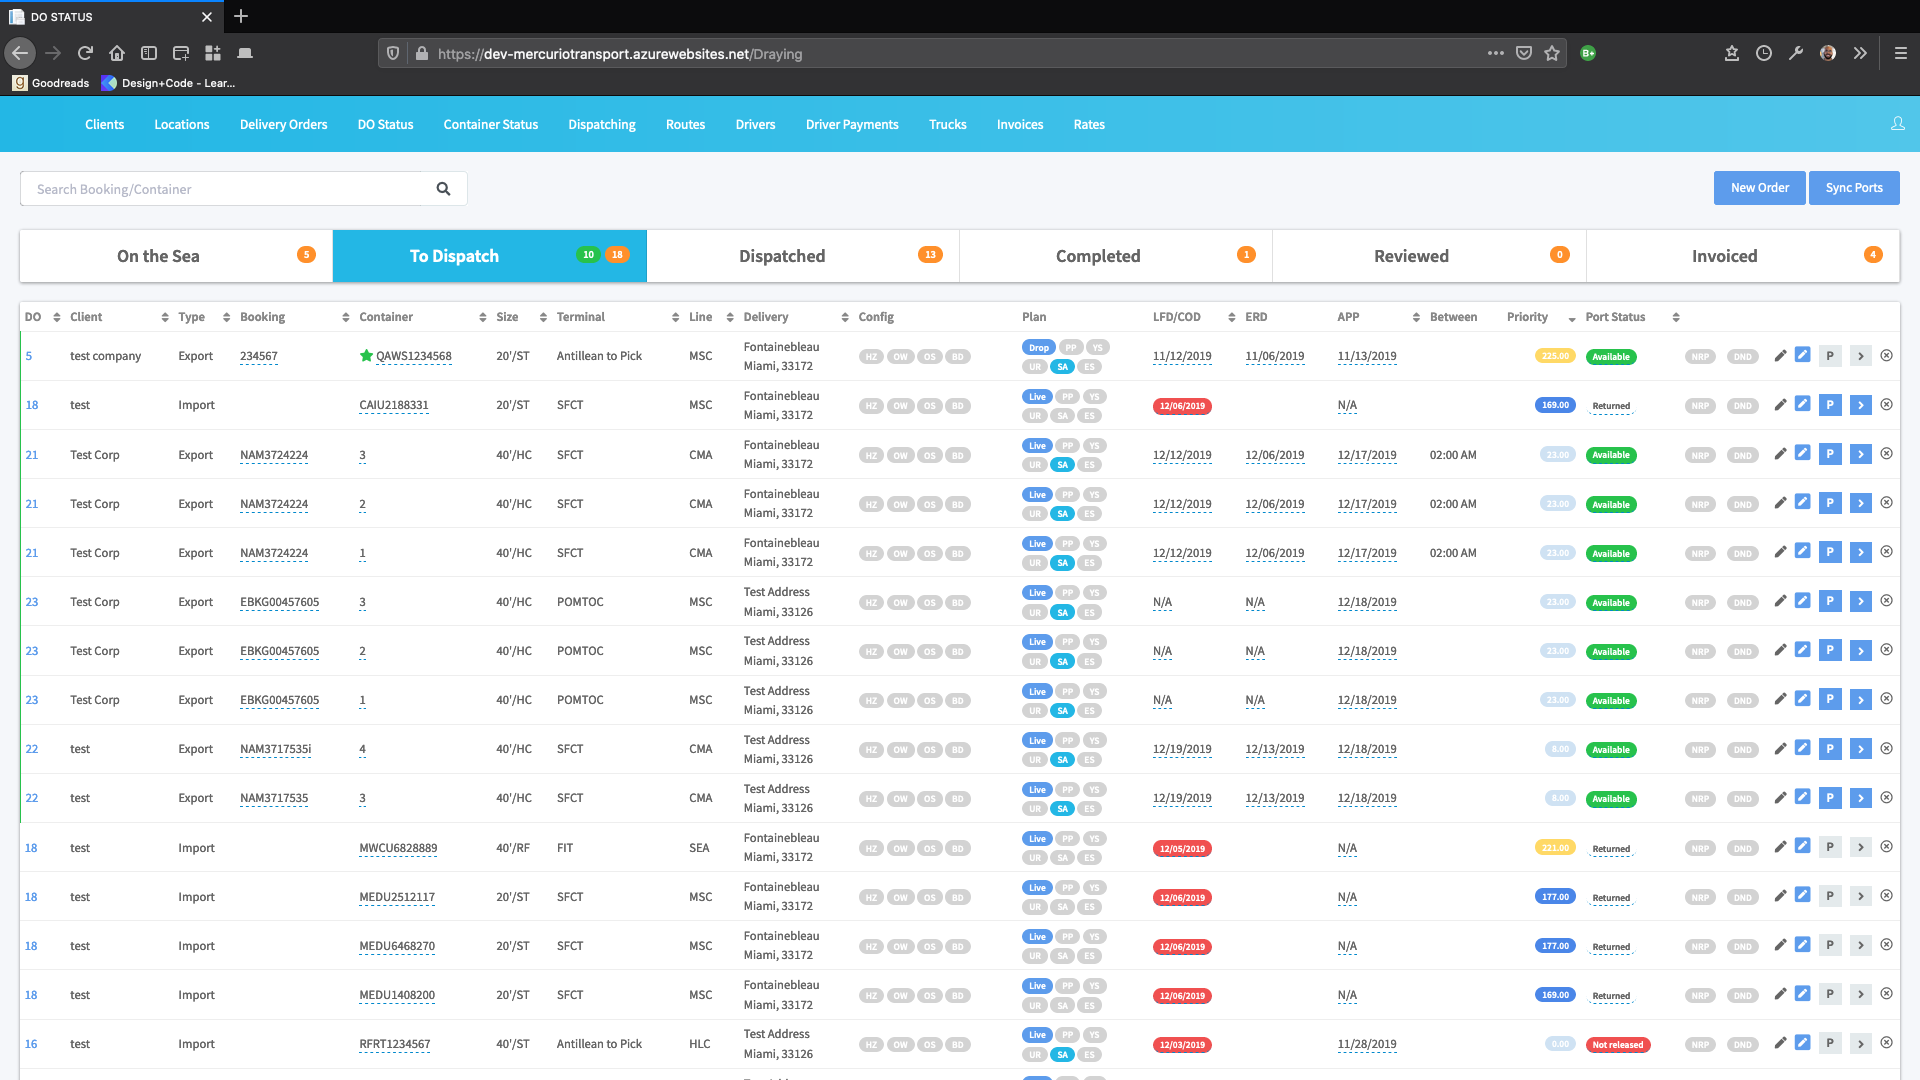
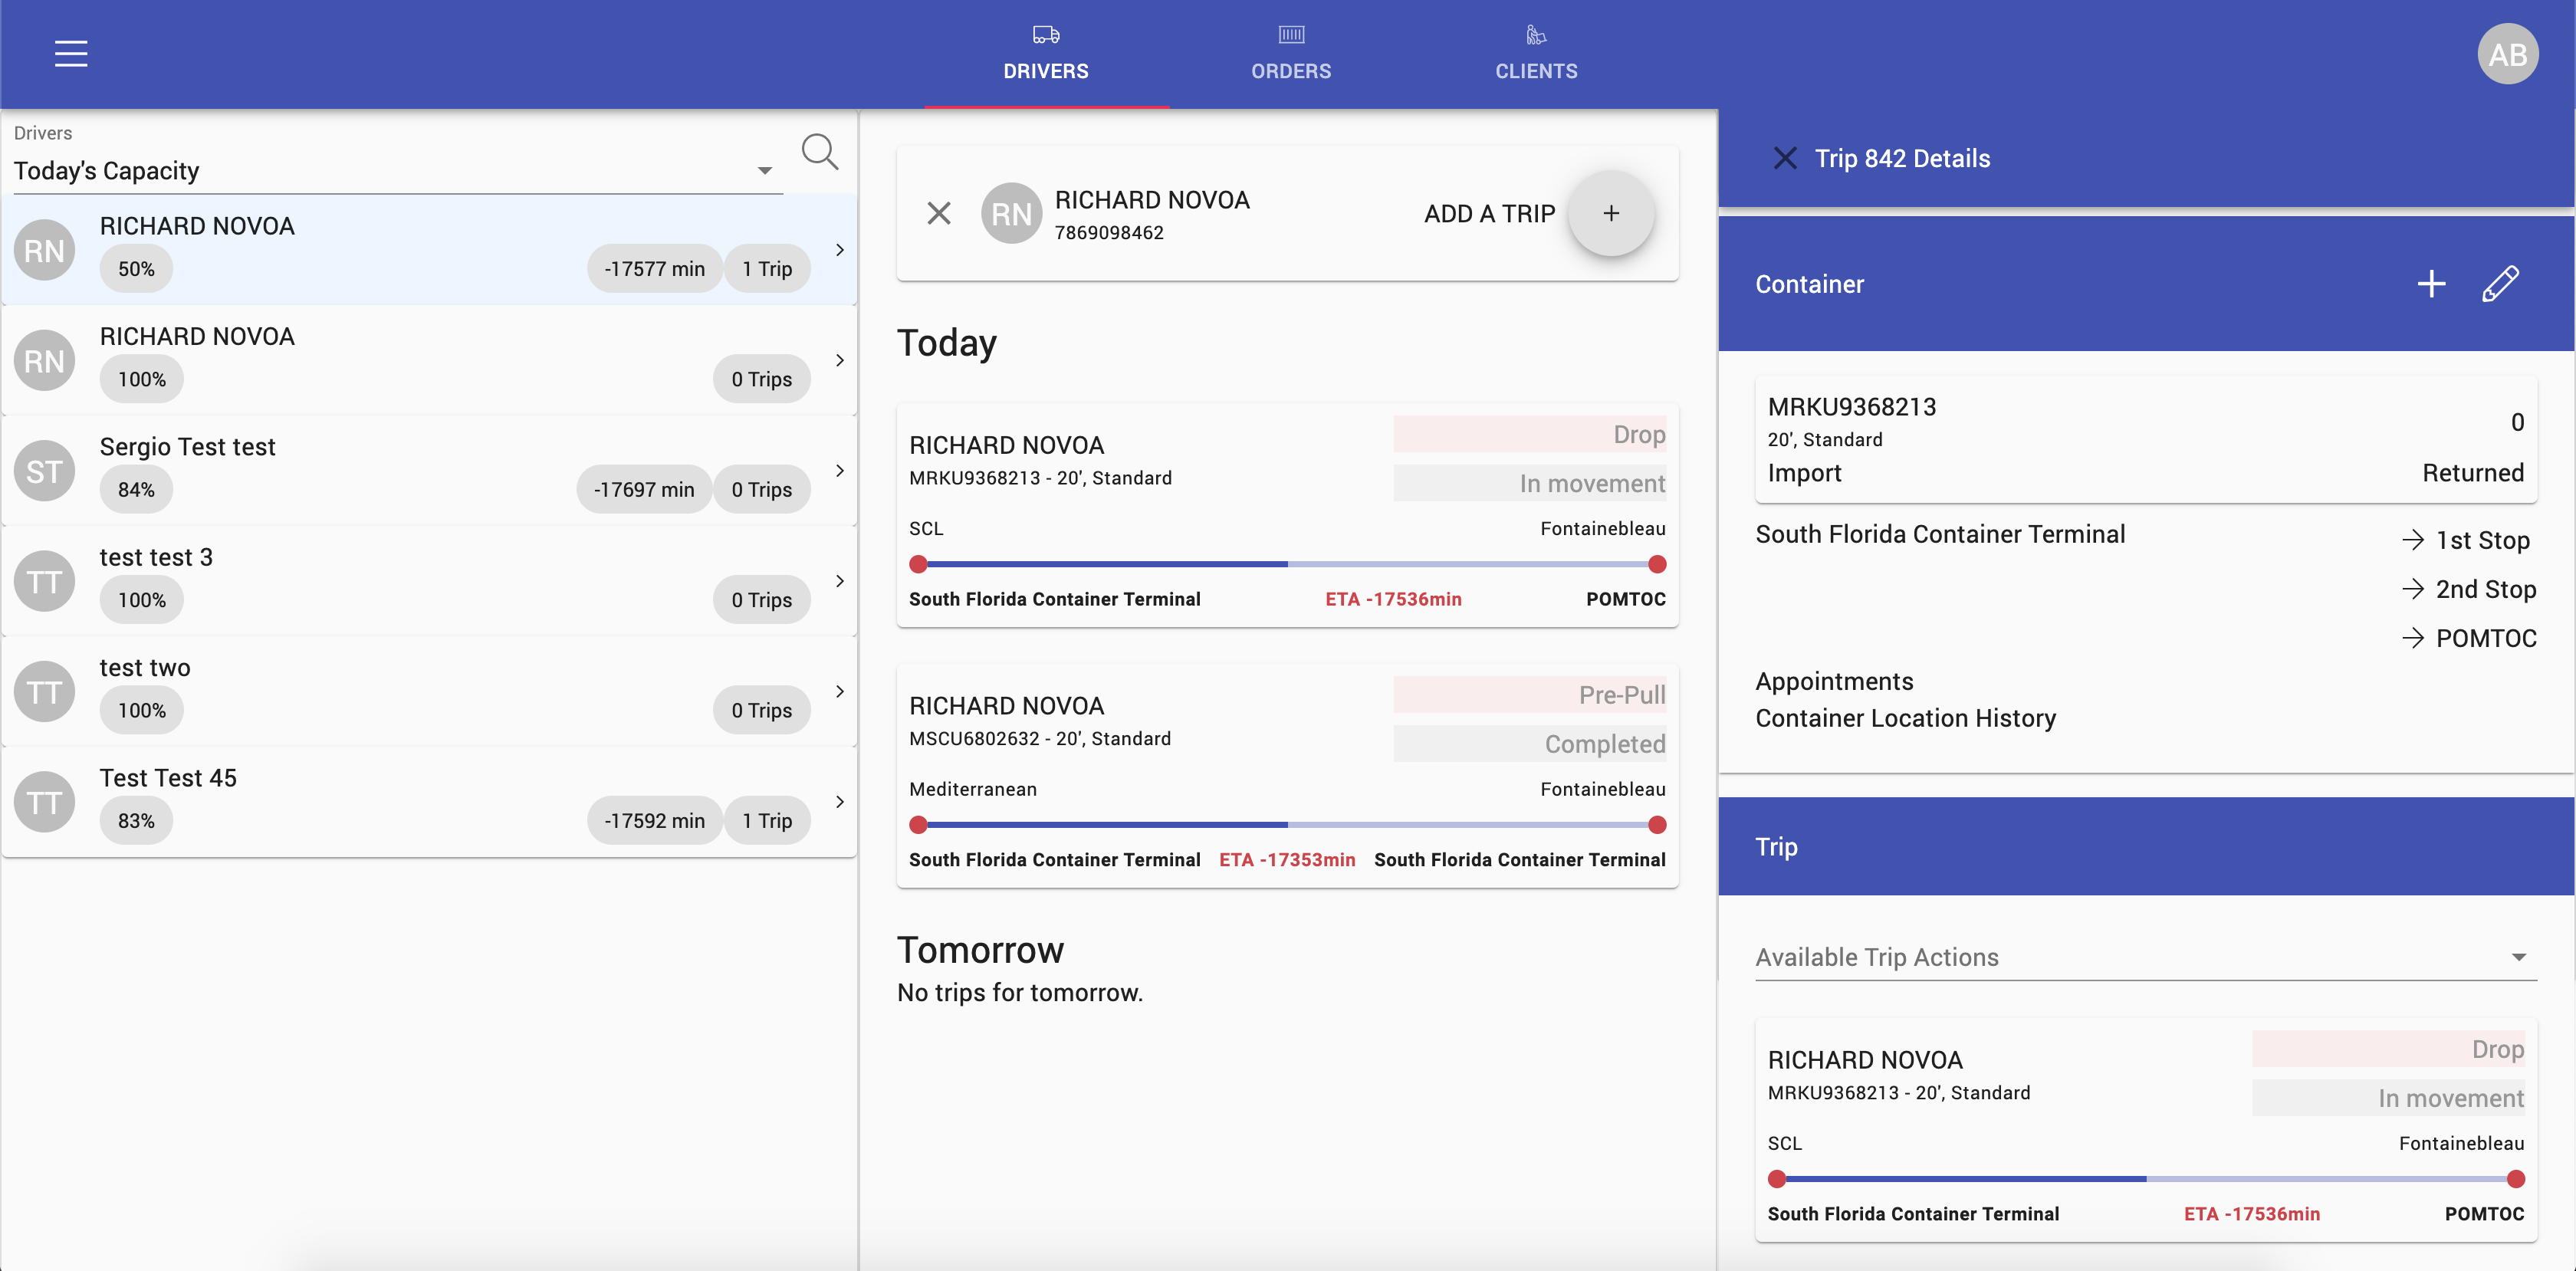
The existing product in kanban view:
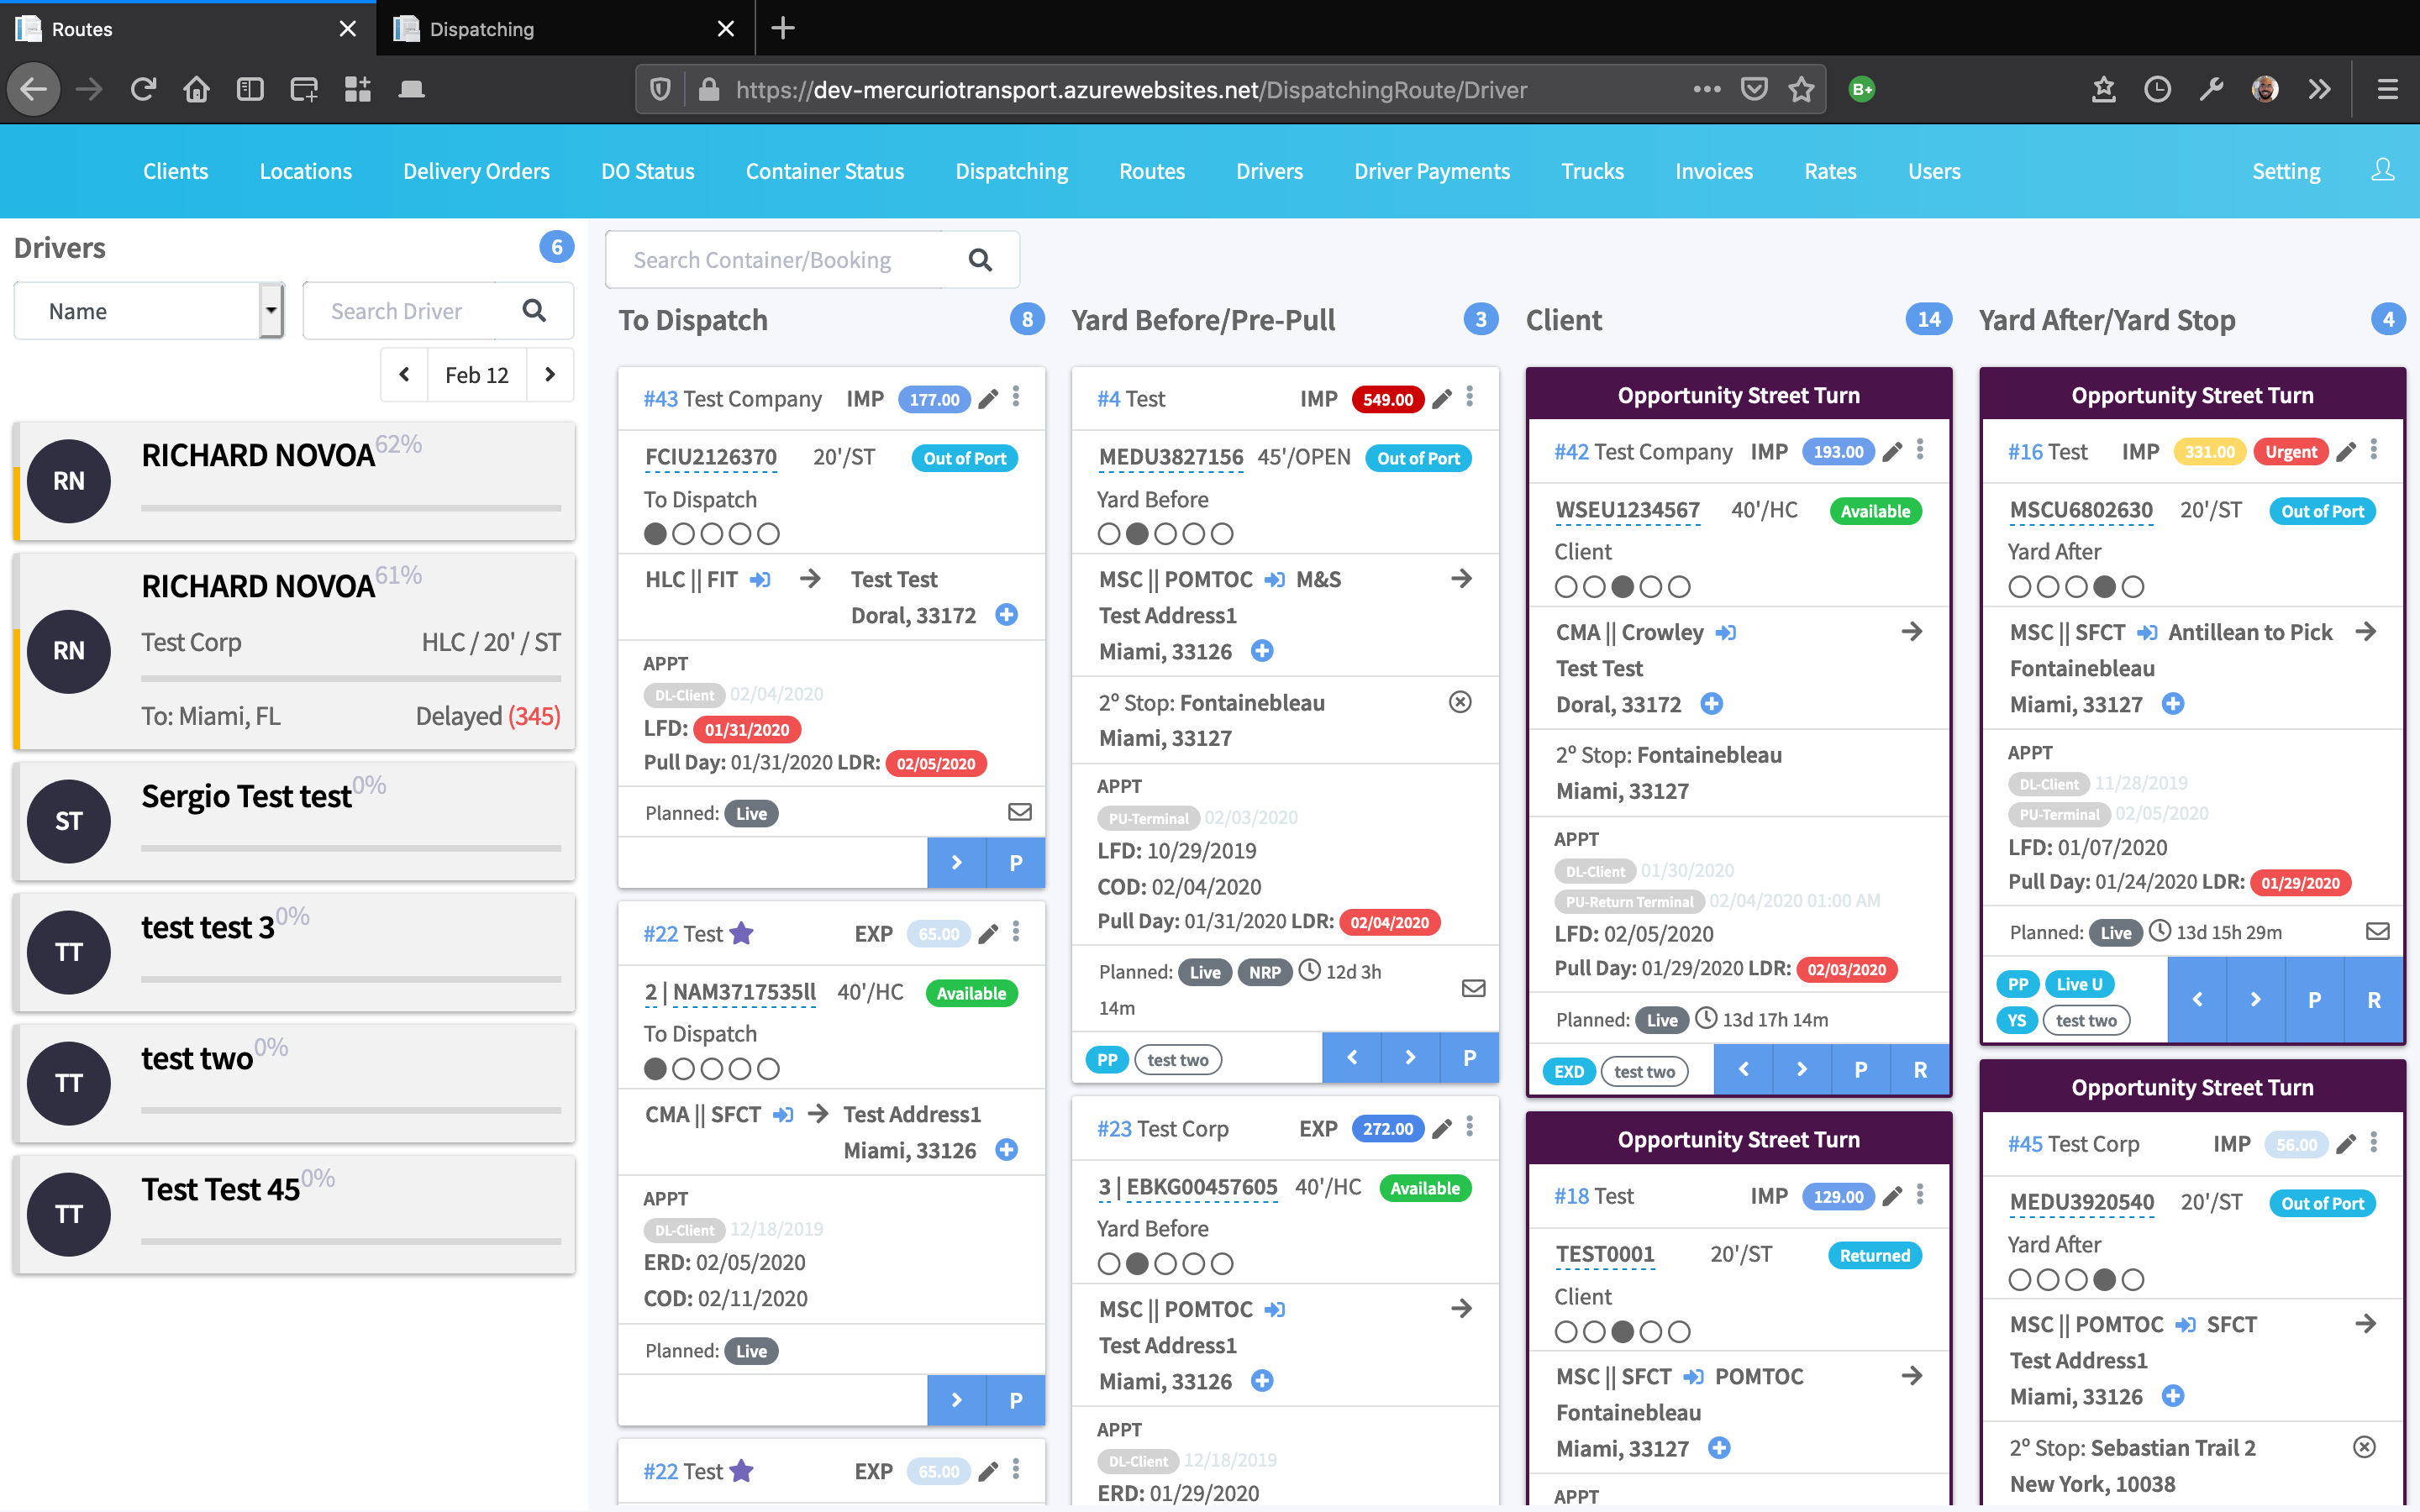
A different view of the existing product in grid/list view:
The main ask for this project was to make the UI more intuitive overall on top of a modern architecture.
The existing application was built in .NET - we proposed building it with React, with graphQL as a middle layer to help with performance and to help the new front-end architecture interact with the old backend.
We proposed leveraging the Material UI design framework for its universality and mobile-first approach, utilizing the material-ui react component library to help us build quickly.
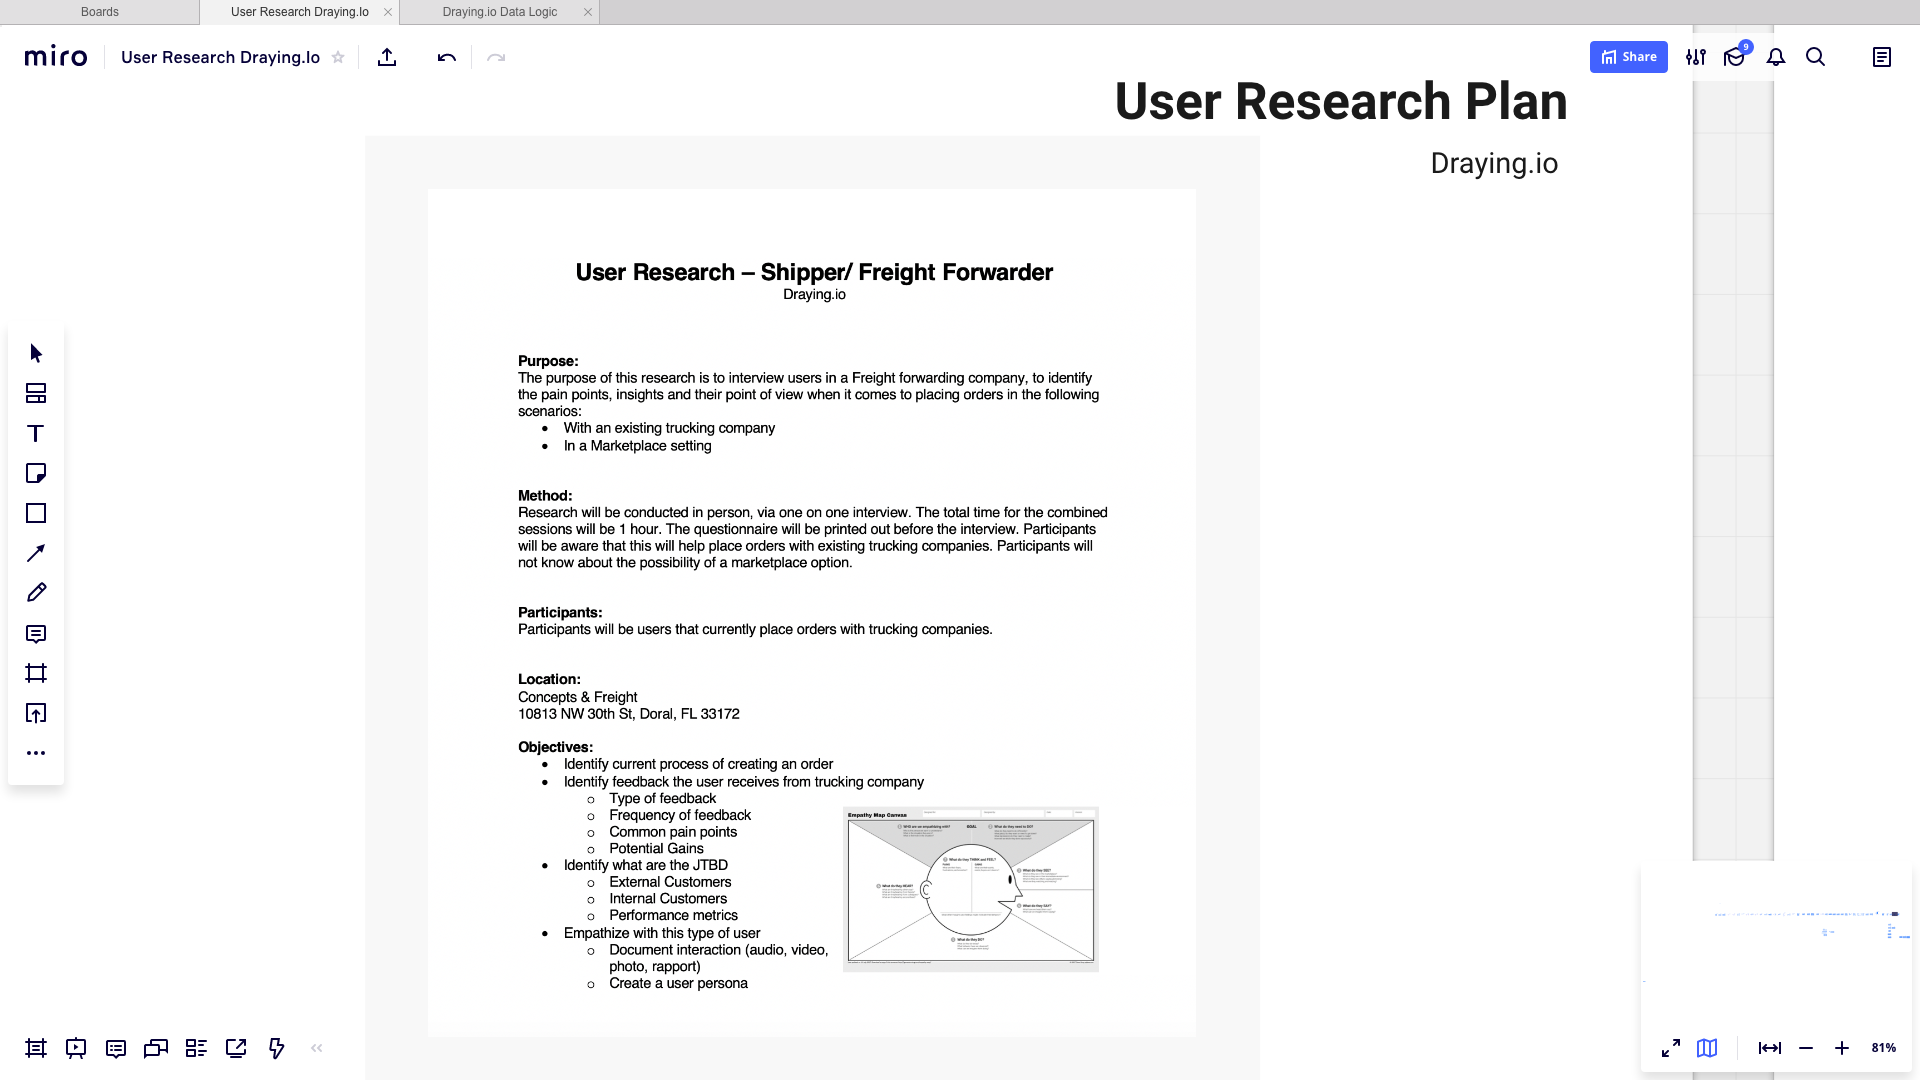
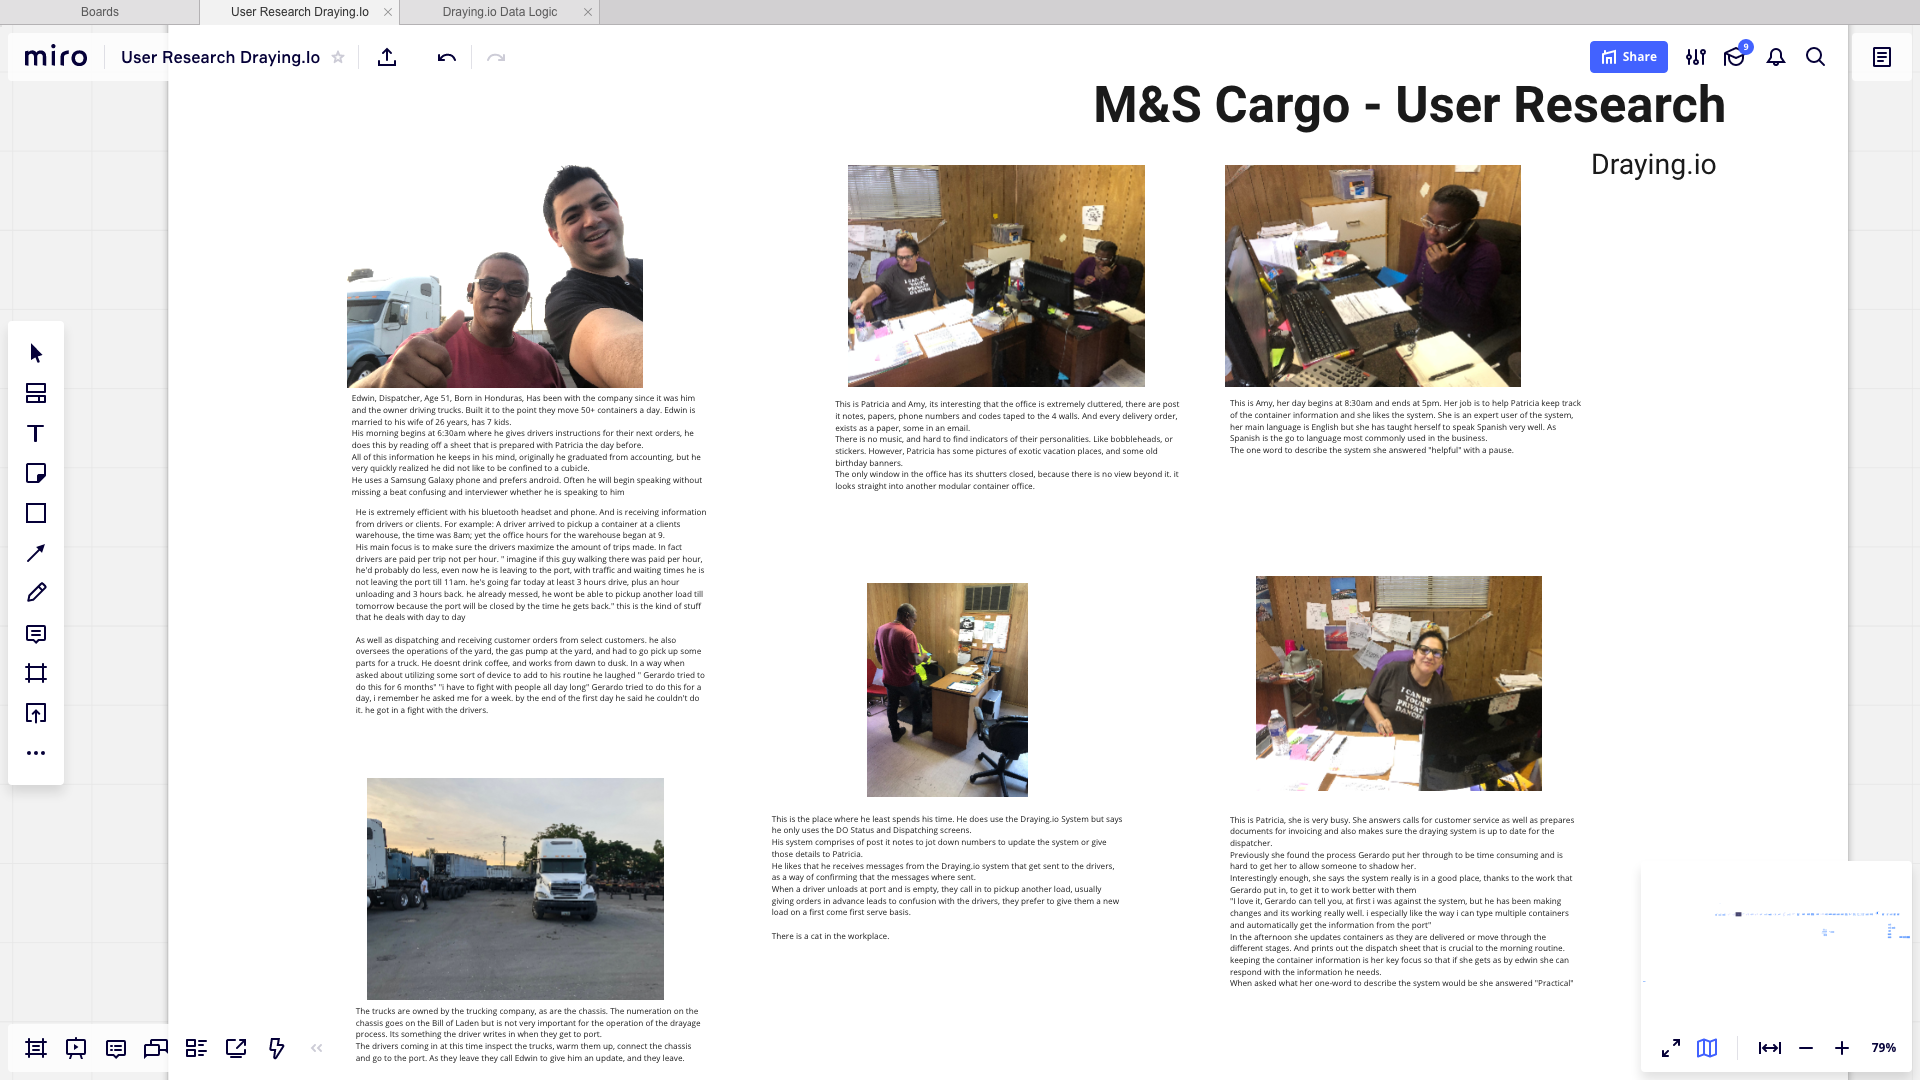
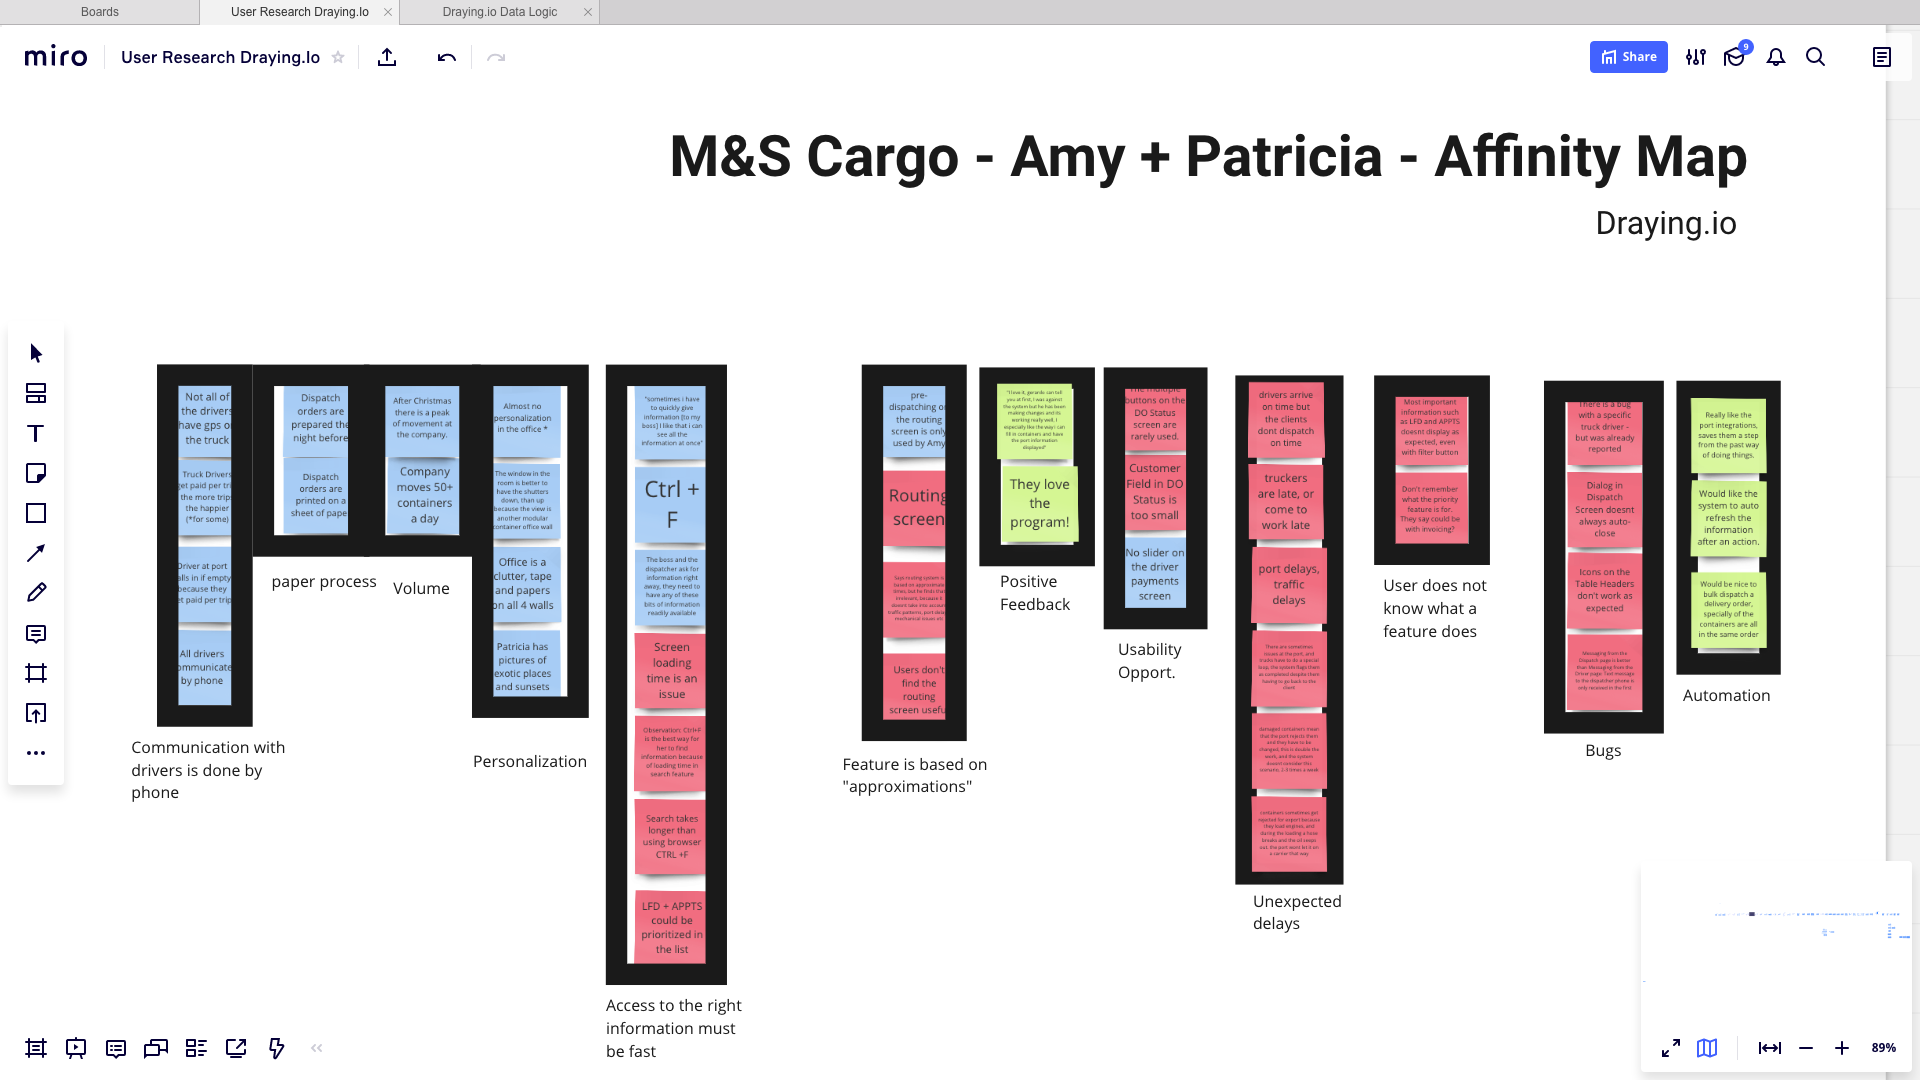
User Research
My colleague Richard Novoa began the project with research into users and the industry.
Information Architecture
As we began to explore general usability conventions and UI frameworks that would fit the product, we looked at the current application to understand and improve the Information Architecture:

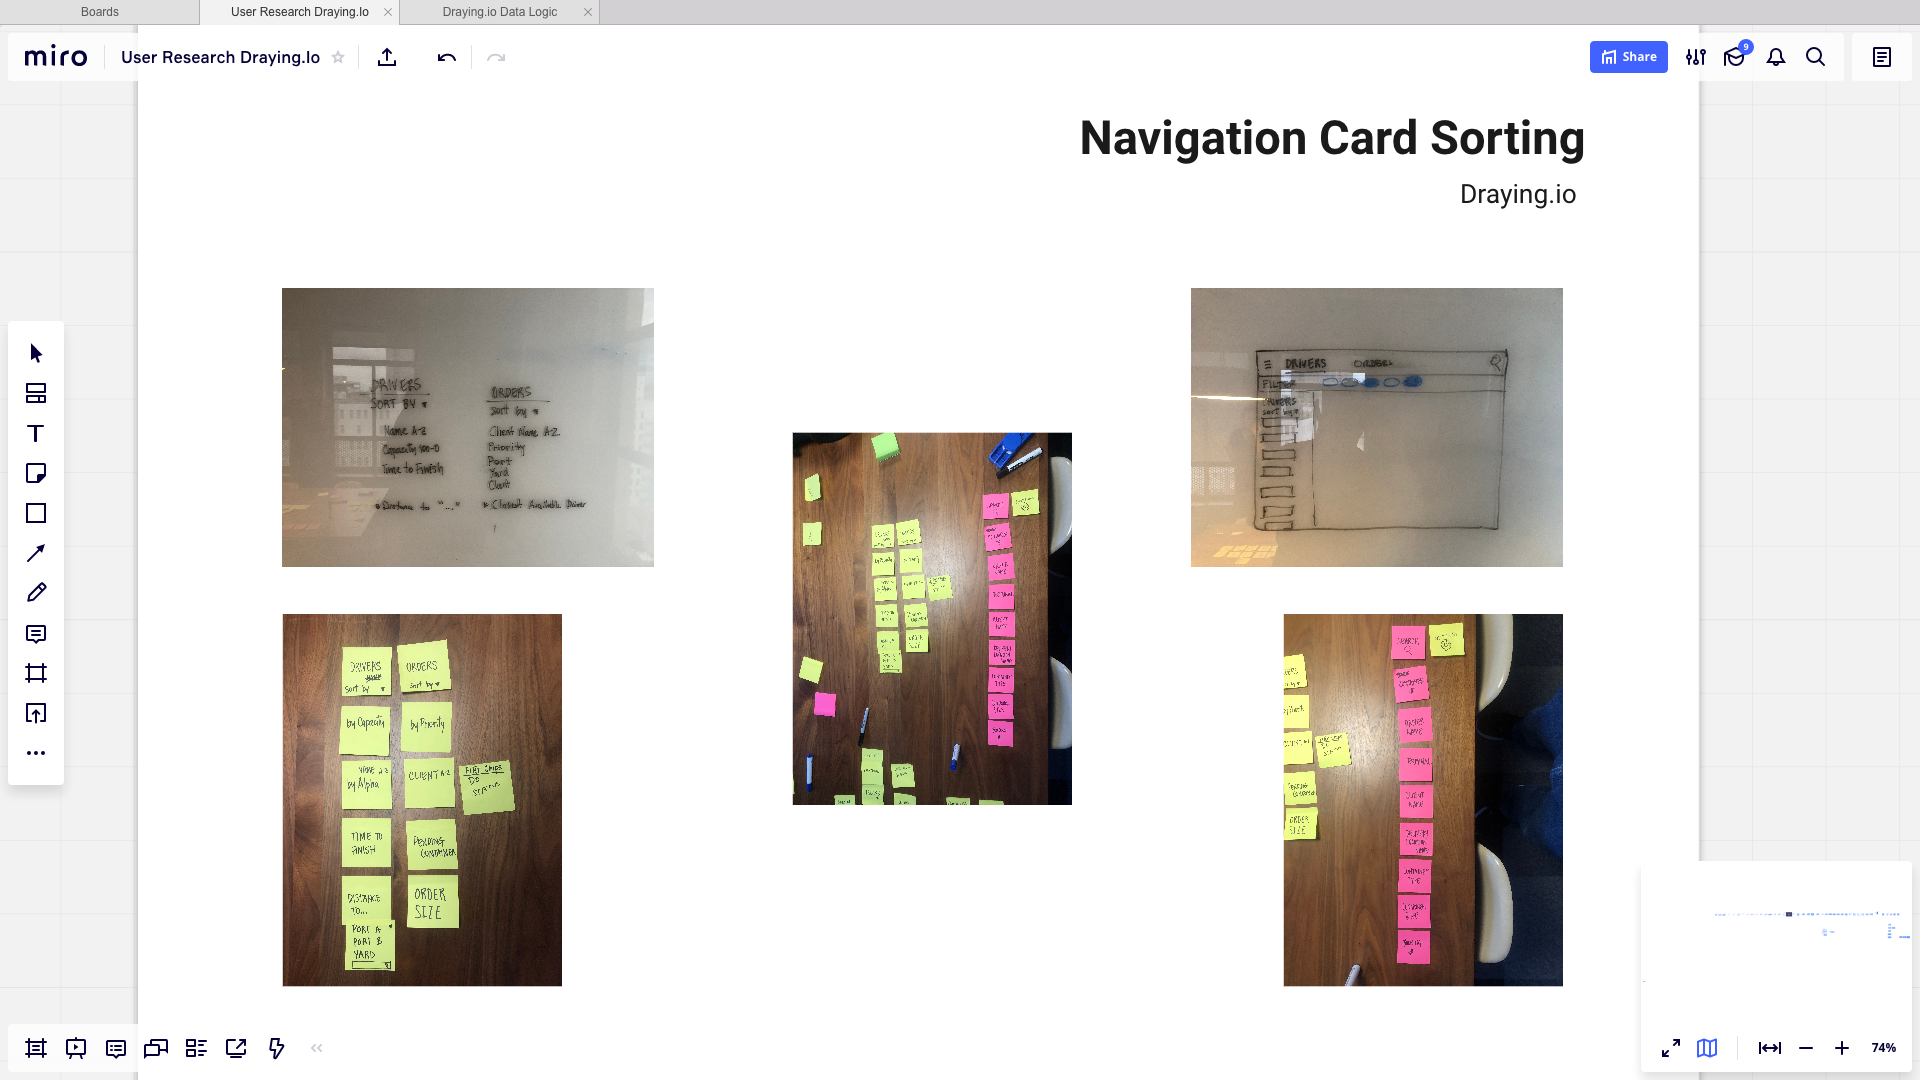
Card Sorting
We presented the IA work above to our client and facilitated a card sorting exercise to help determine how to organize the new site:
Mapping the new Information Architecture
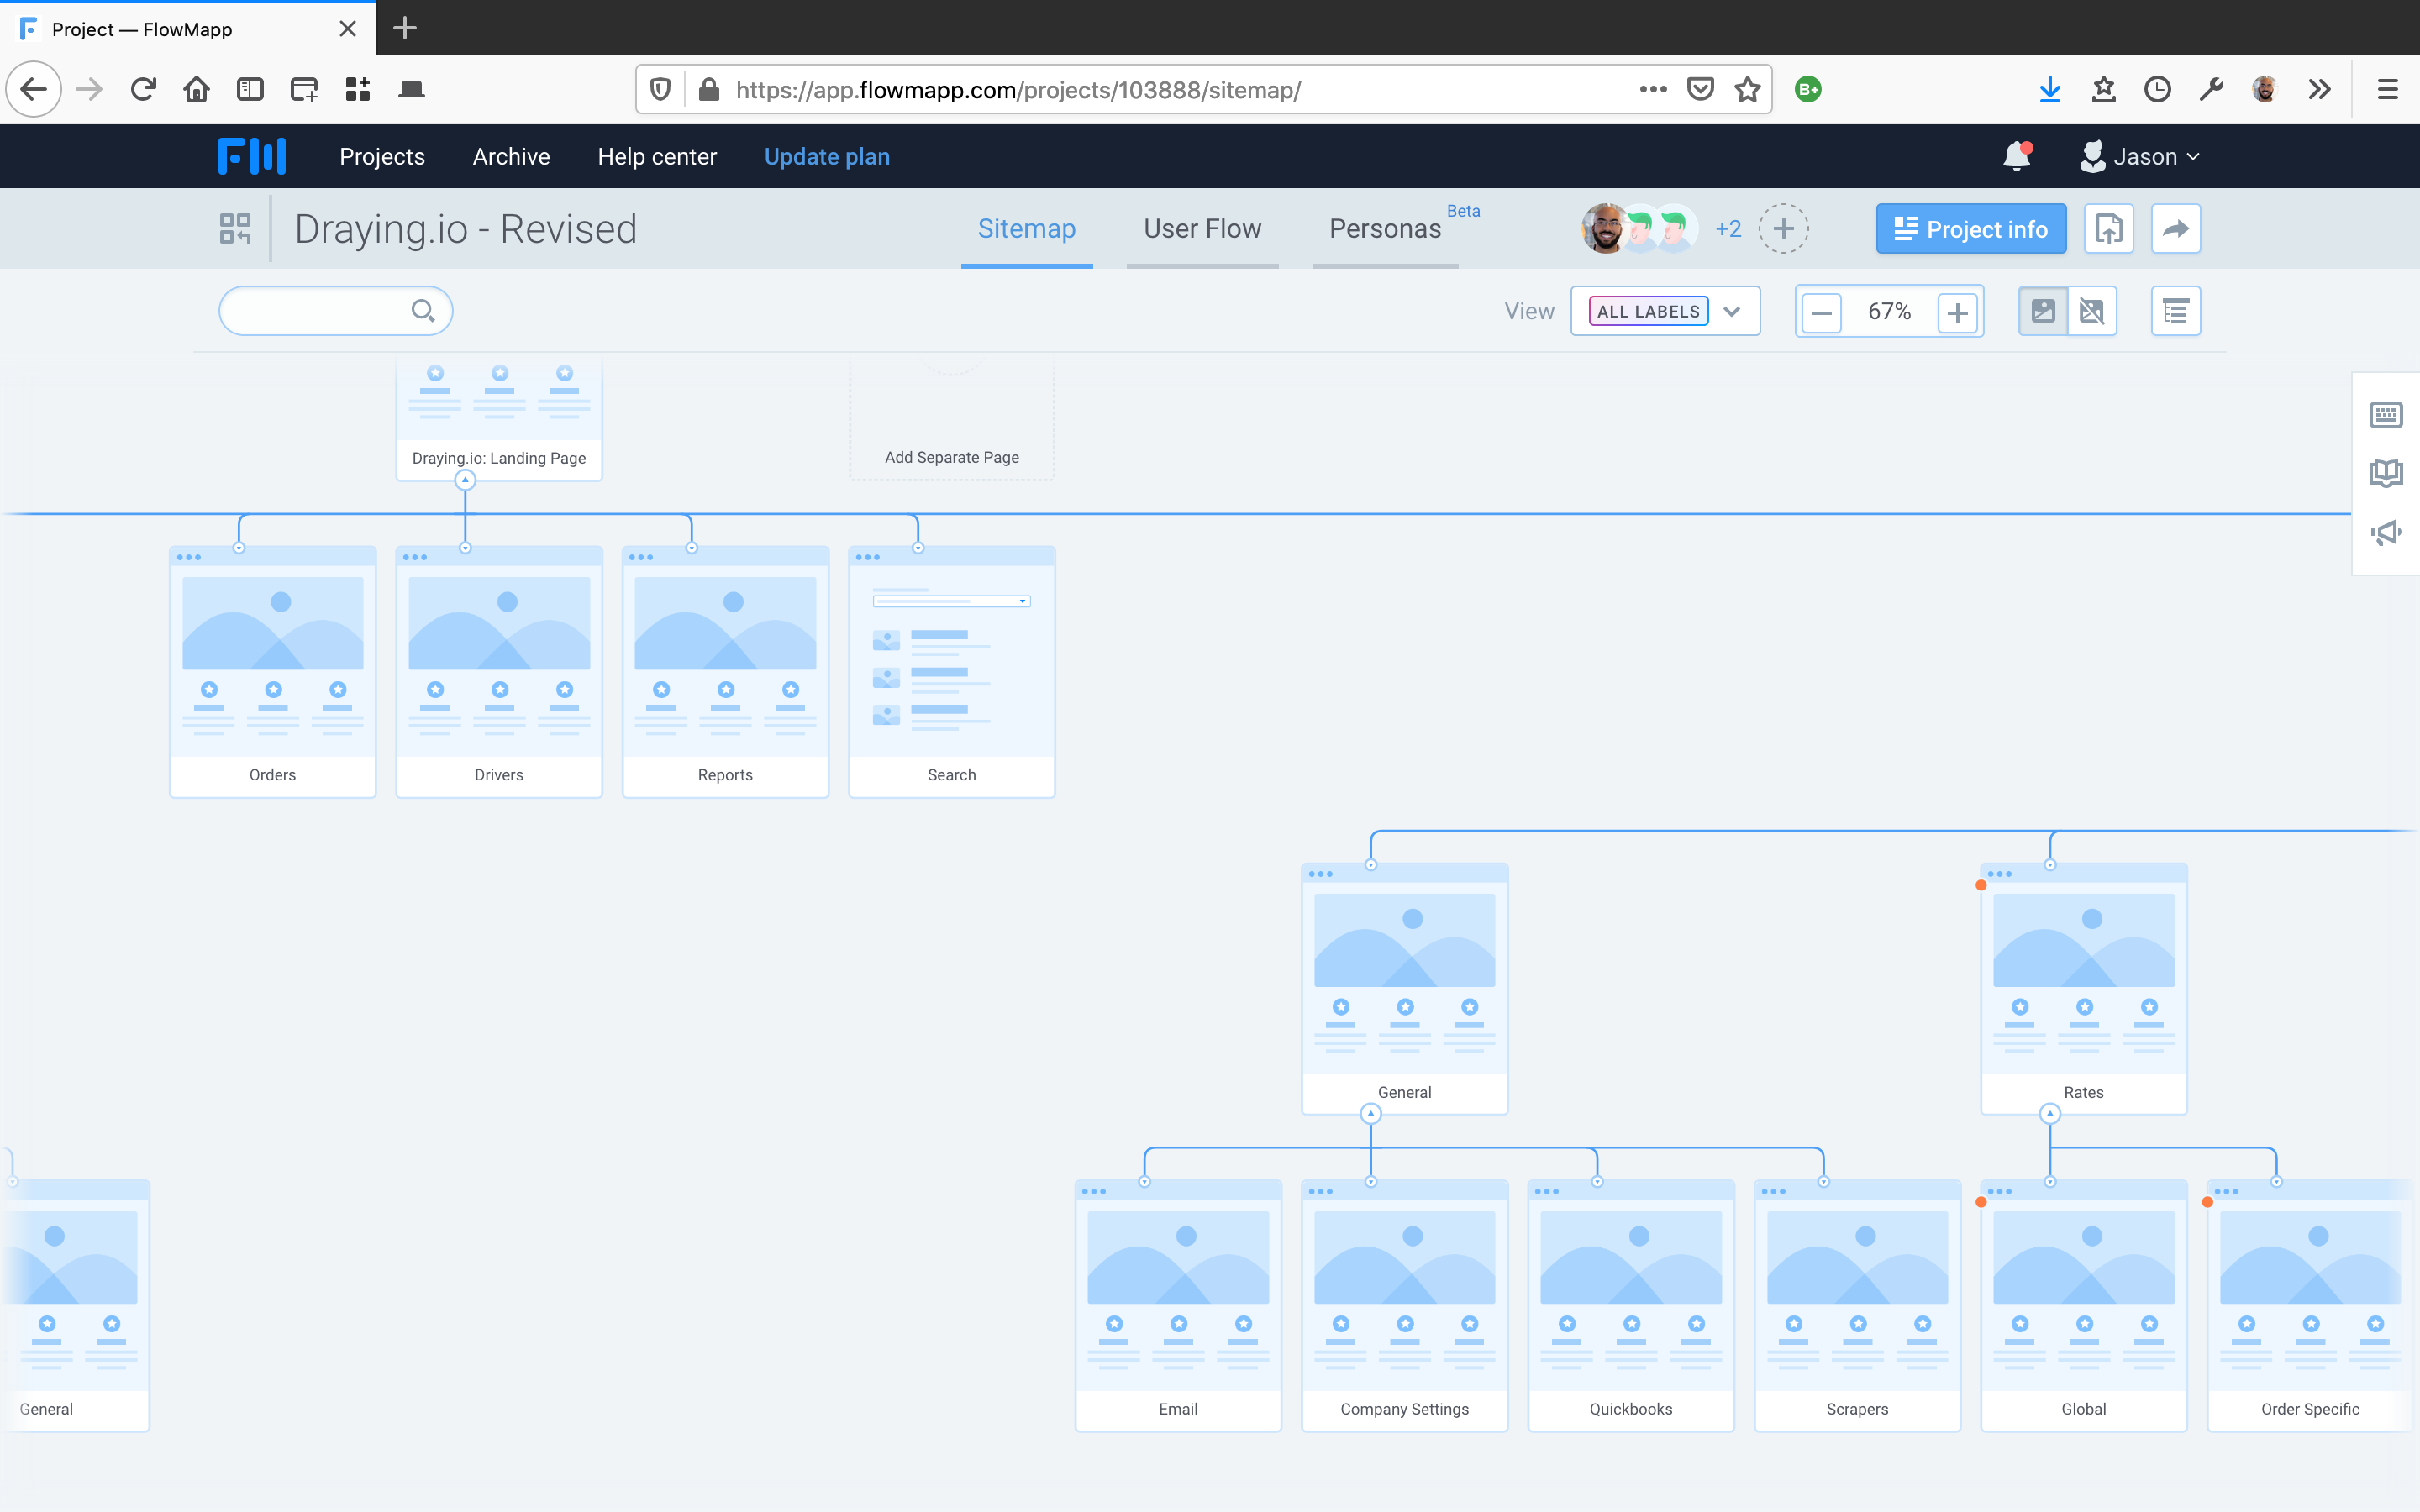
The image above was created with Flowmapp. Here’s the entire architecture I created with my colleague Richard. Select the image to view a larger version:

Wireframing
Richard continued his great work by sketching wireframes considering the research he uncovered:
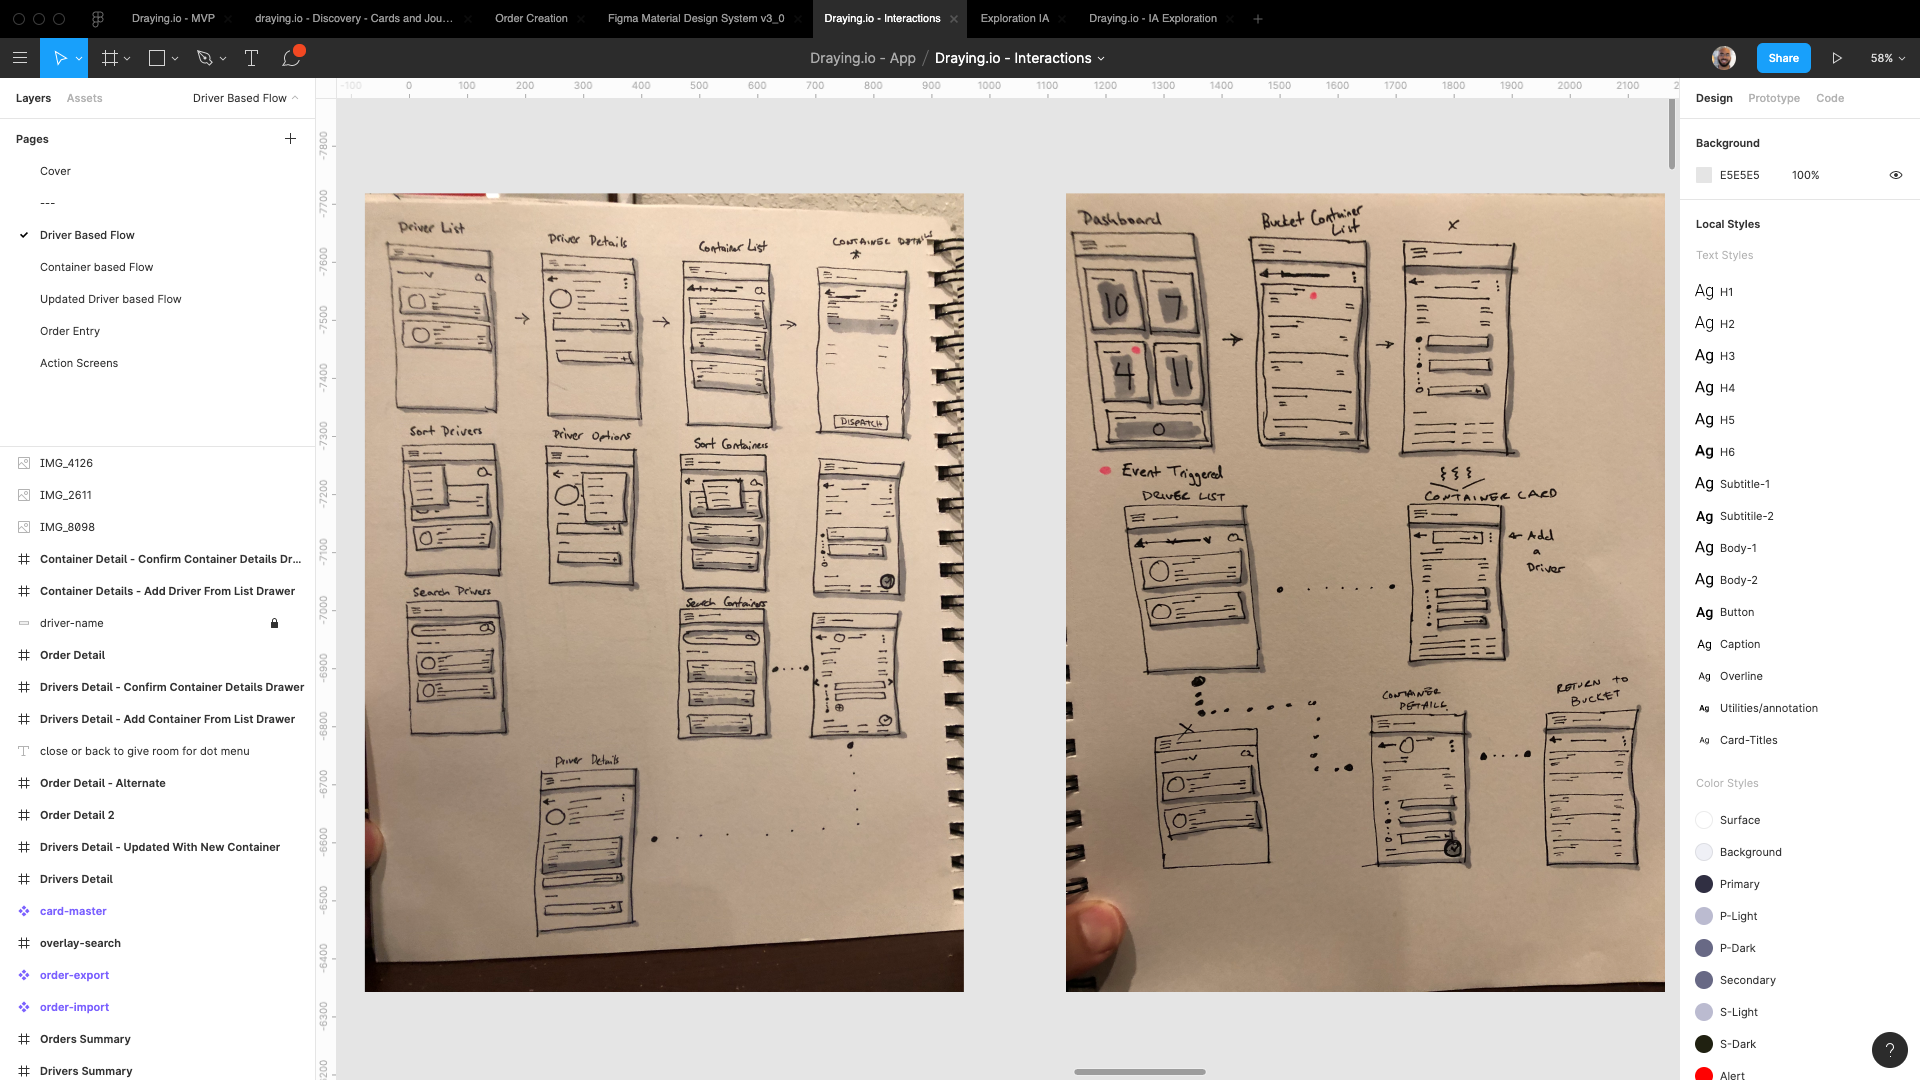
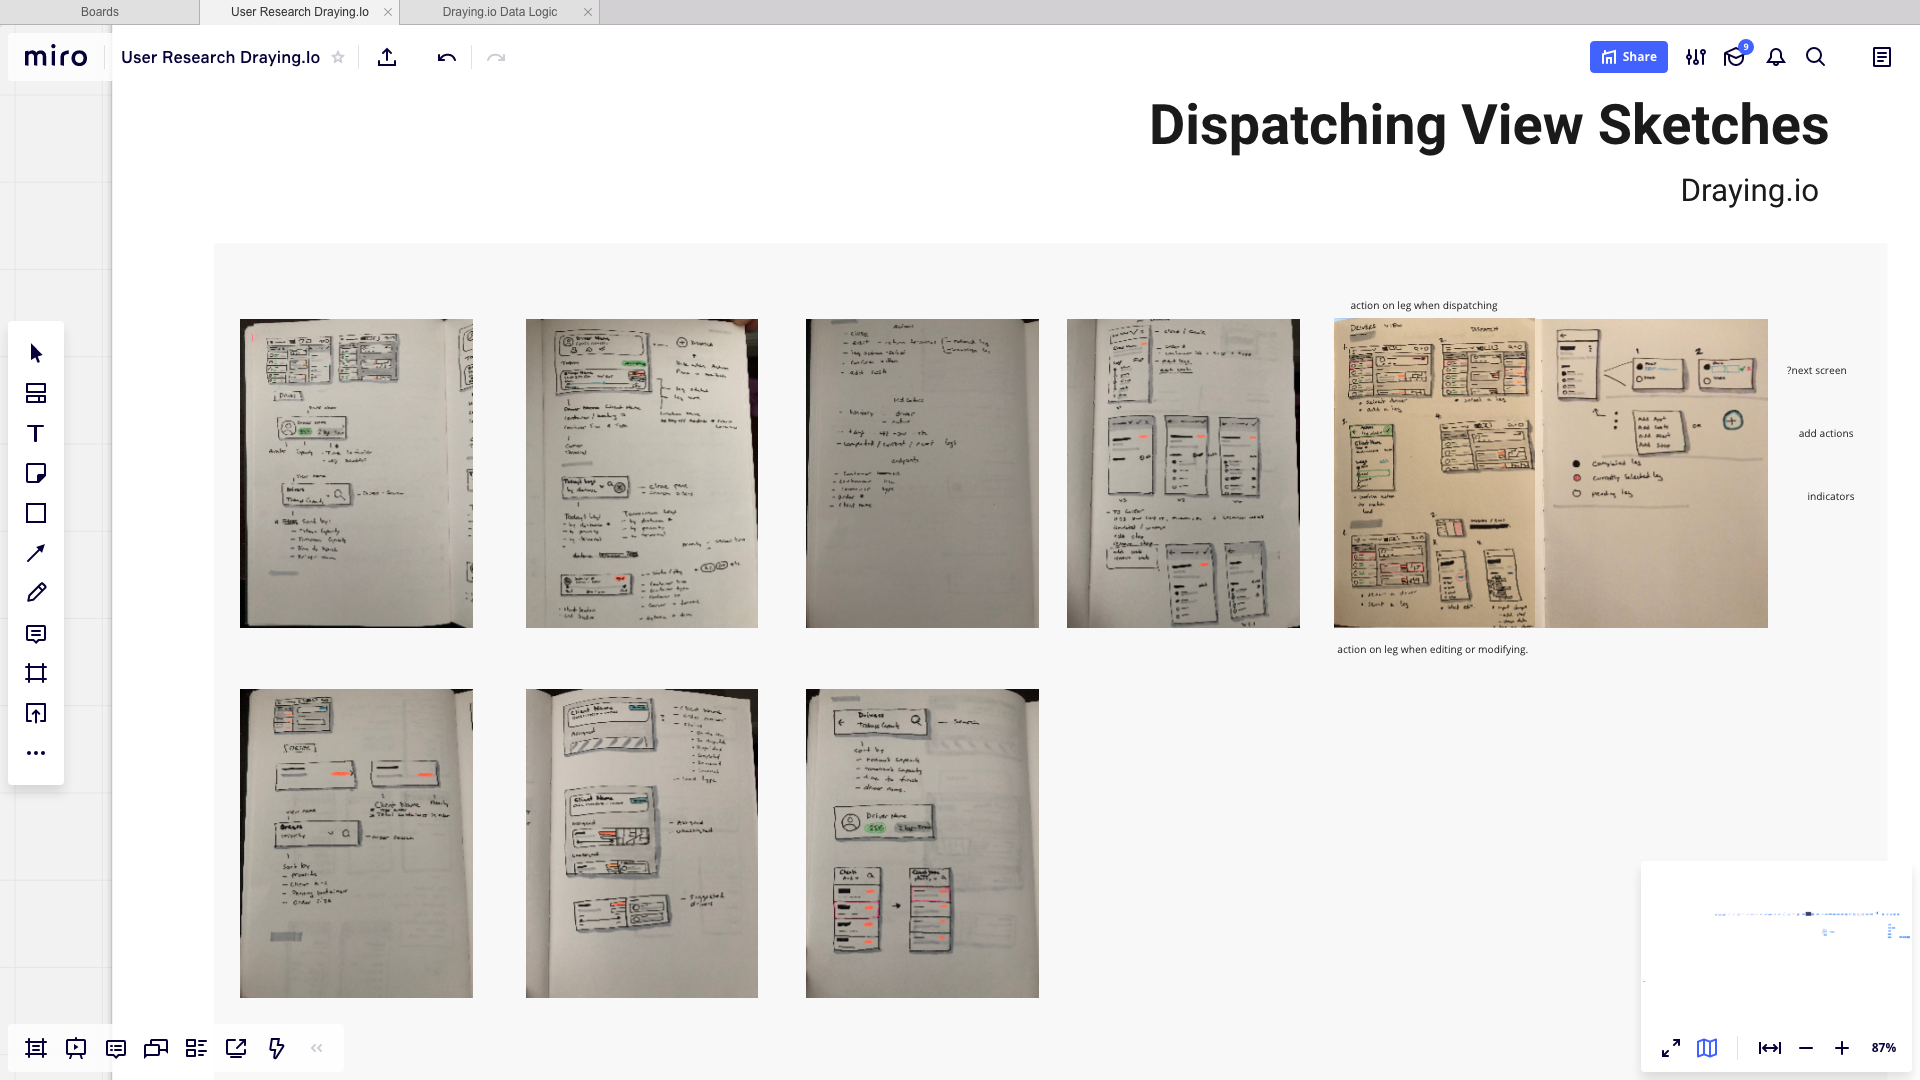
And then translated those wireframes into interactions with feedback from the team:
Interaction Design
Translating Richard’s Work into Visual Design and Development
It was then my task to translate these wireframes and interactive prototypes into visual design.
A Framework for Visual Design
My colleague Marcelo had already established the general visual language, based on Material Design guidlines, given the research and ongoing conversations we were having with the main stakeholder (client) and users:
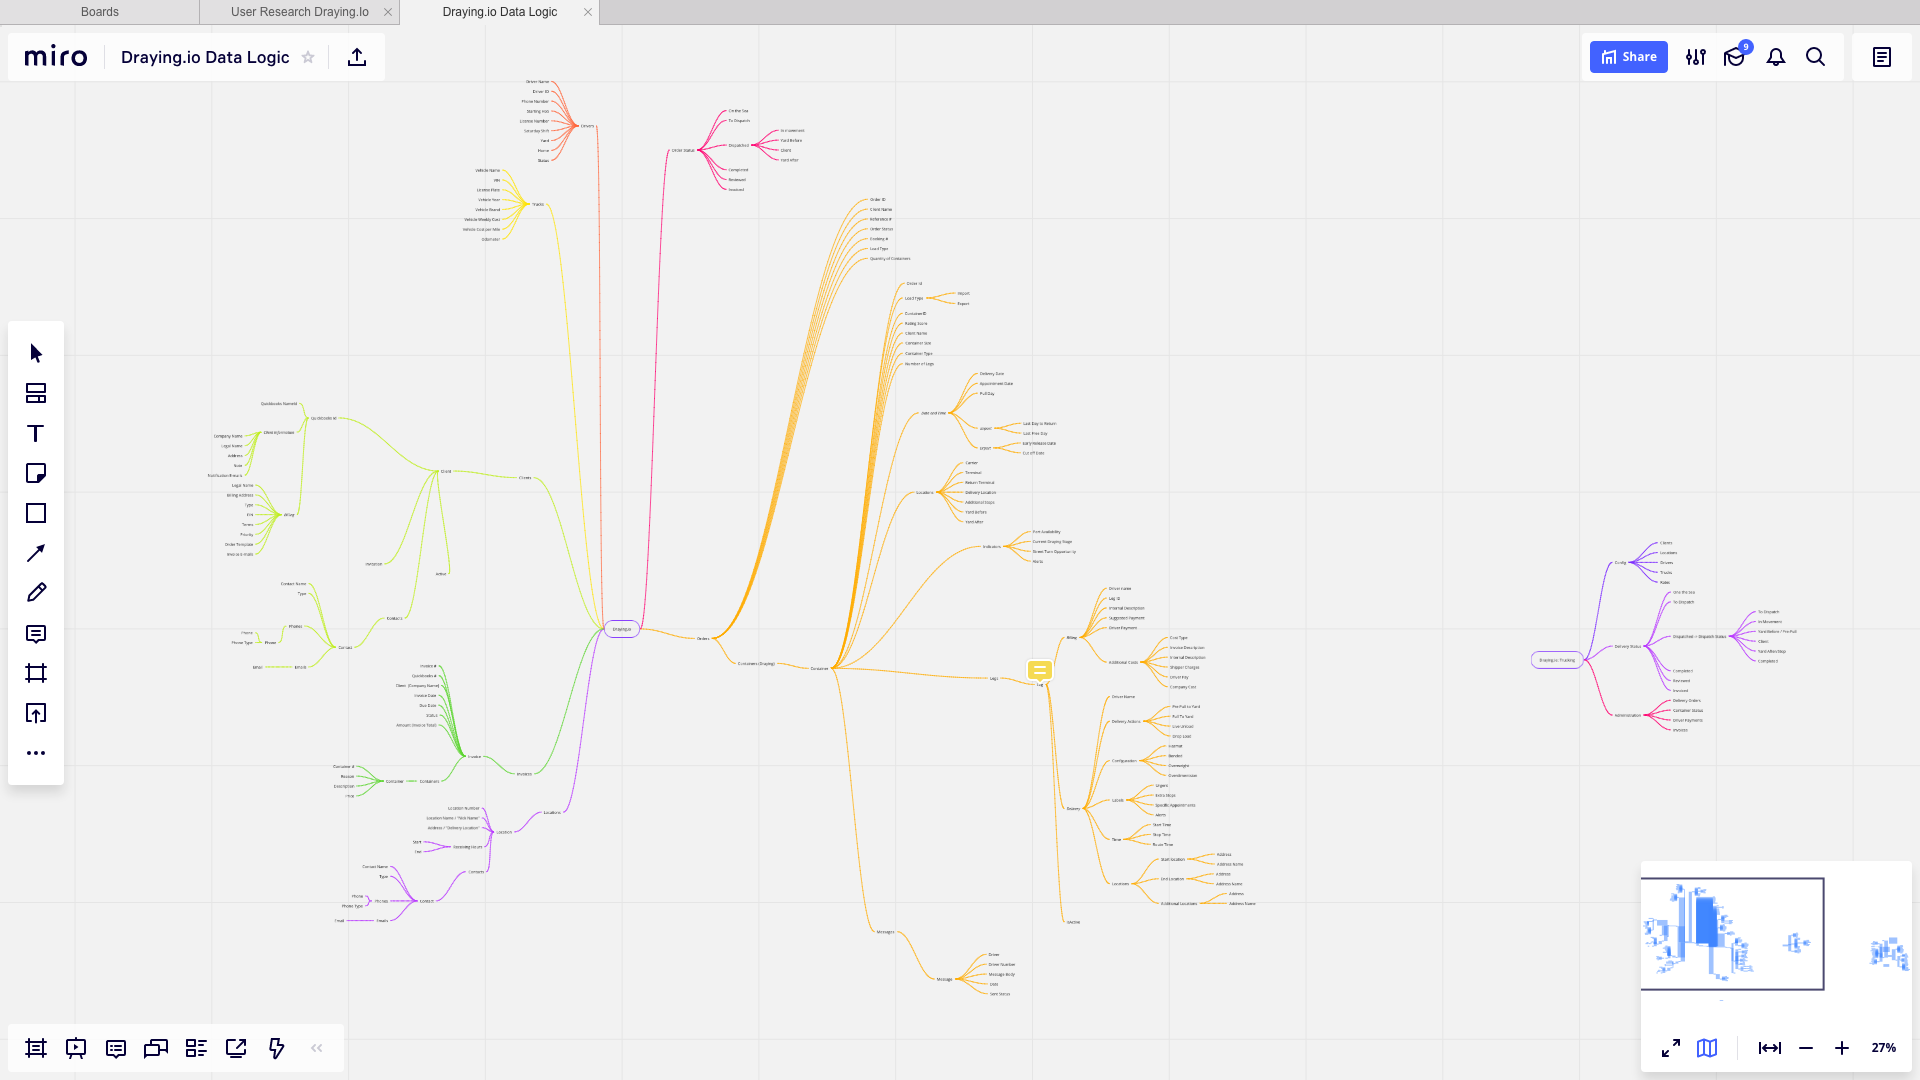
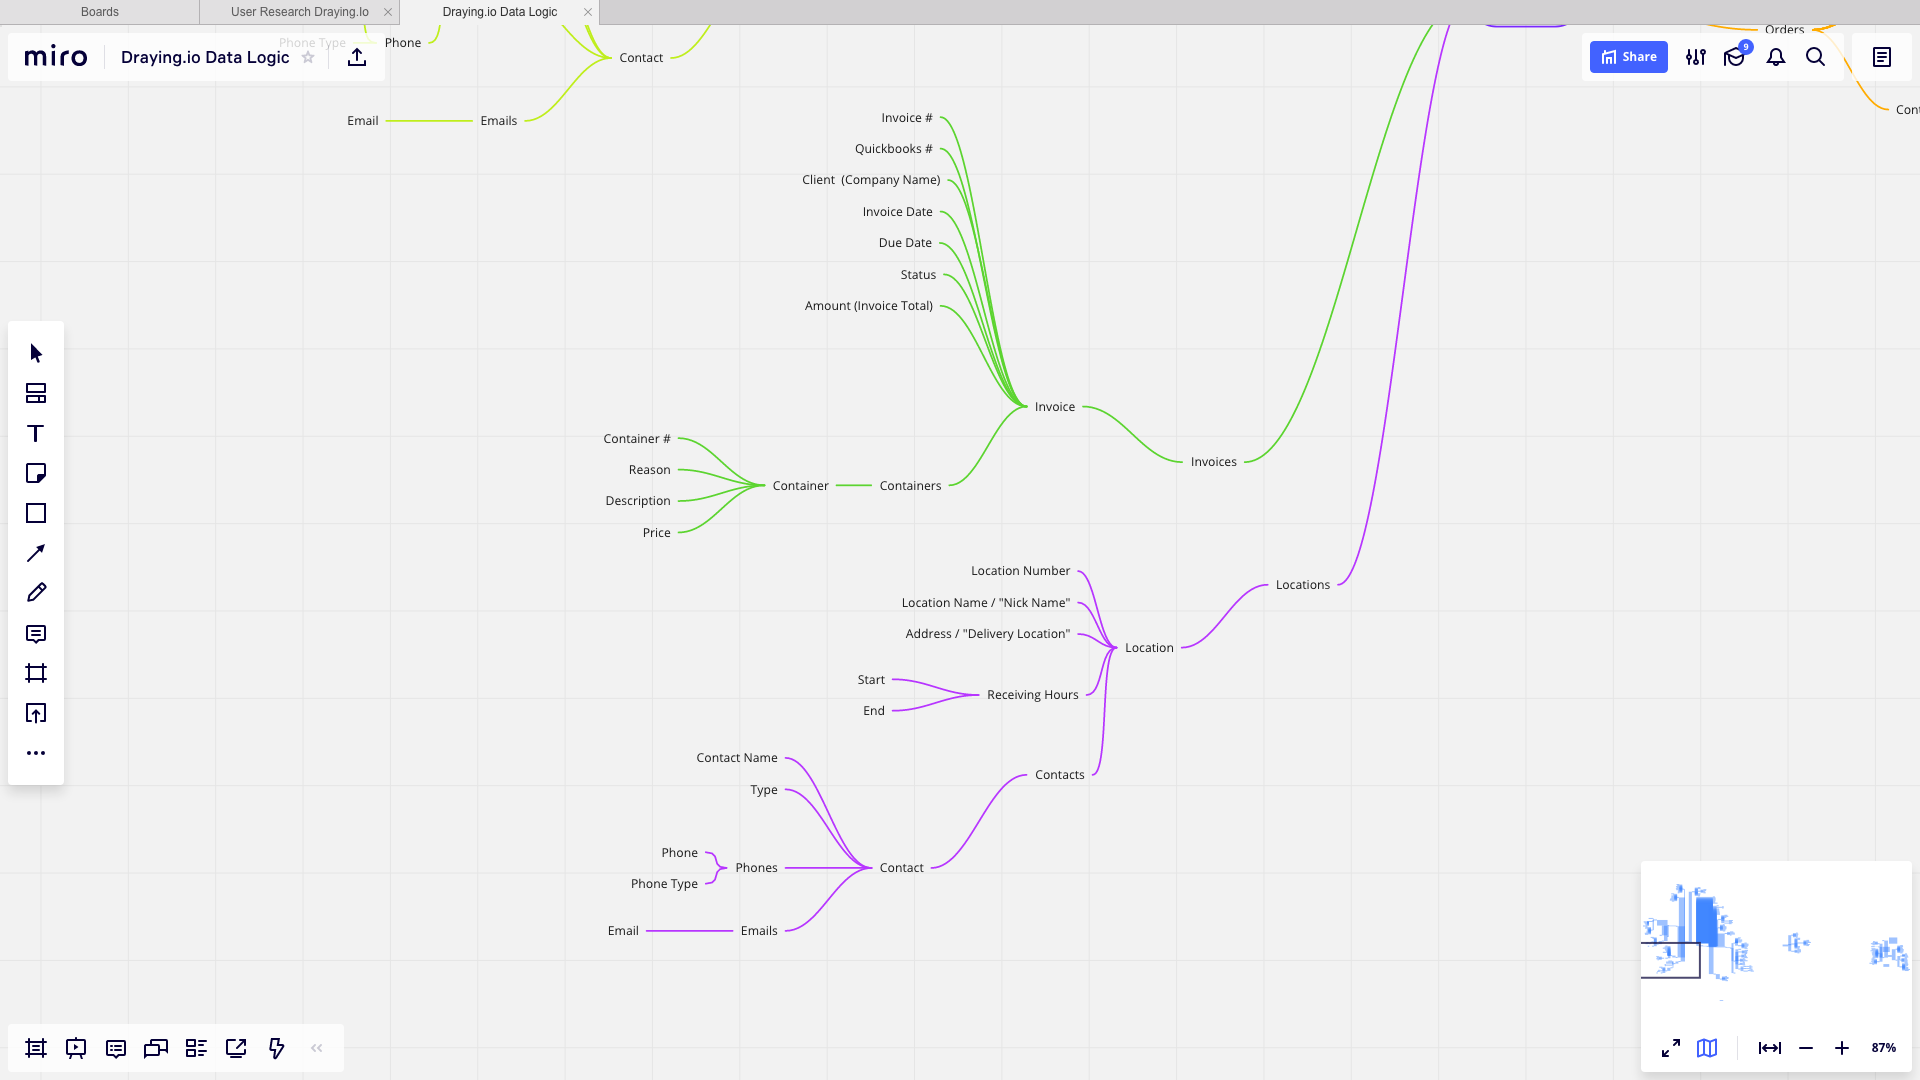
Documenting the Existing Product
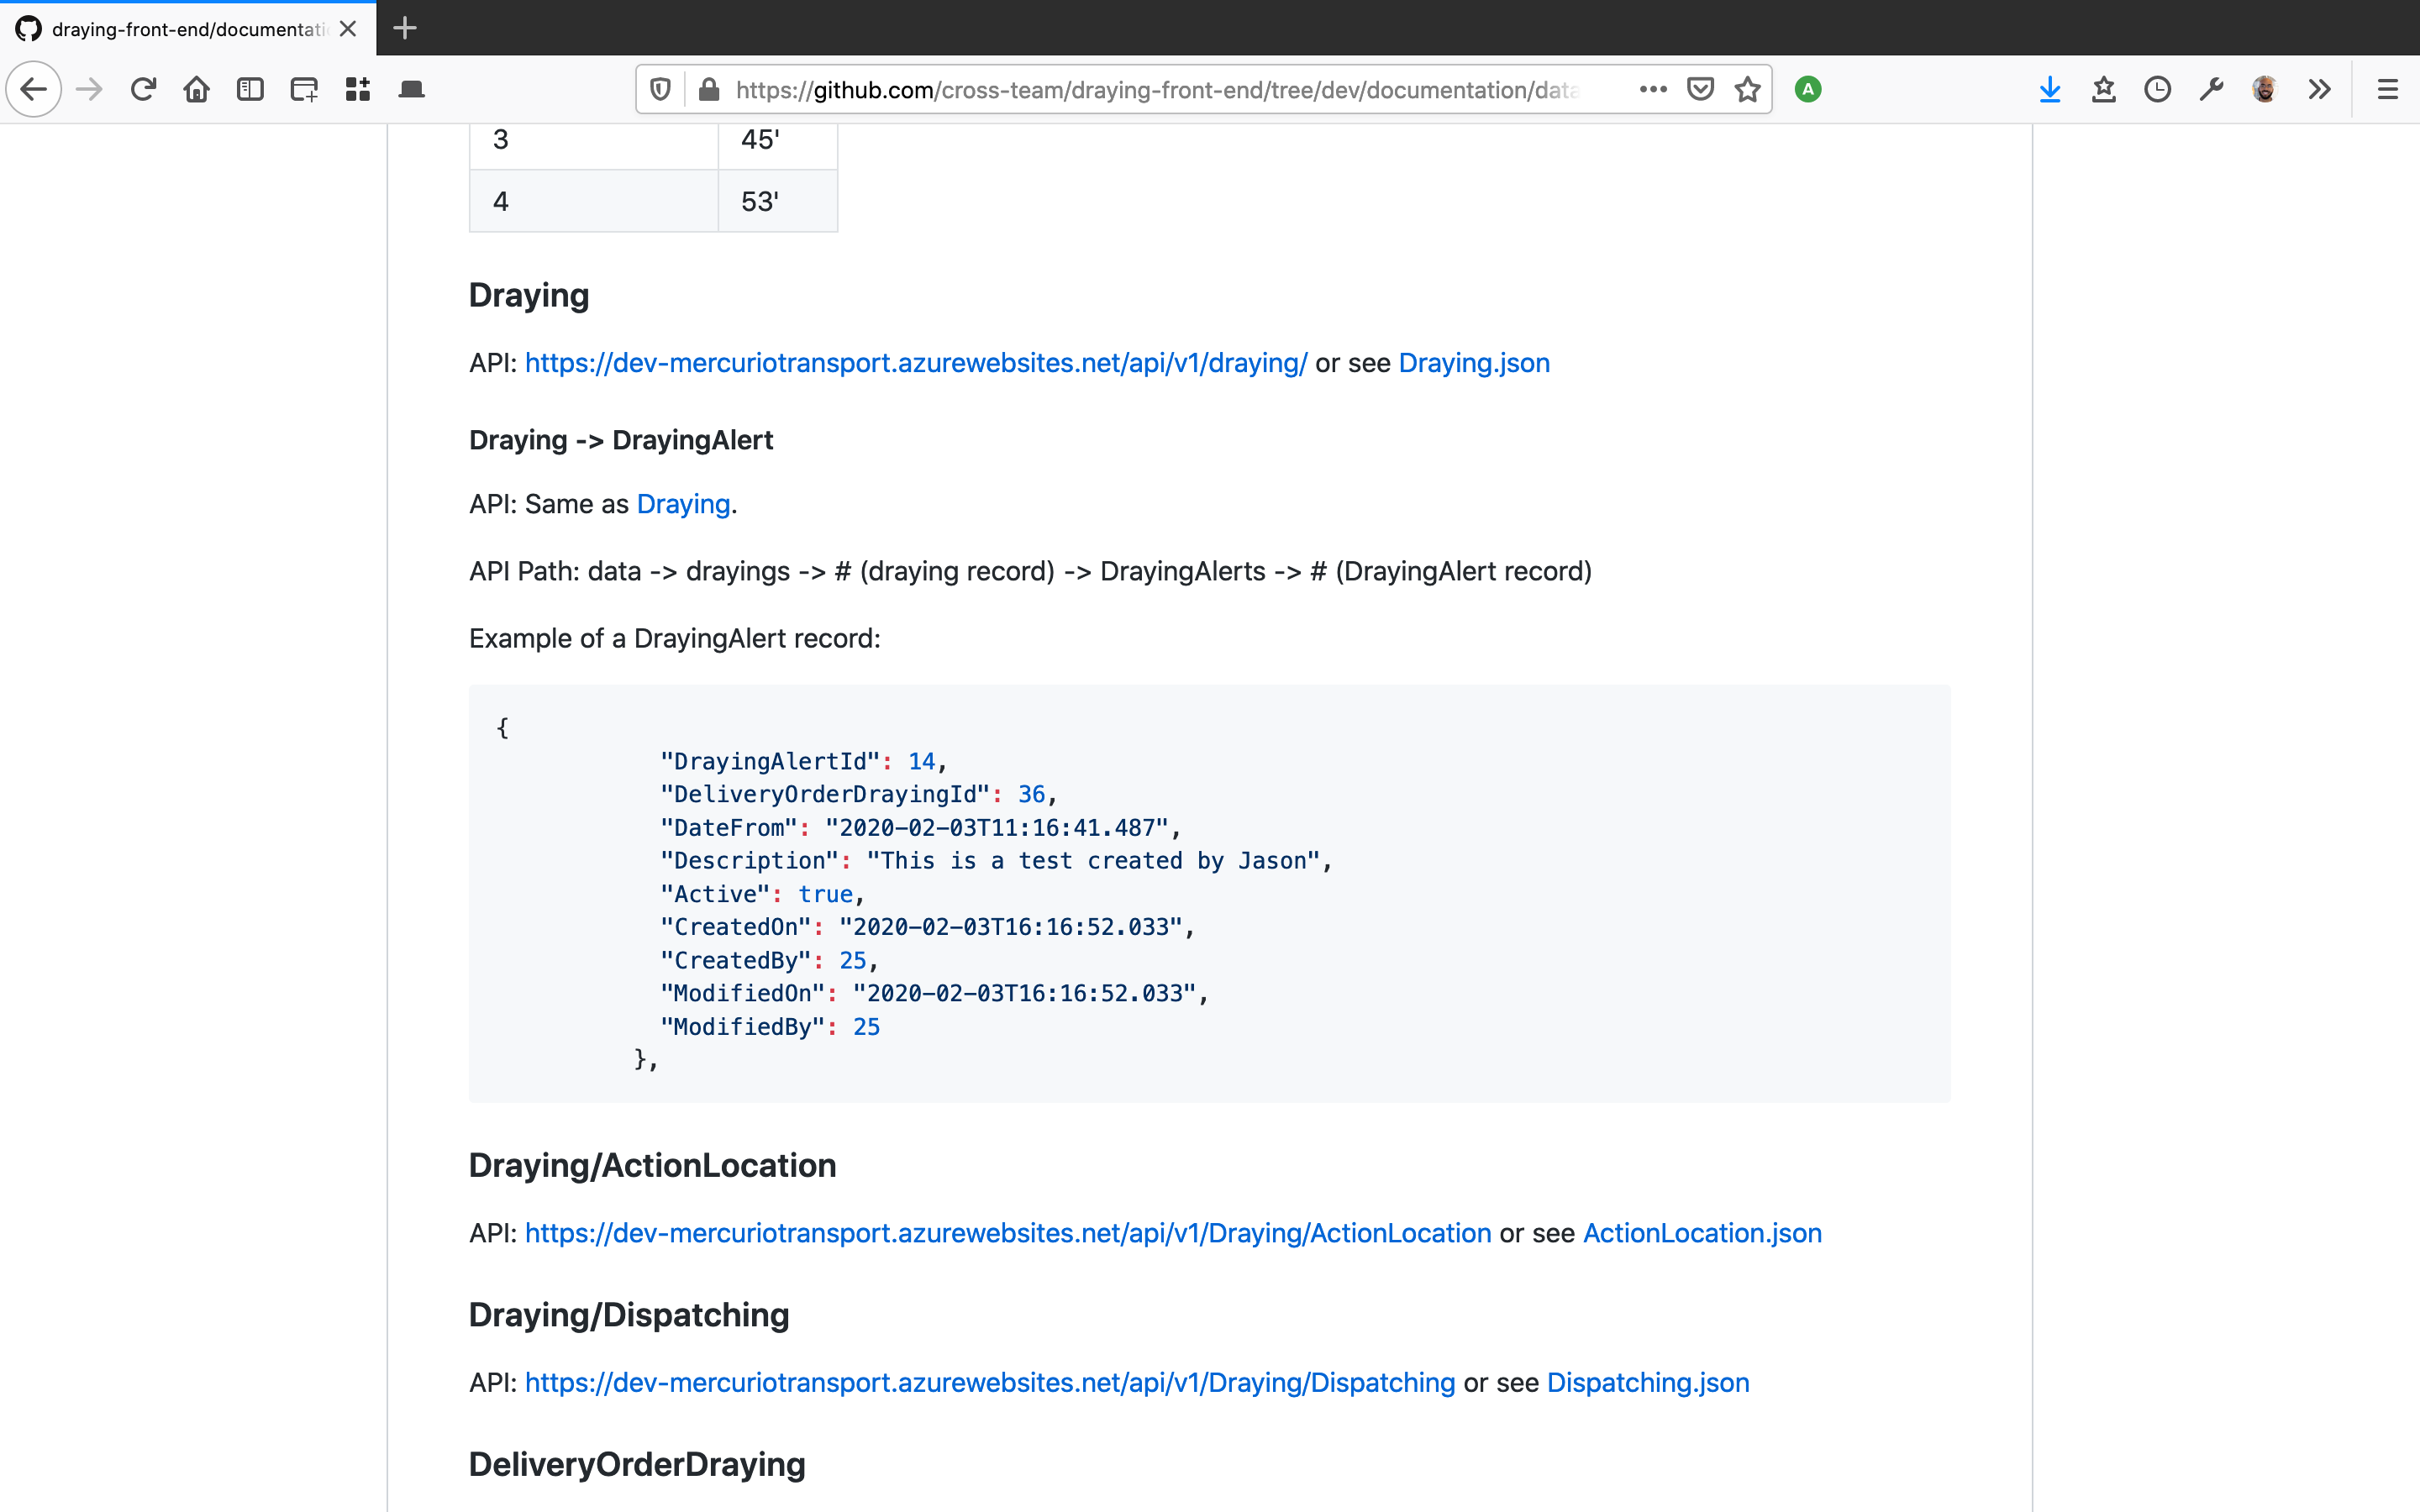
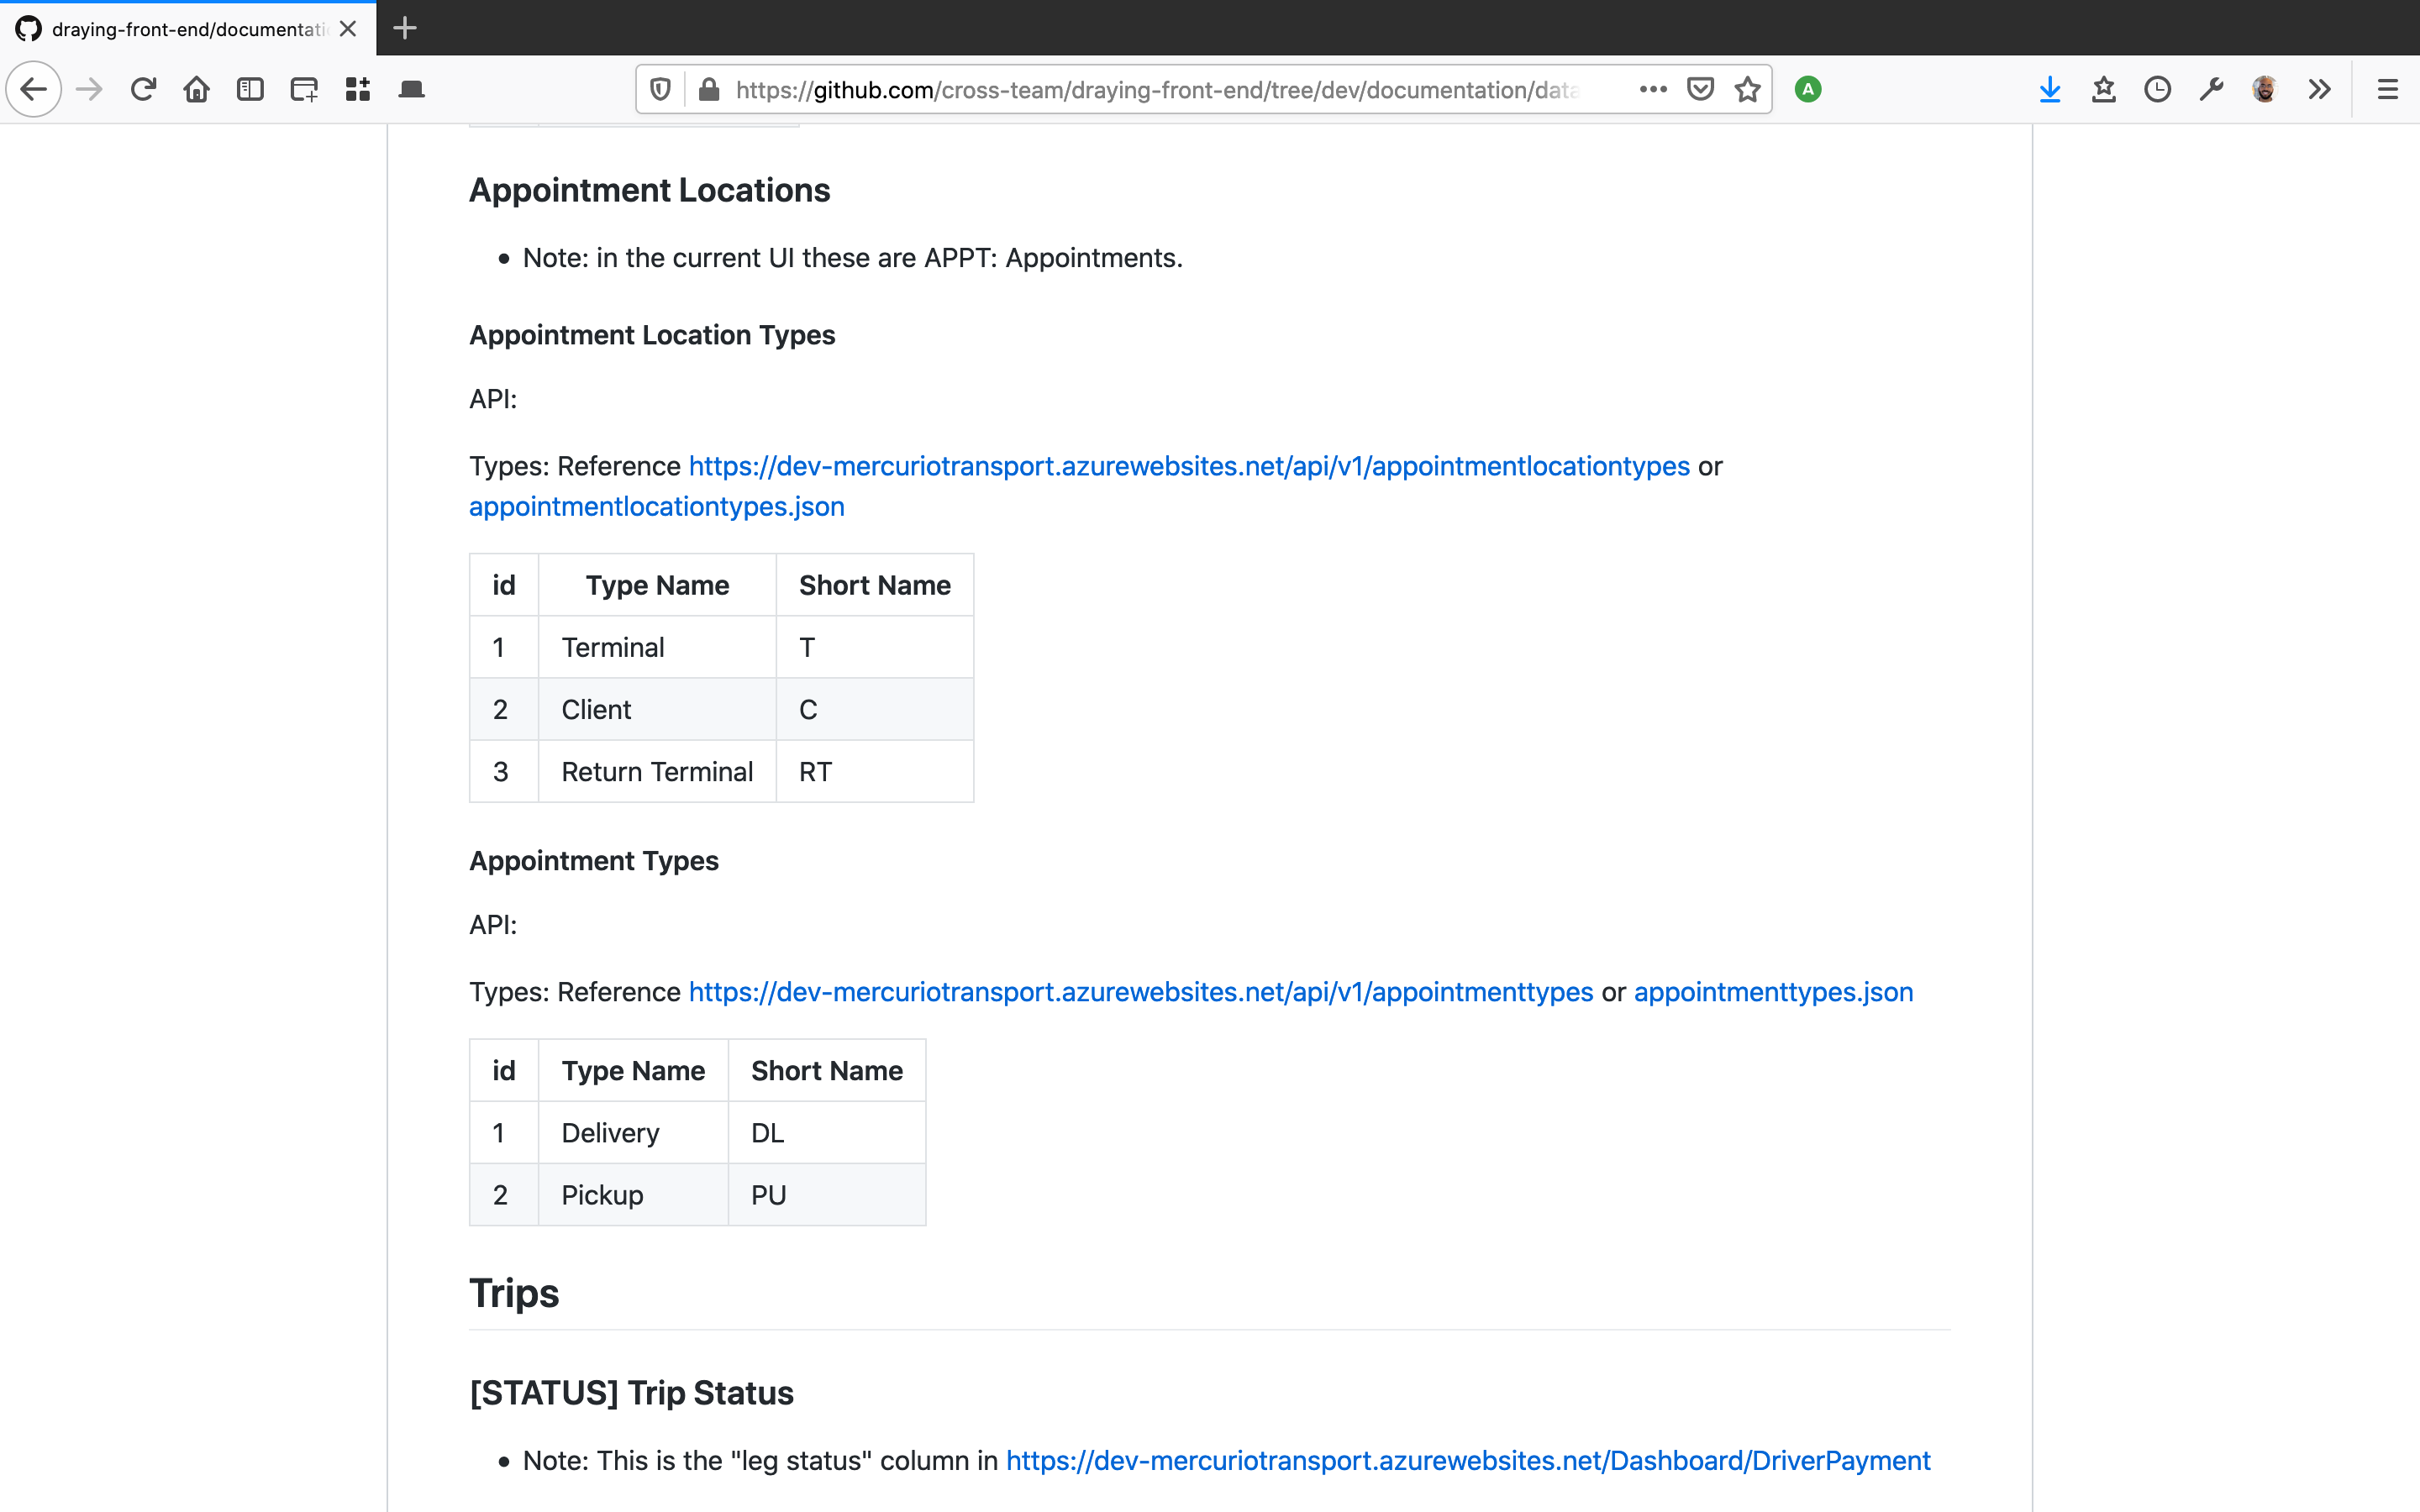
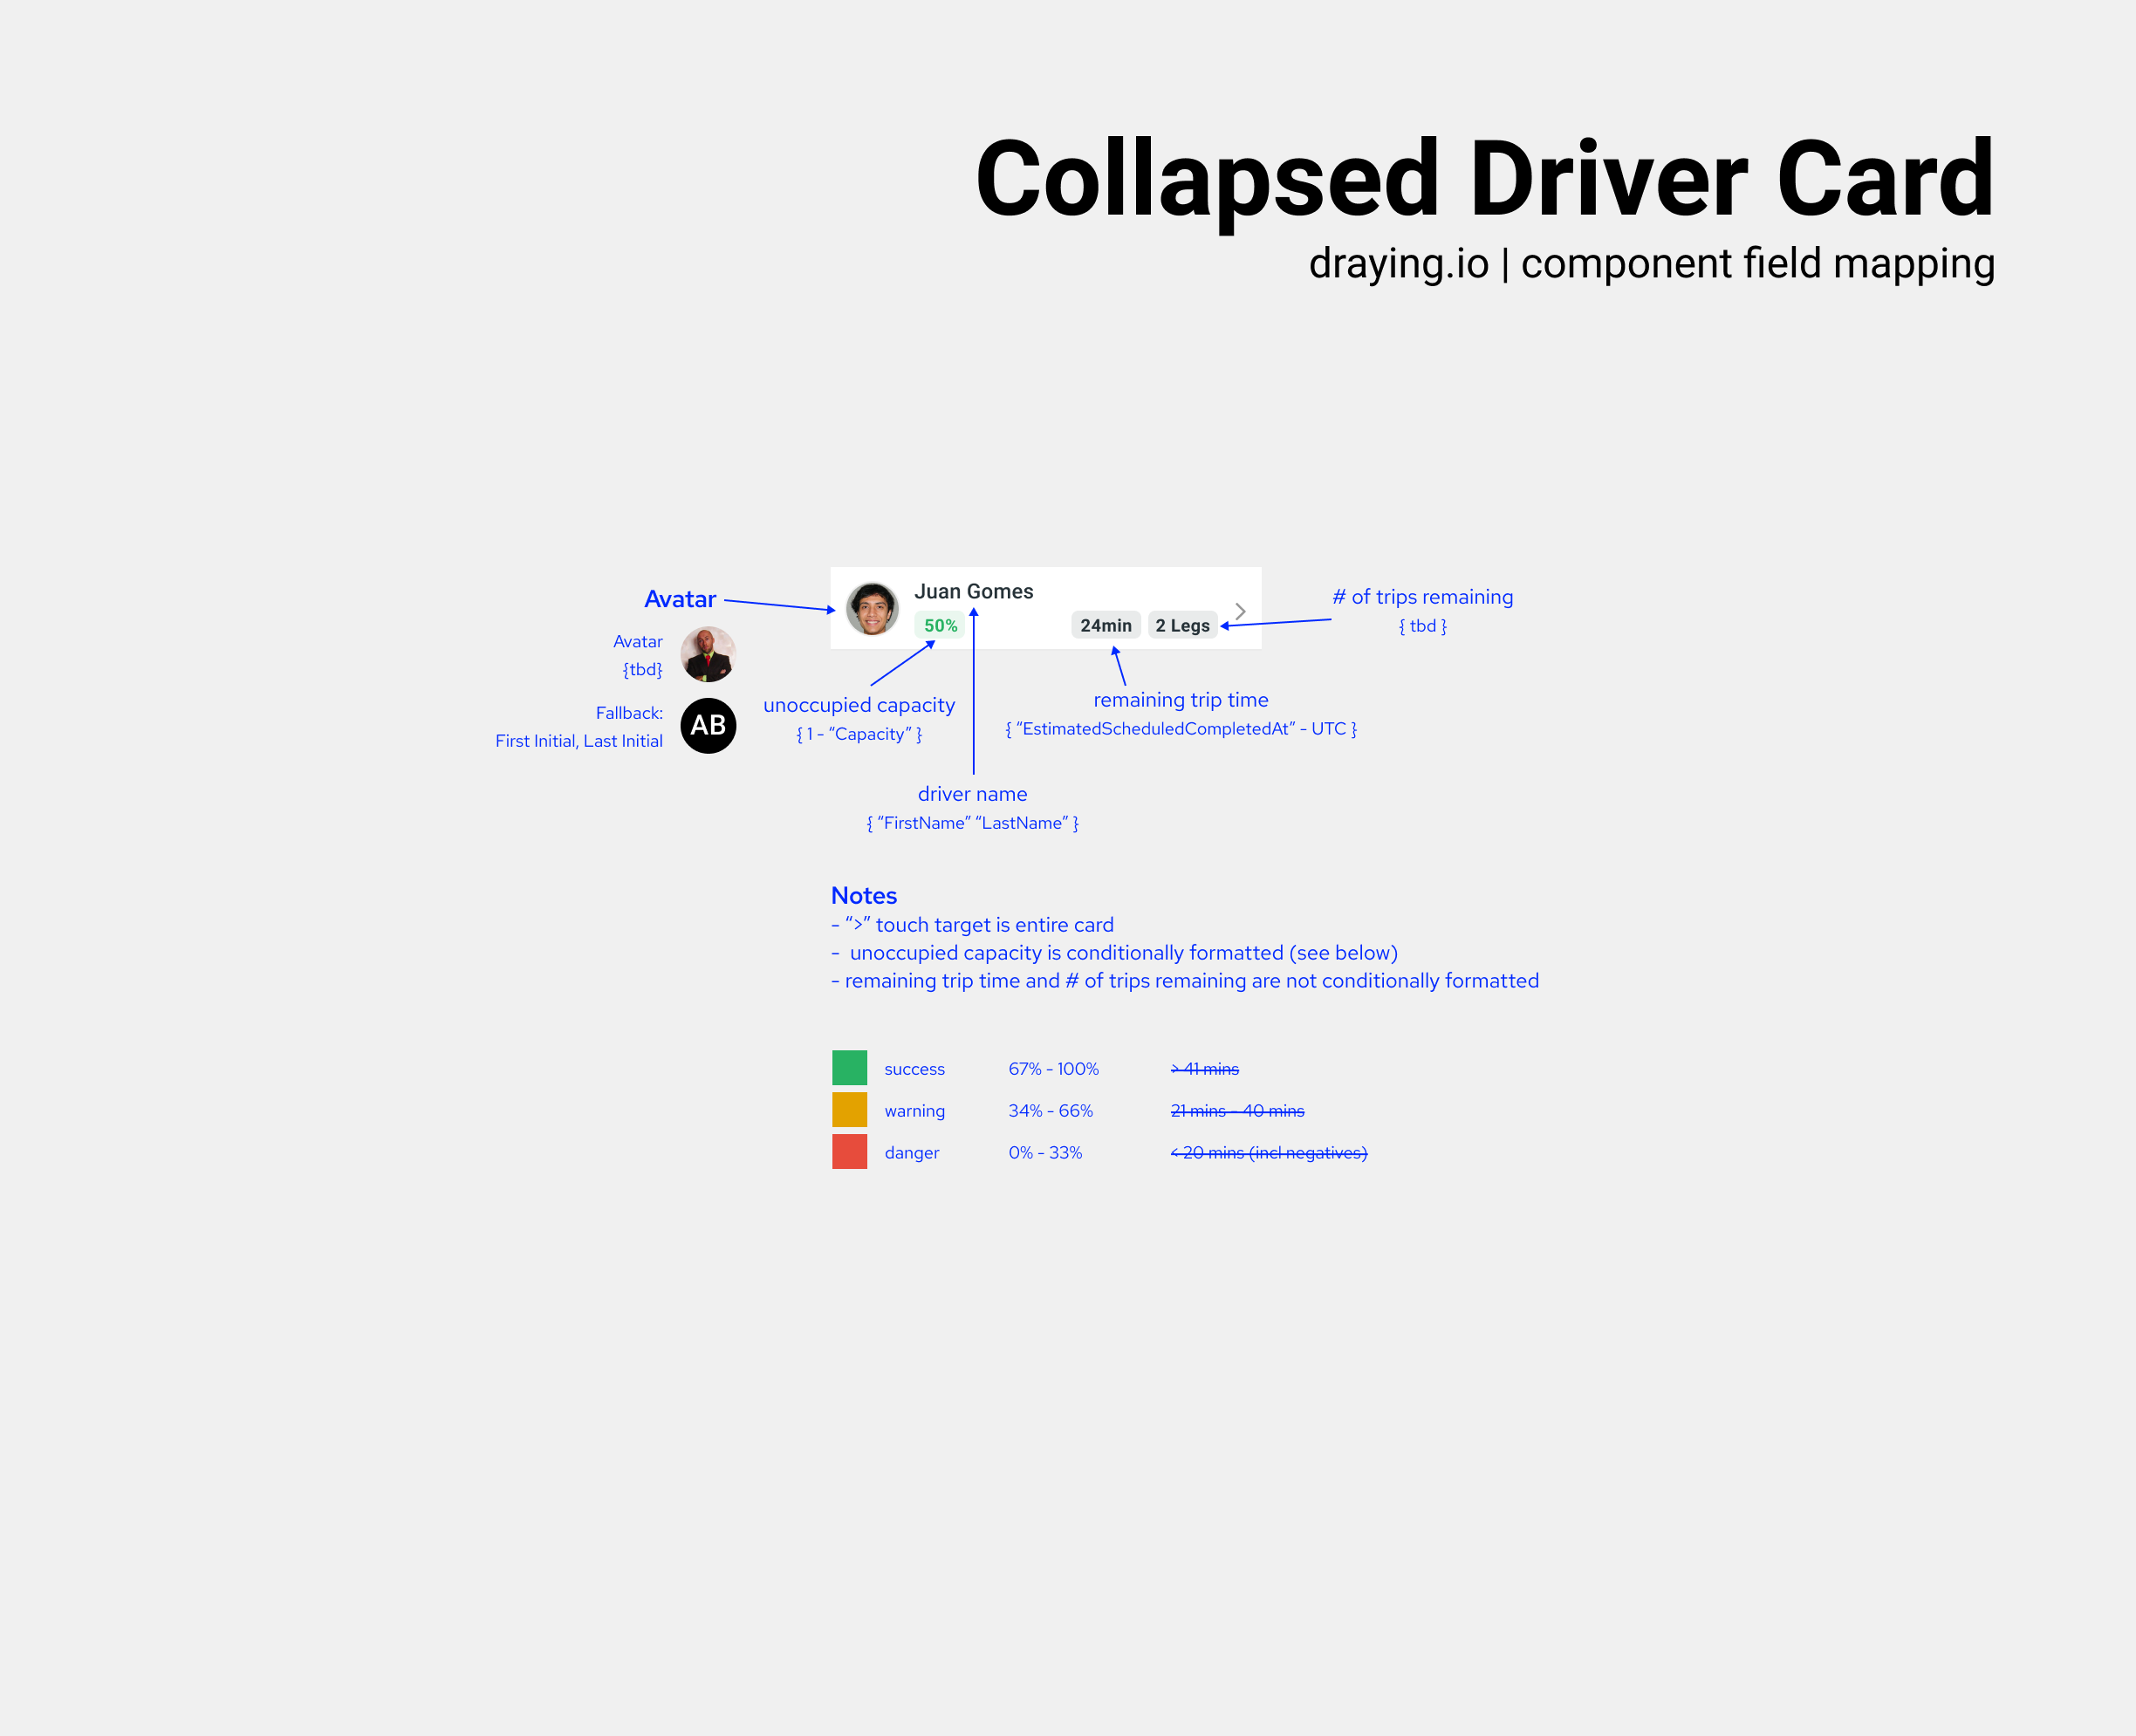
As I collected feature requirements and learned more about the existing products architecture, I paused visual design to document the existing product to help business, design, and development use the same language and have the same understanding of the product.
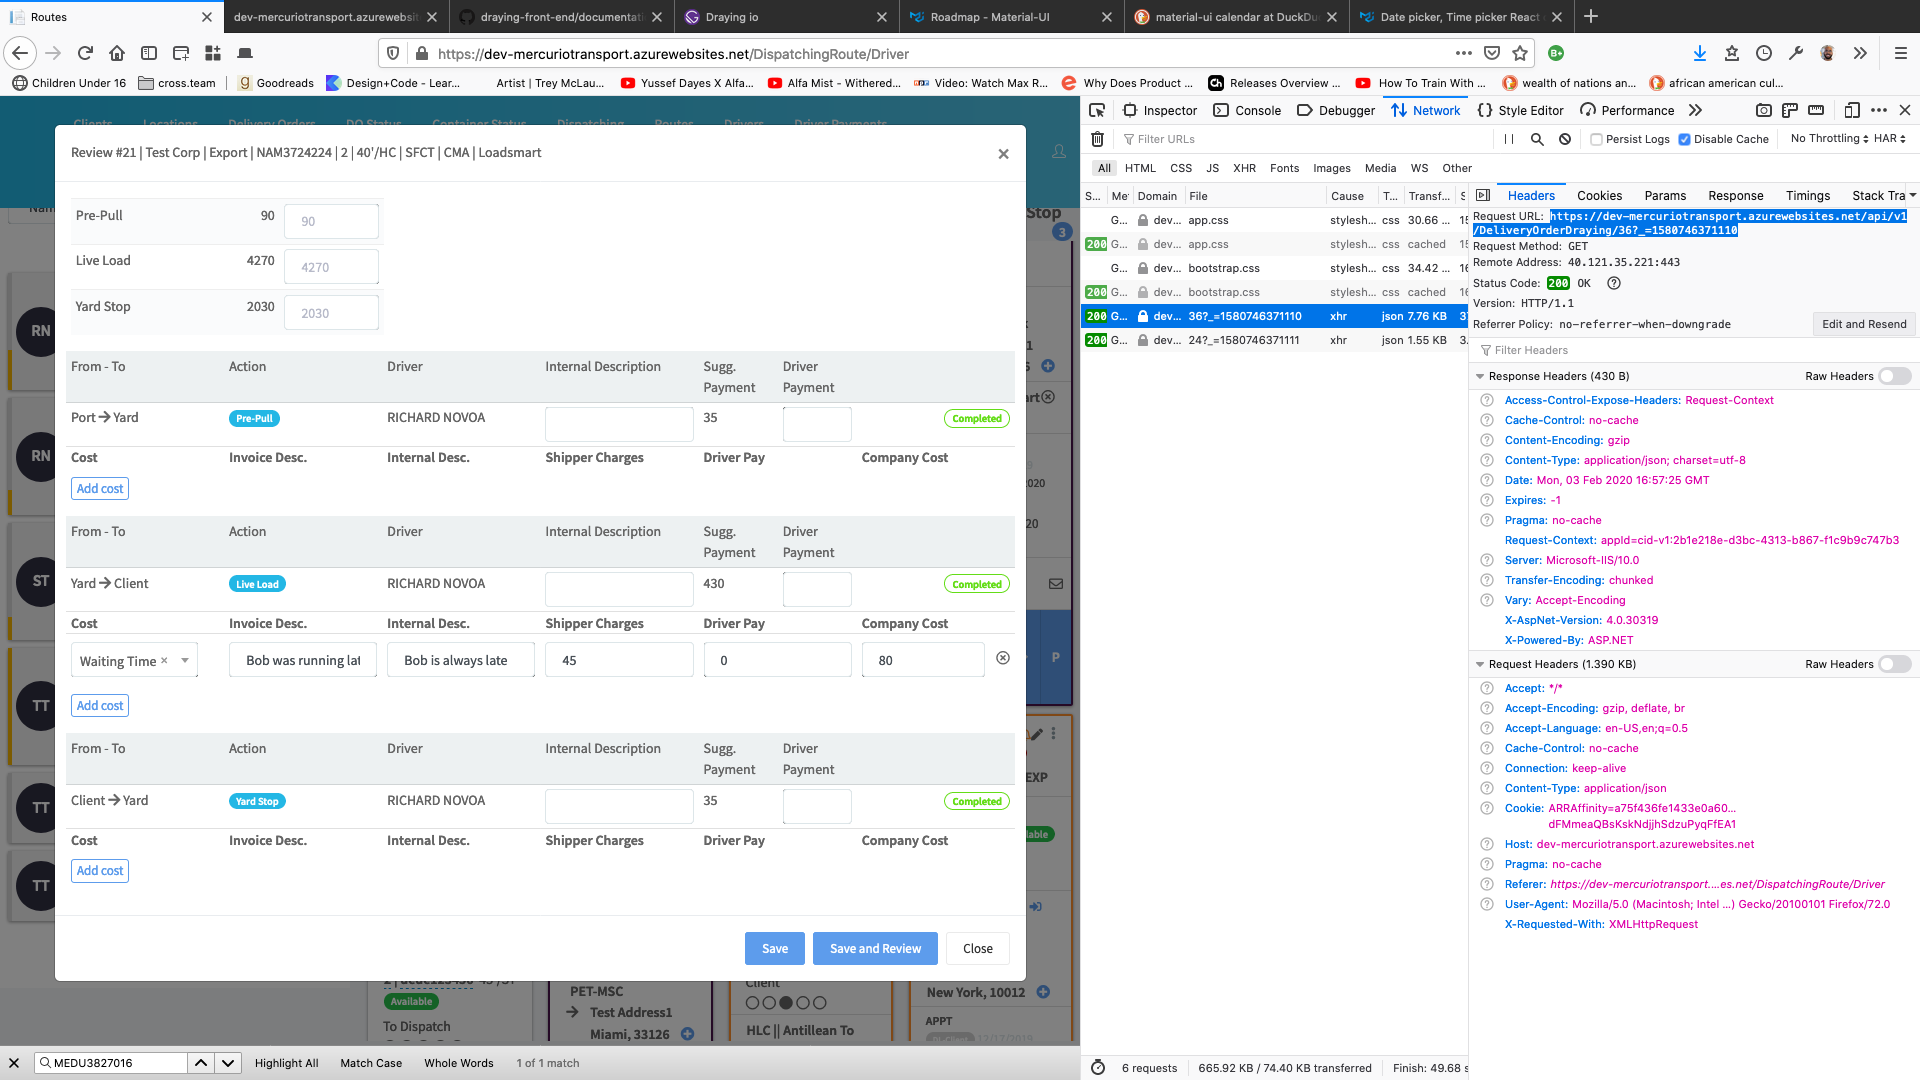
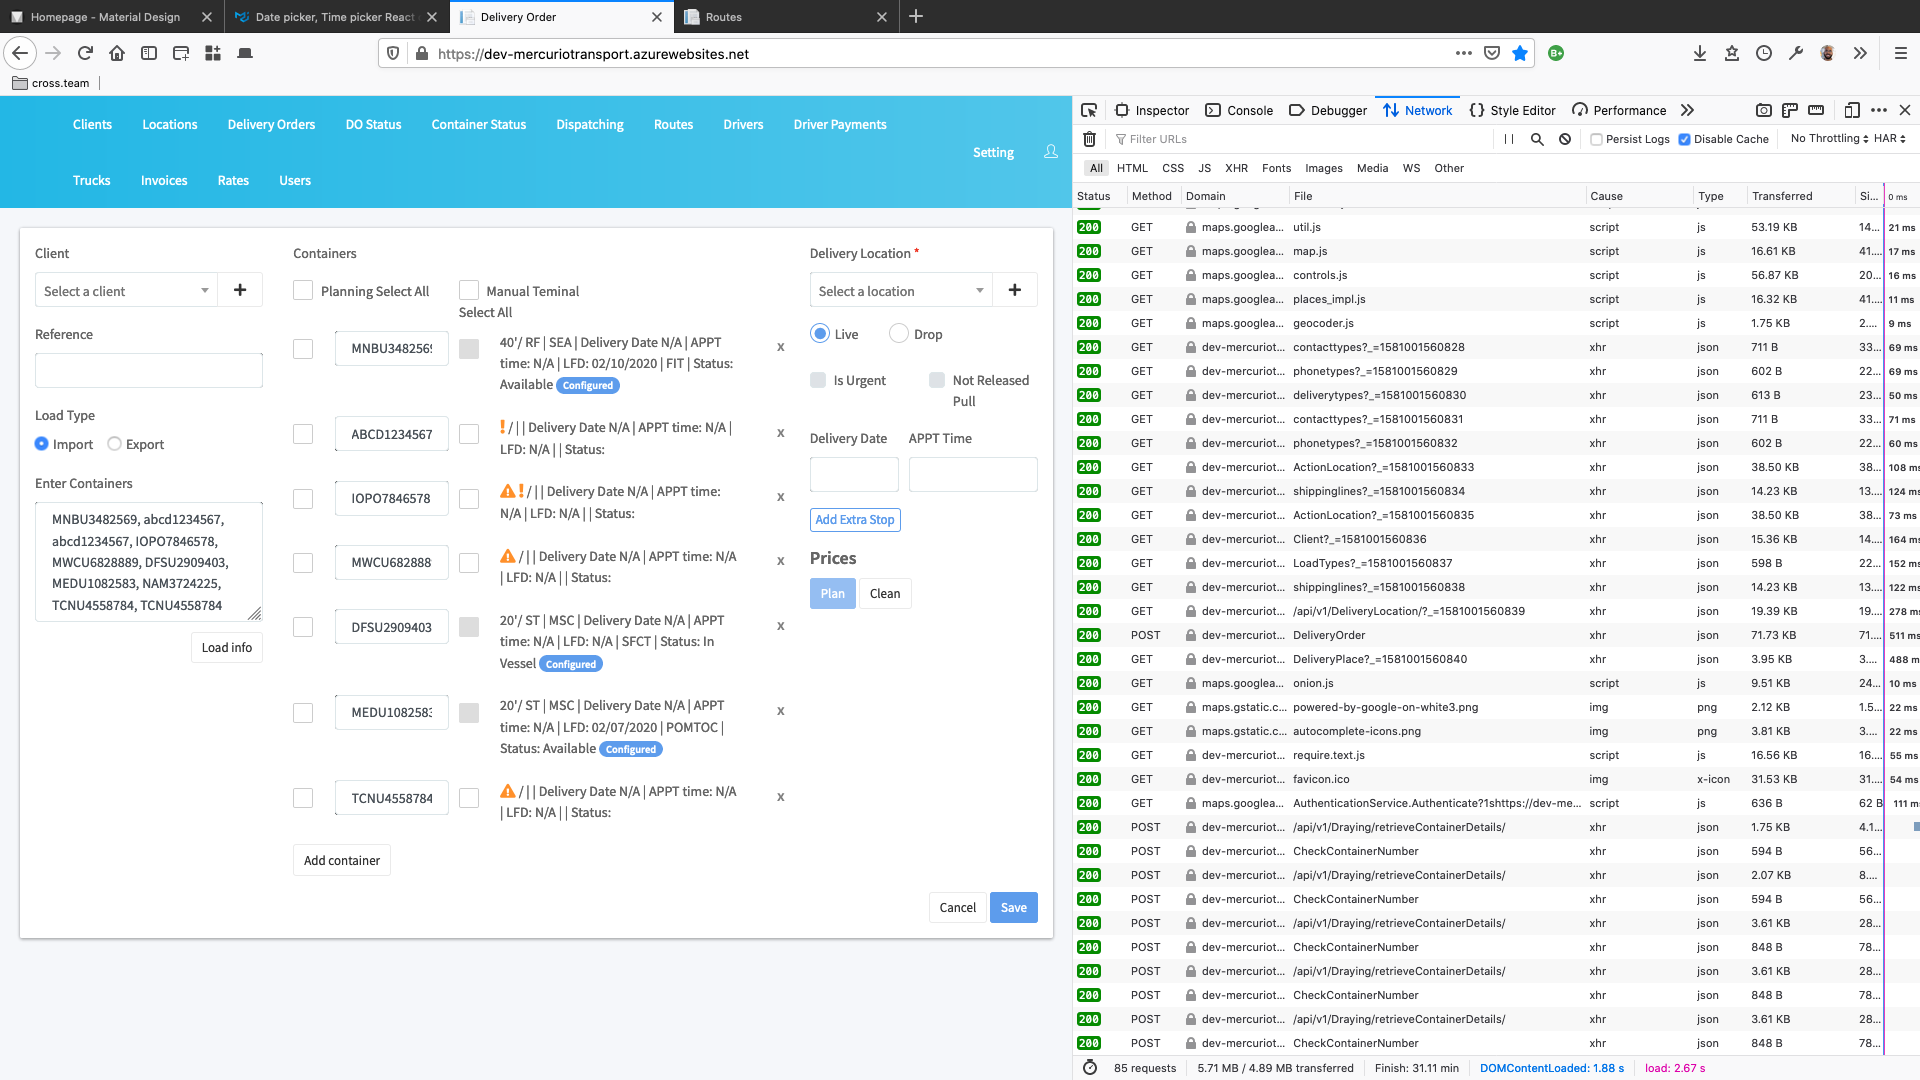
Documentation often began with inspecting the existing application and then asking the developer questions as they arose:
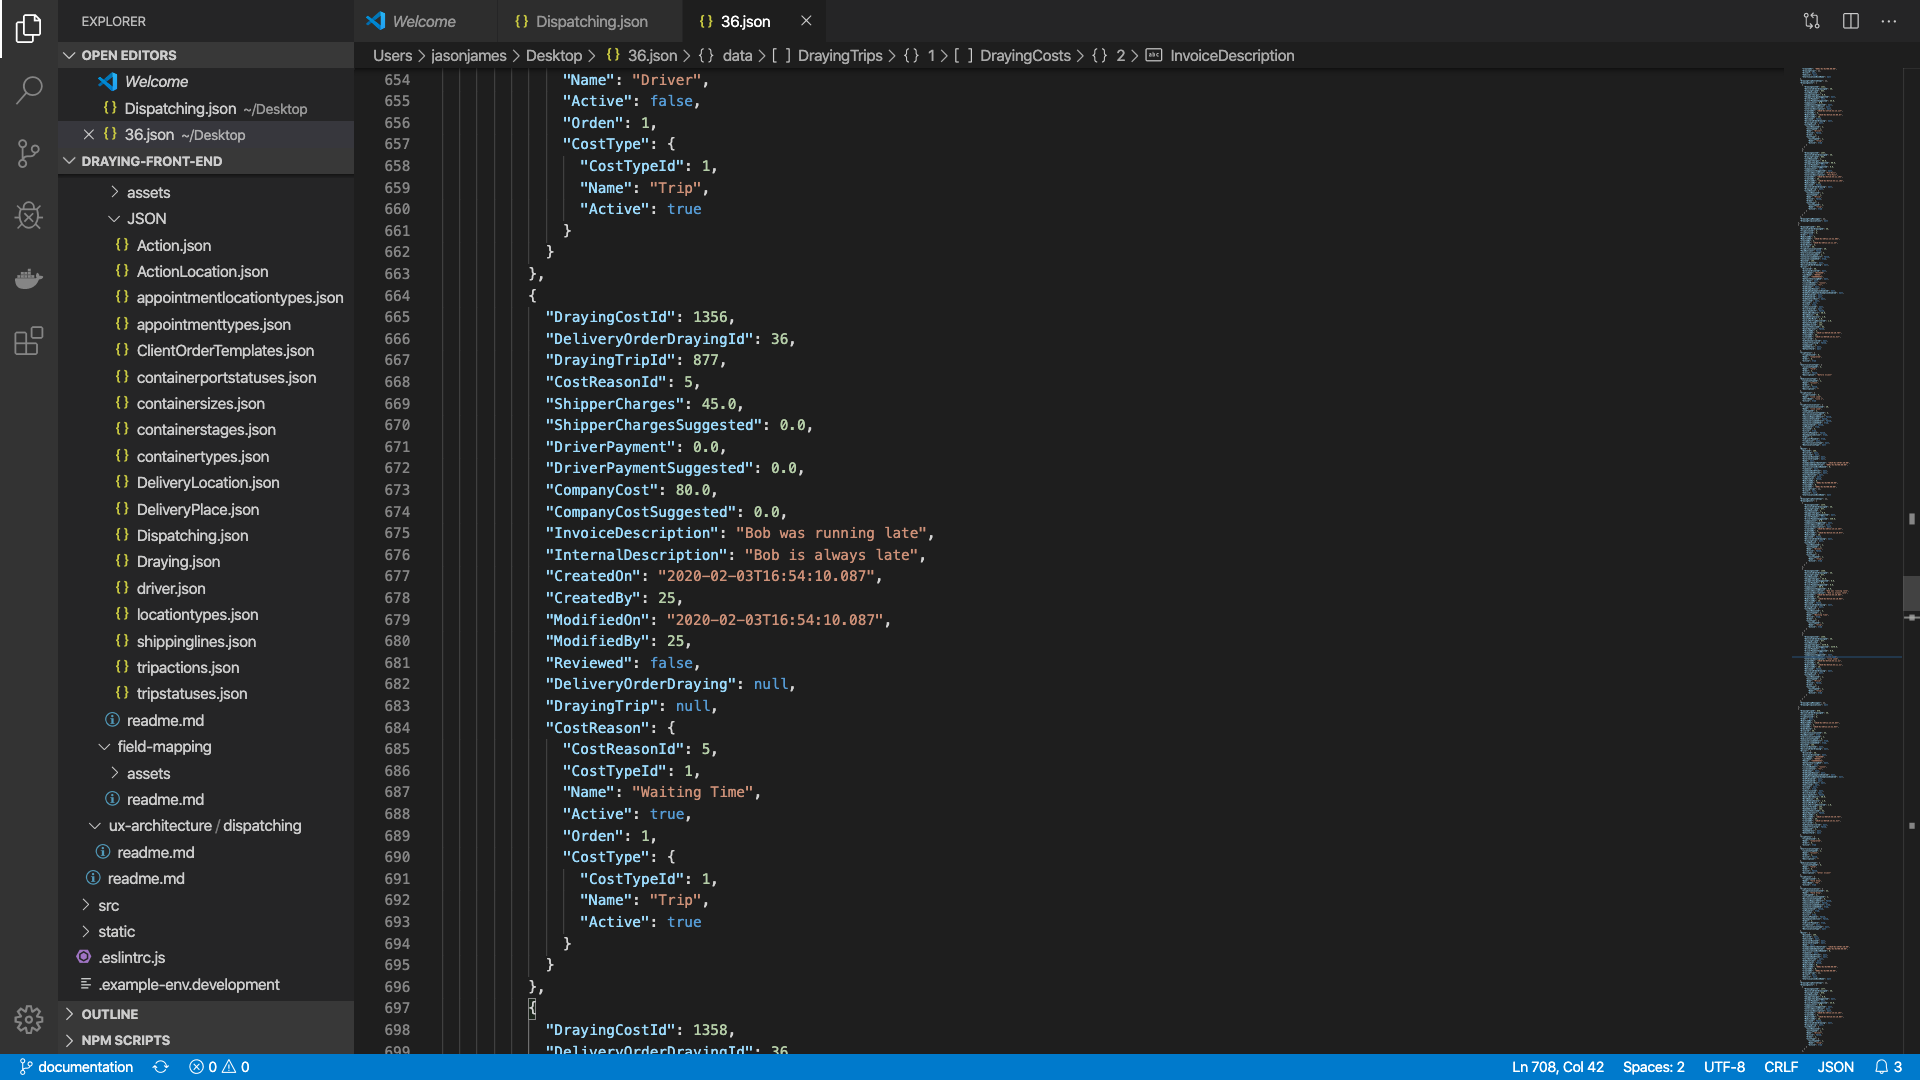
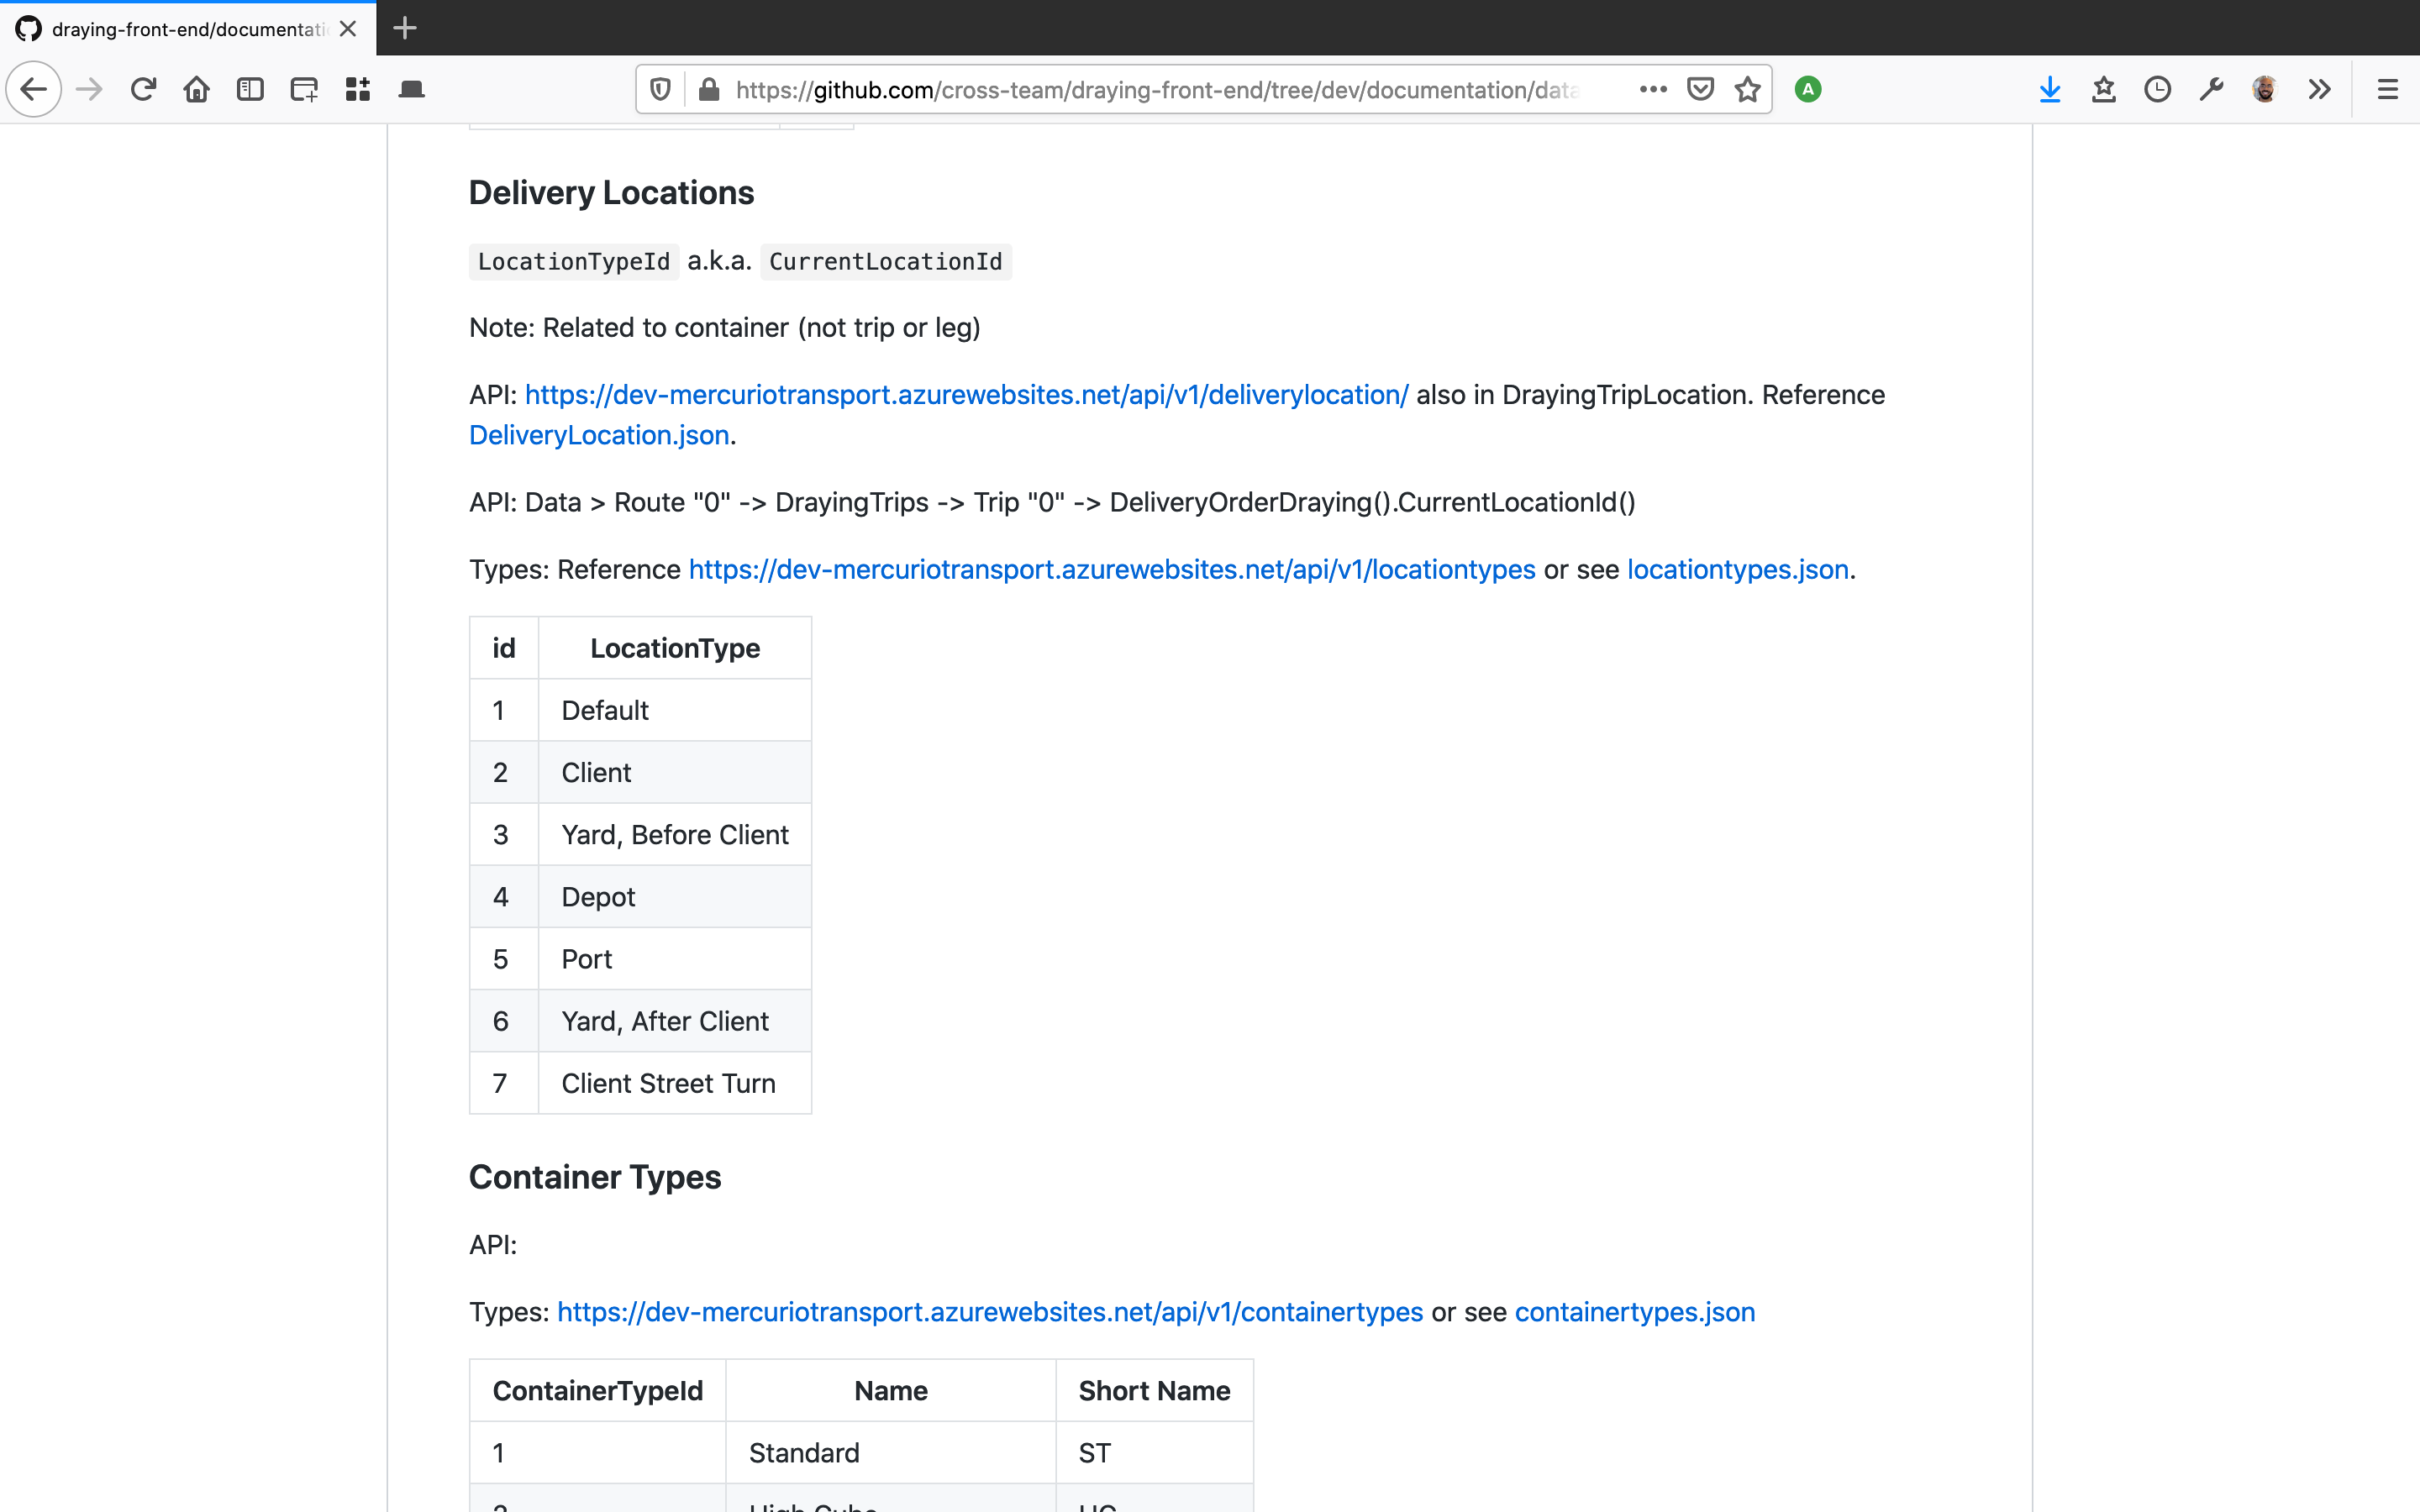
I wrote the documentation in markdown, which made storage in the repositories a breeze, ensuring the documentation would always exist alongside code:
My documentation of the front-end went hand-in-hand with my developer colleague Sebastian’s creation of the graphQL schema that would be the intermediary between the old backend and new front end.
Sometimes my research and explorations would help him document the schema in-line or answer a feature question - other times he’d help explain how the backend worked, which helped me understand how the UI functioned and its larger intent.
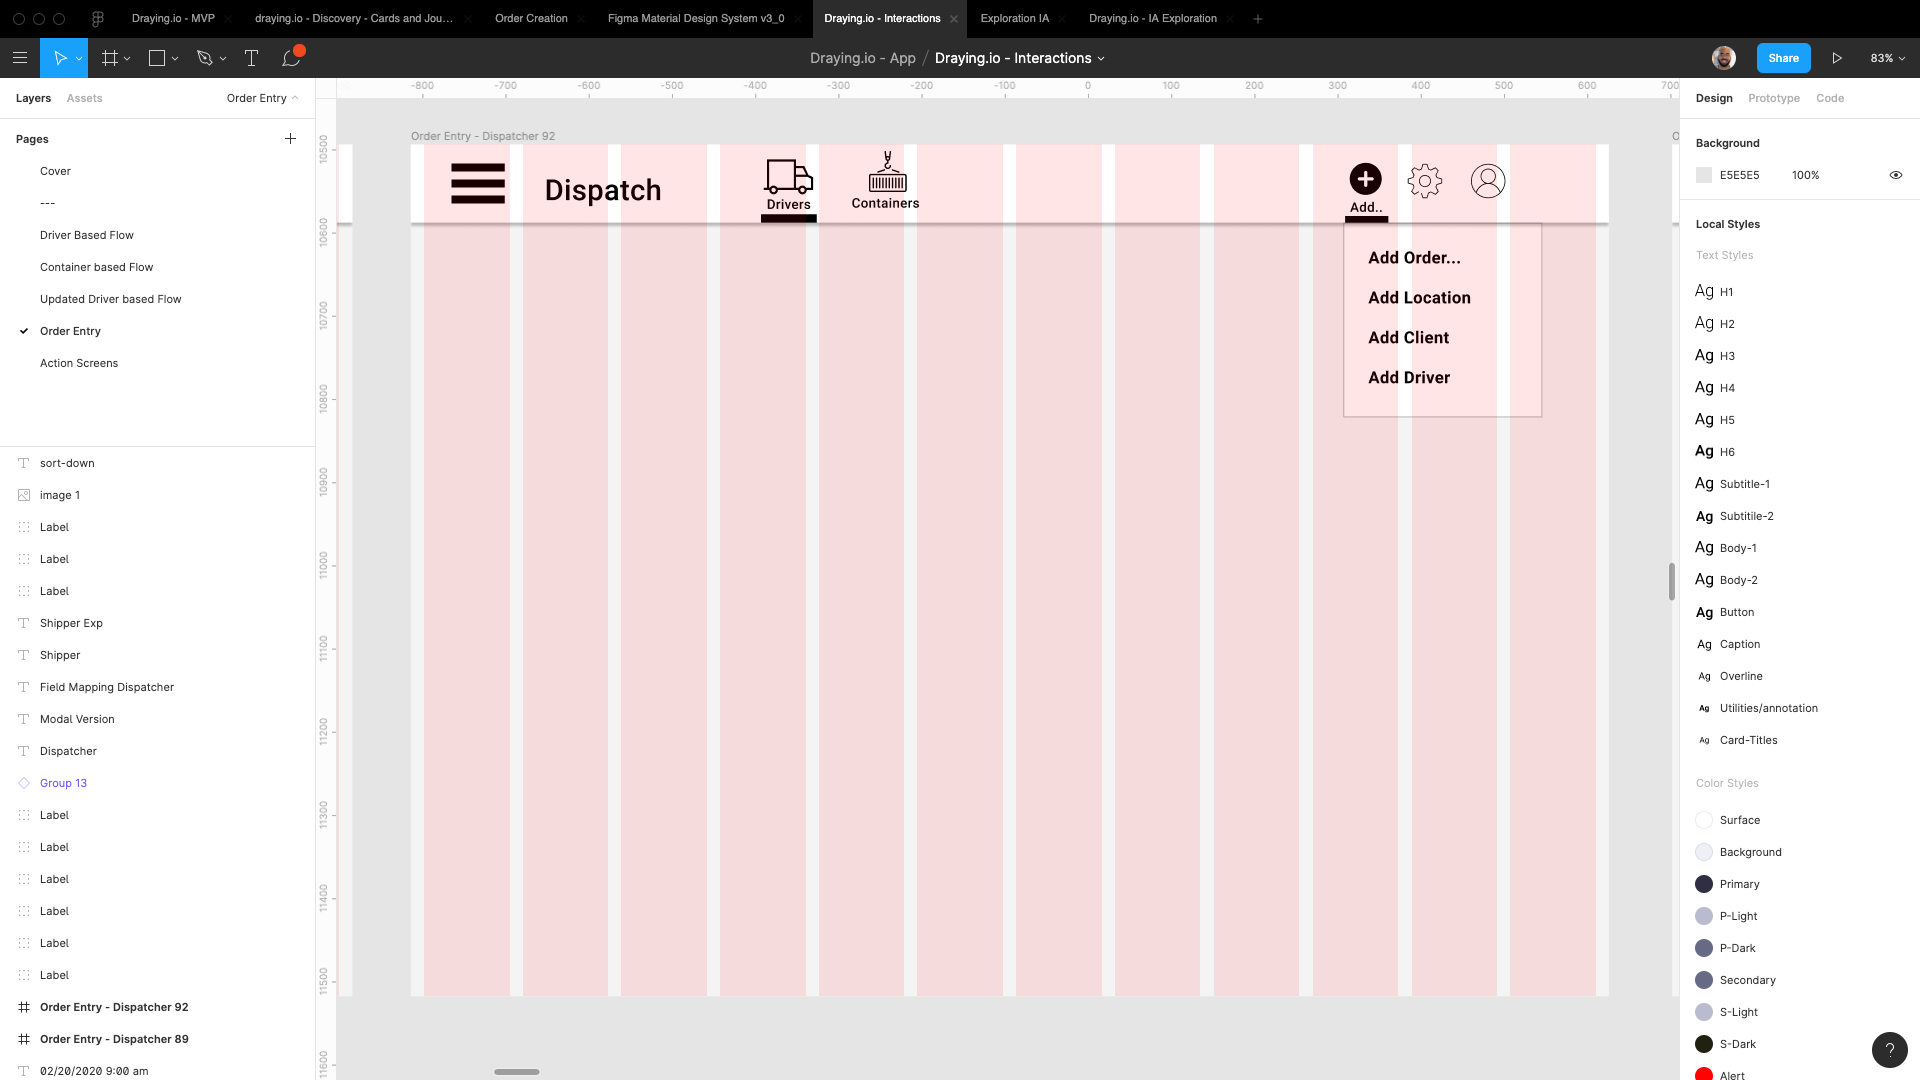
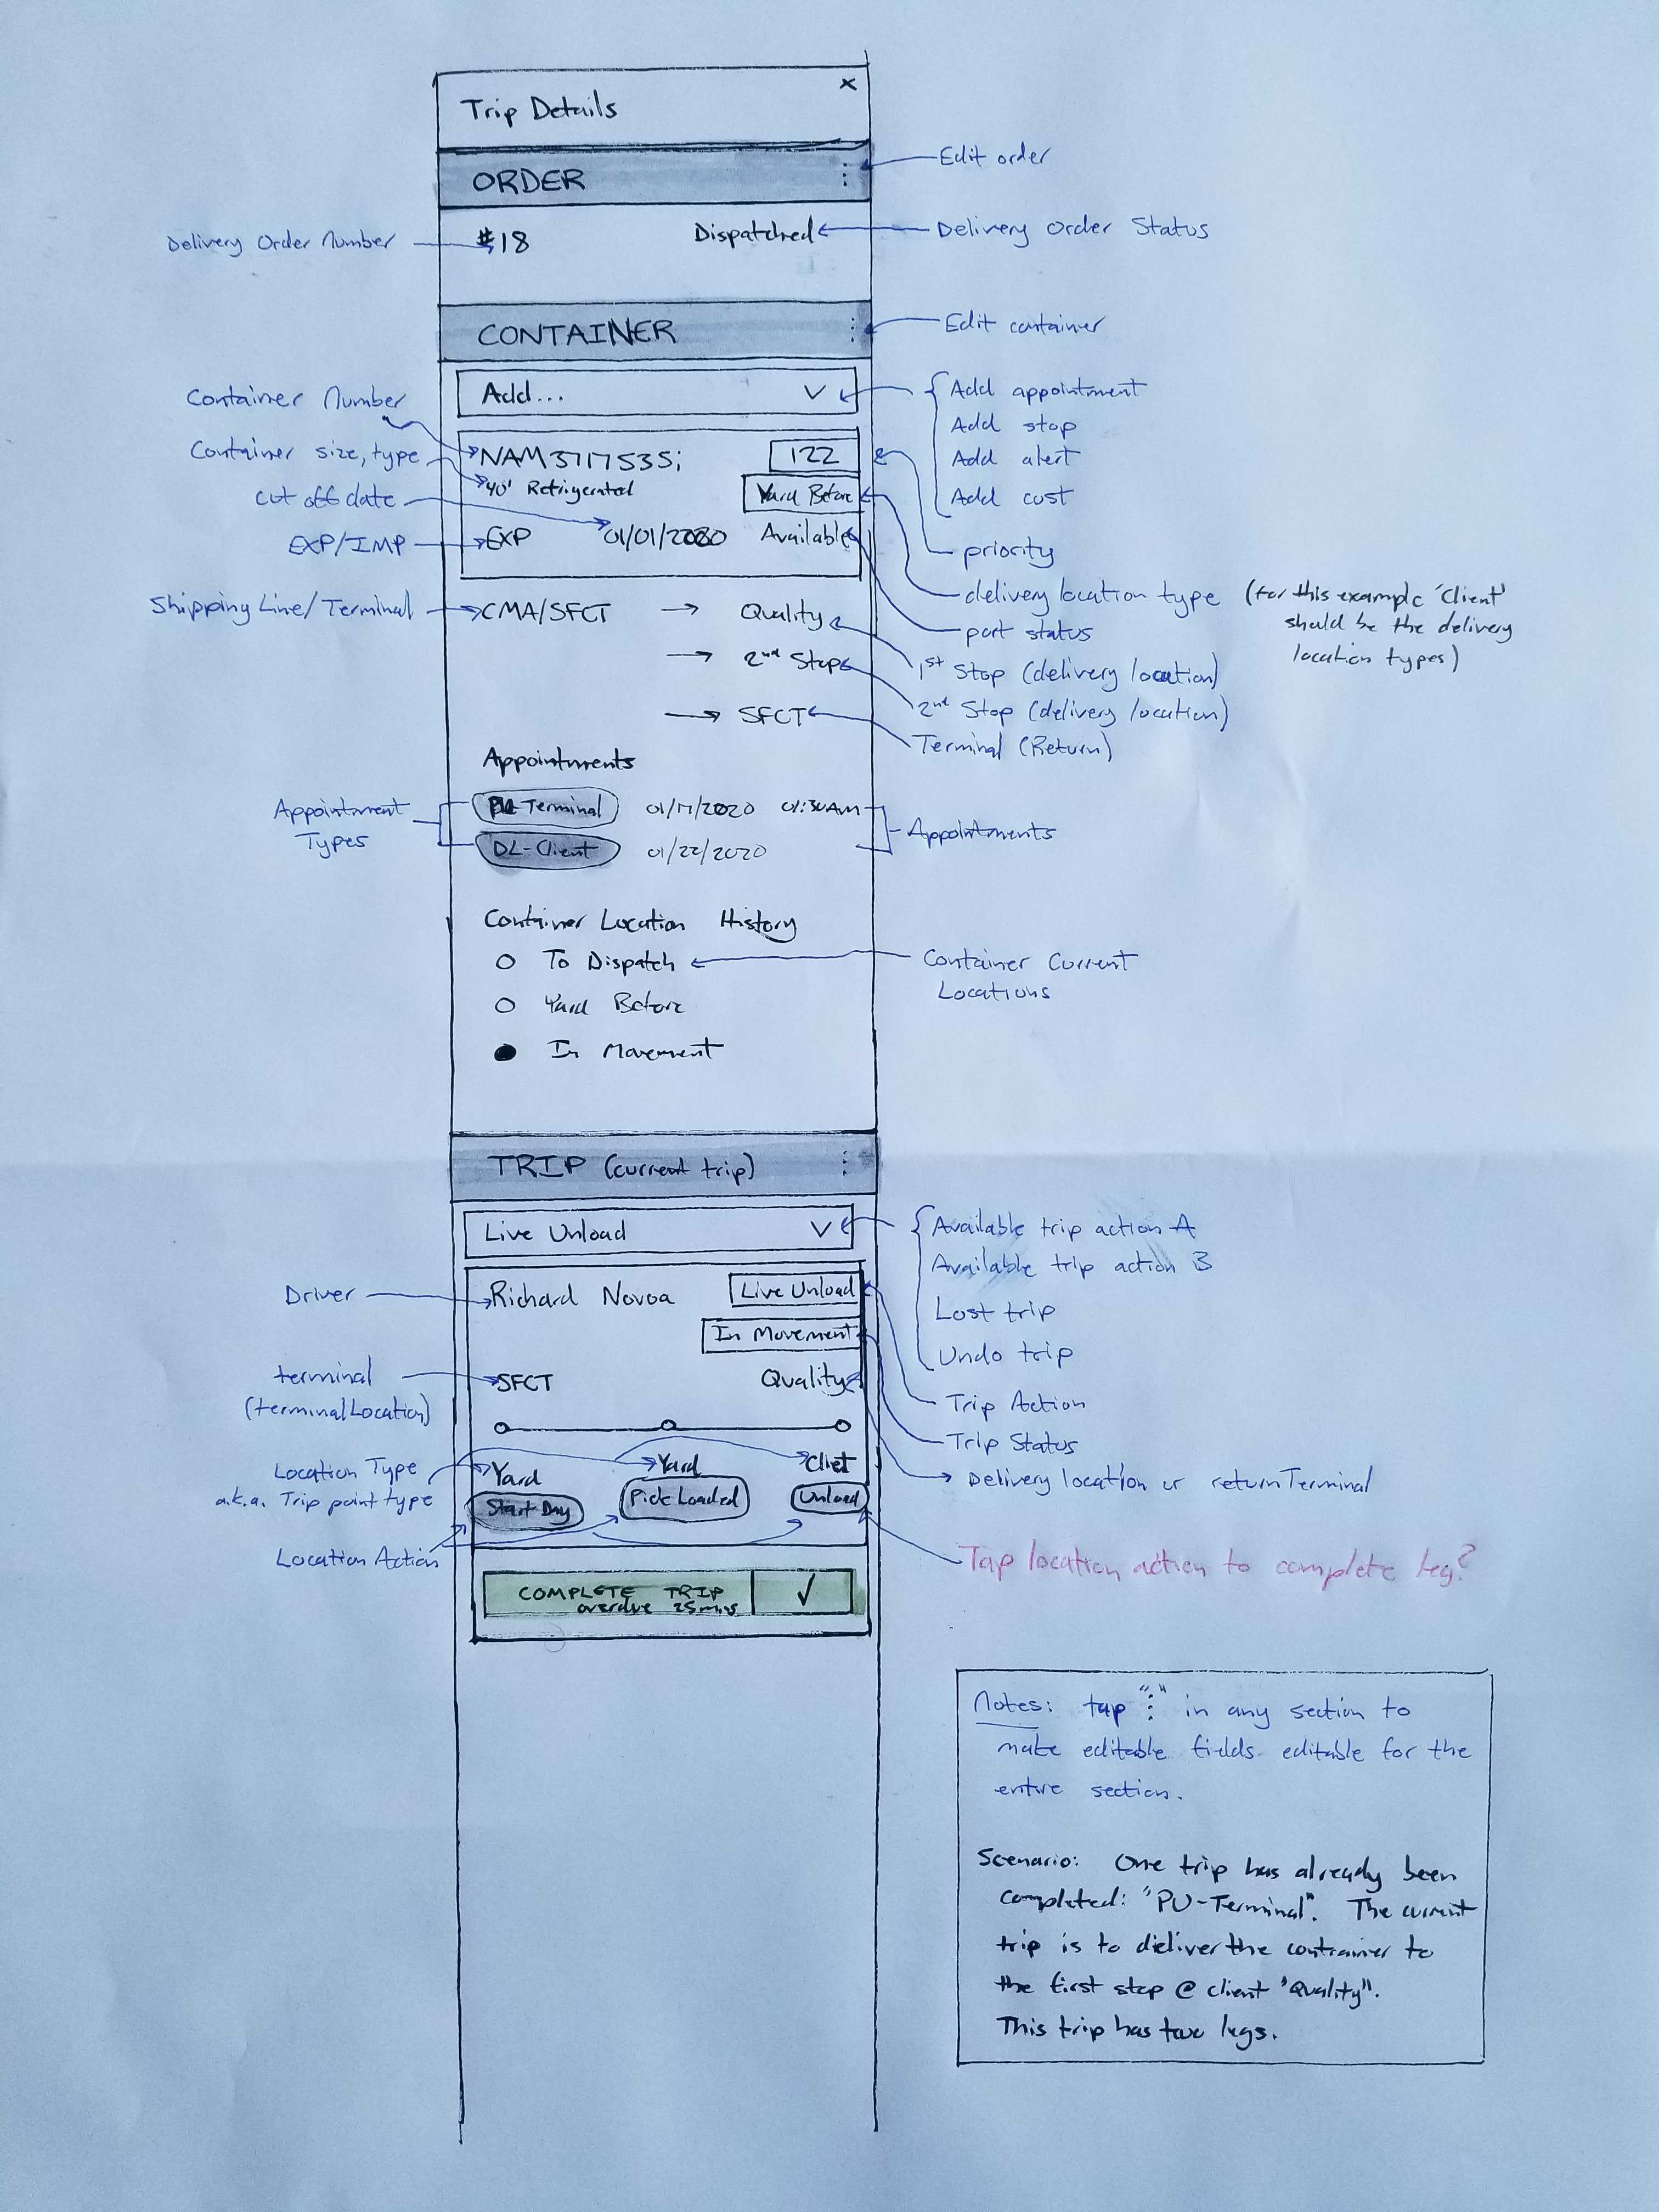
If I had questions, I documented them:

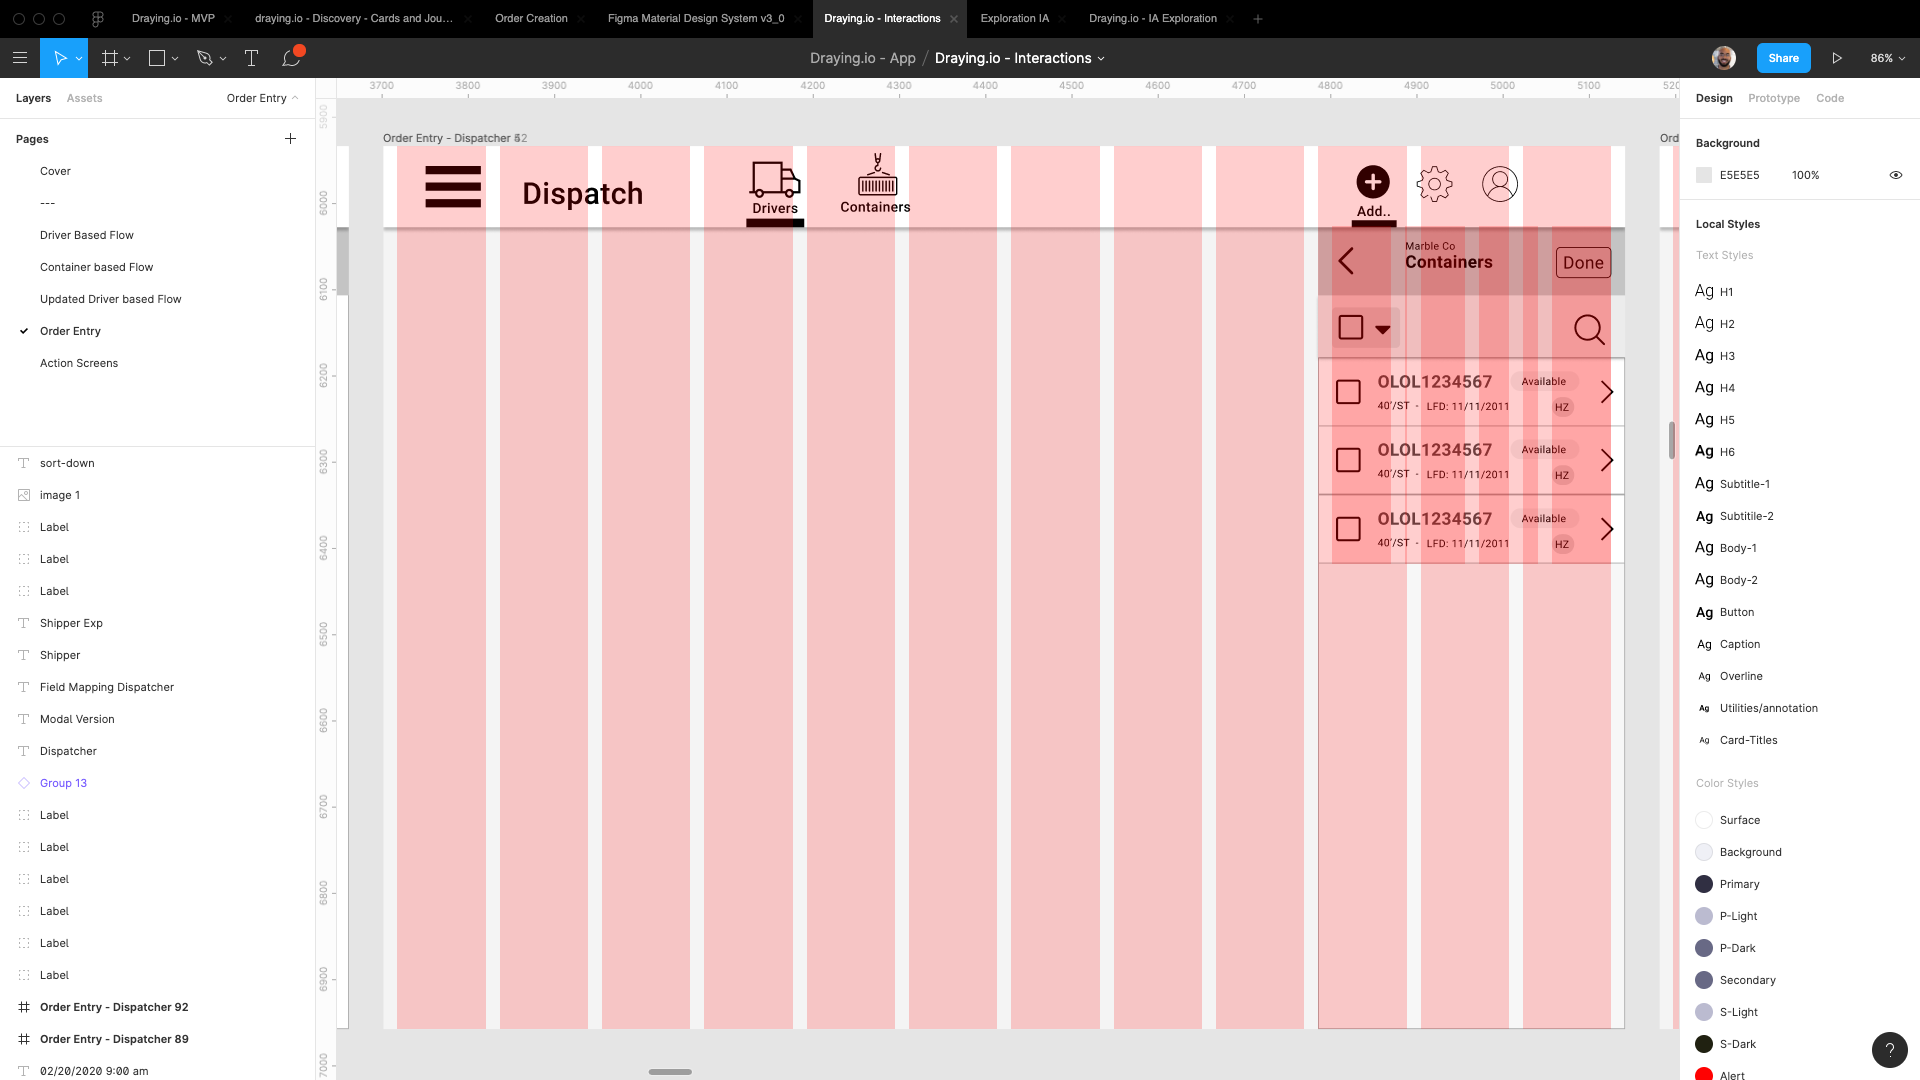
I also documented the user experience architecture; how the pieces of the product fit together:
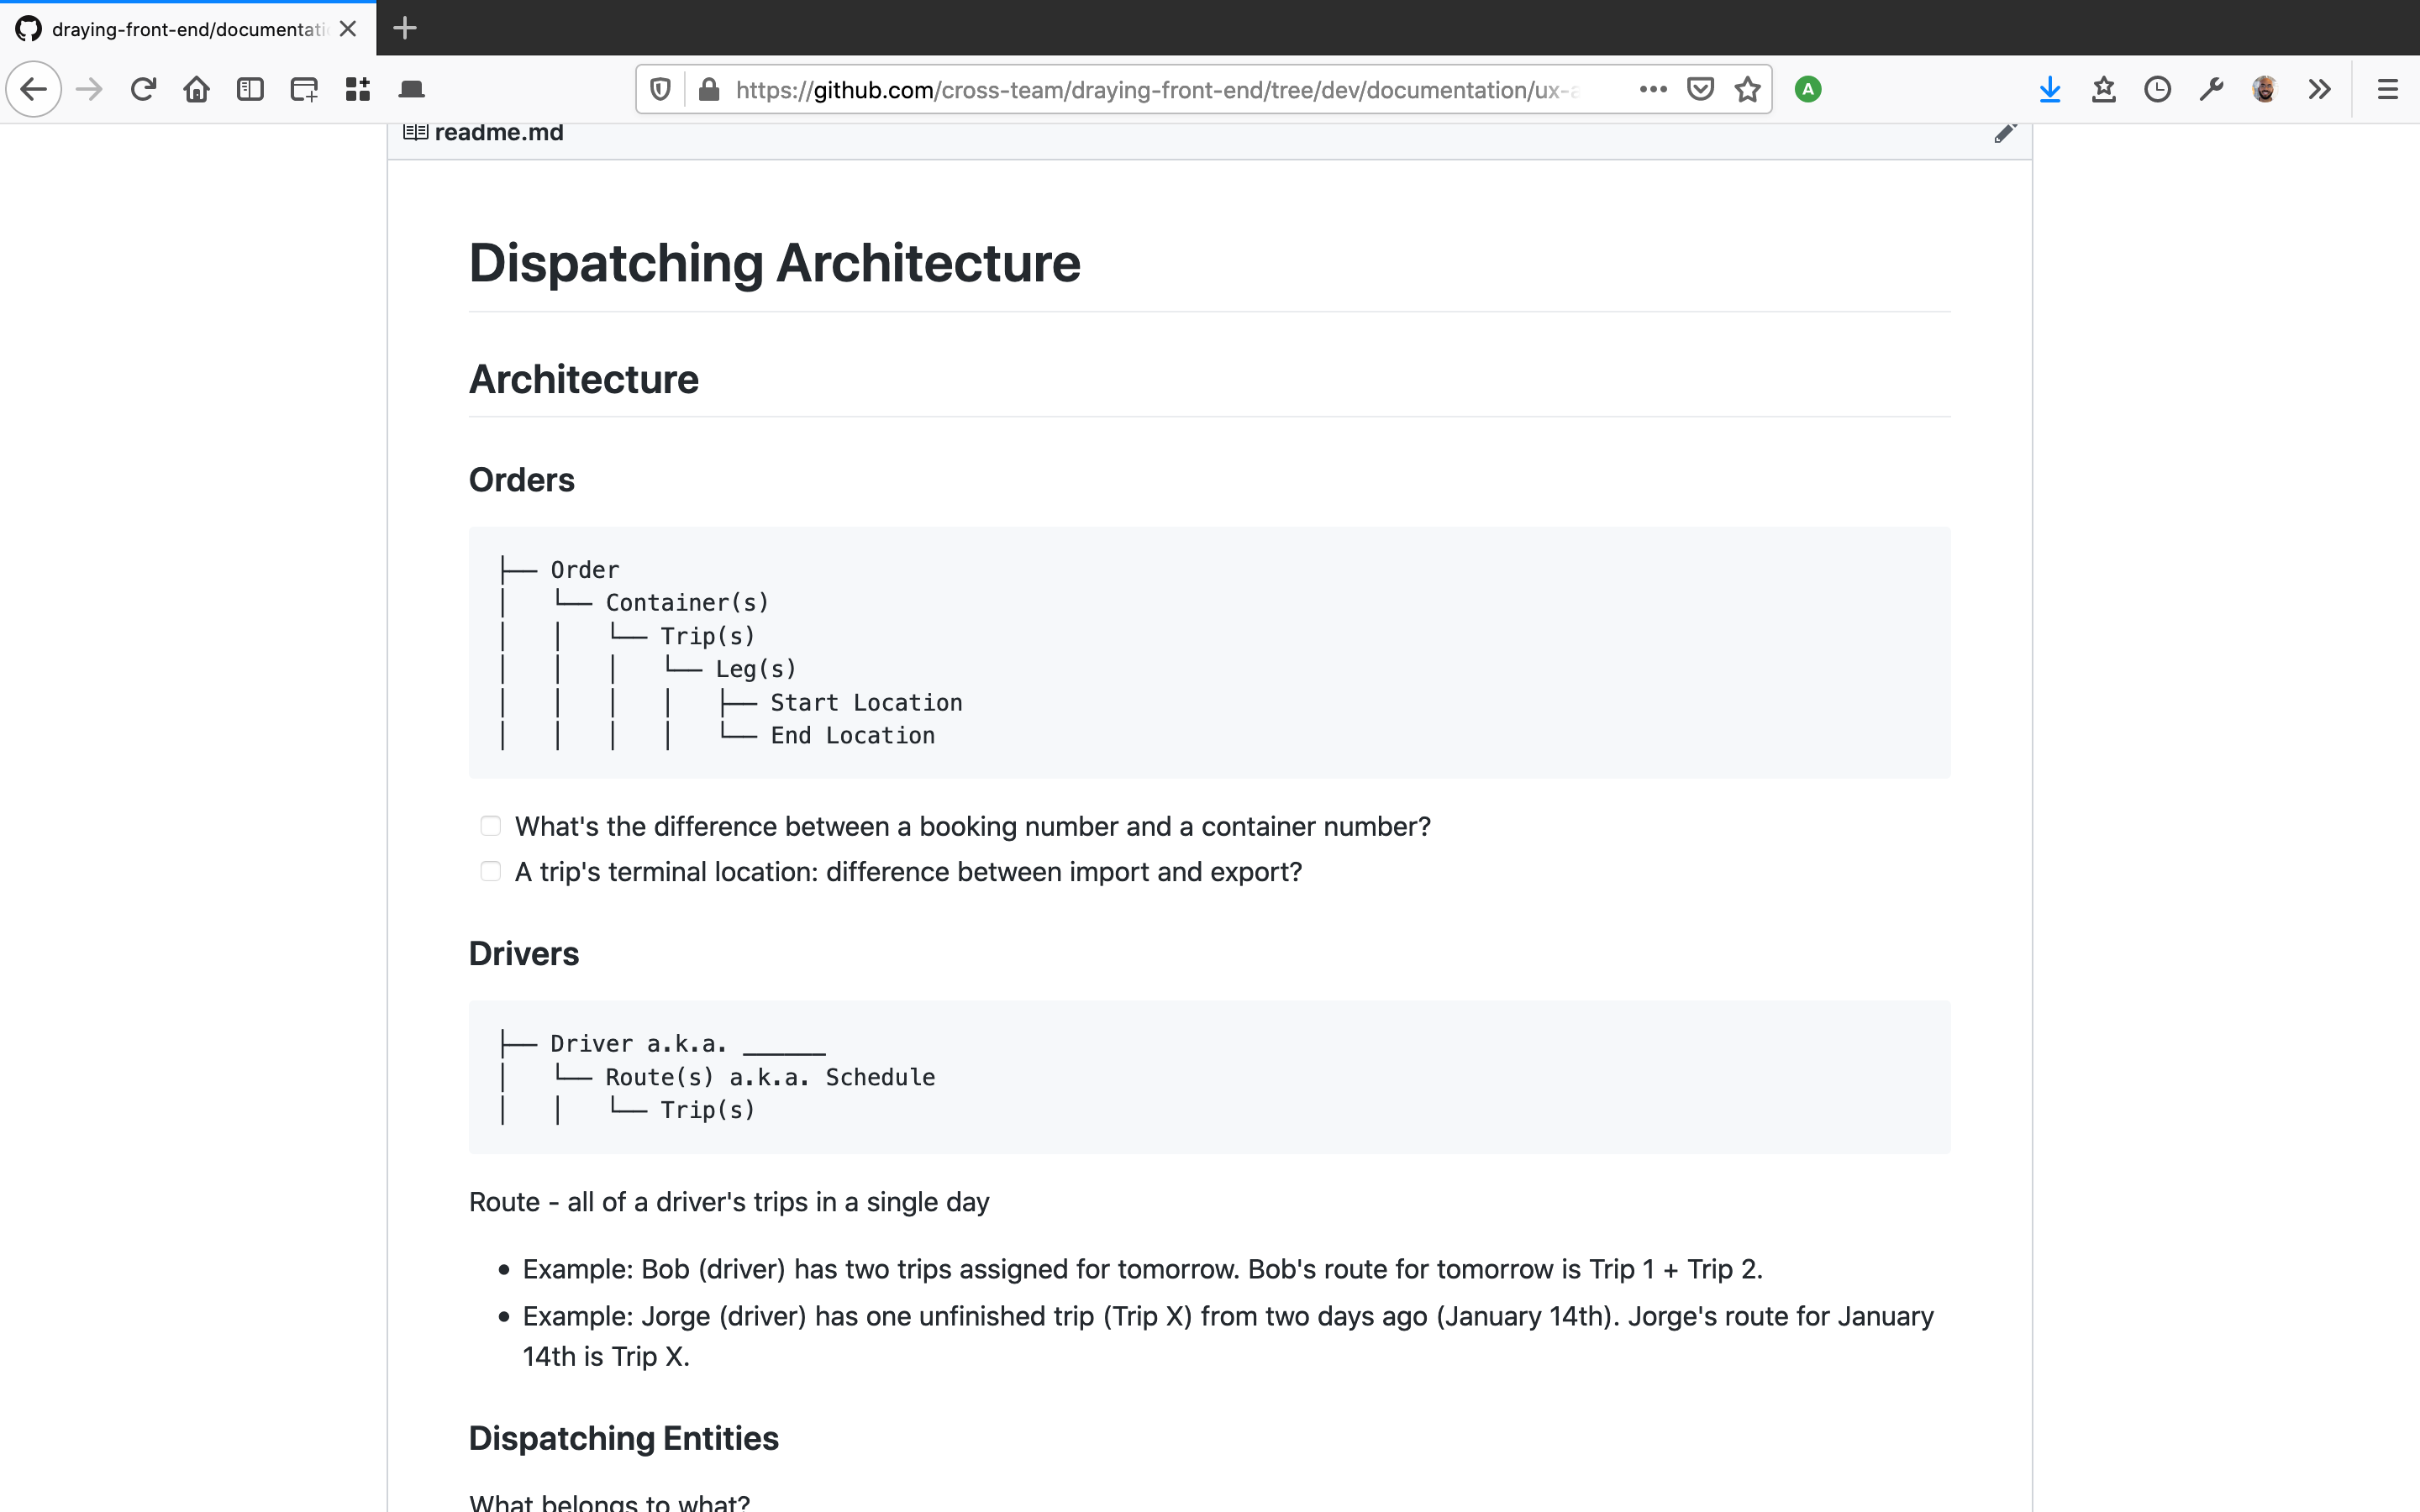

Getting clarity around what the features were and how they actually fit together in a complex product helped us speak the same language as a team.
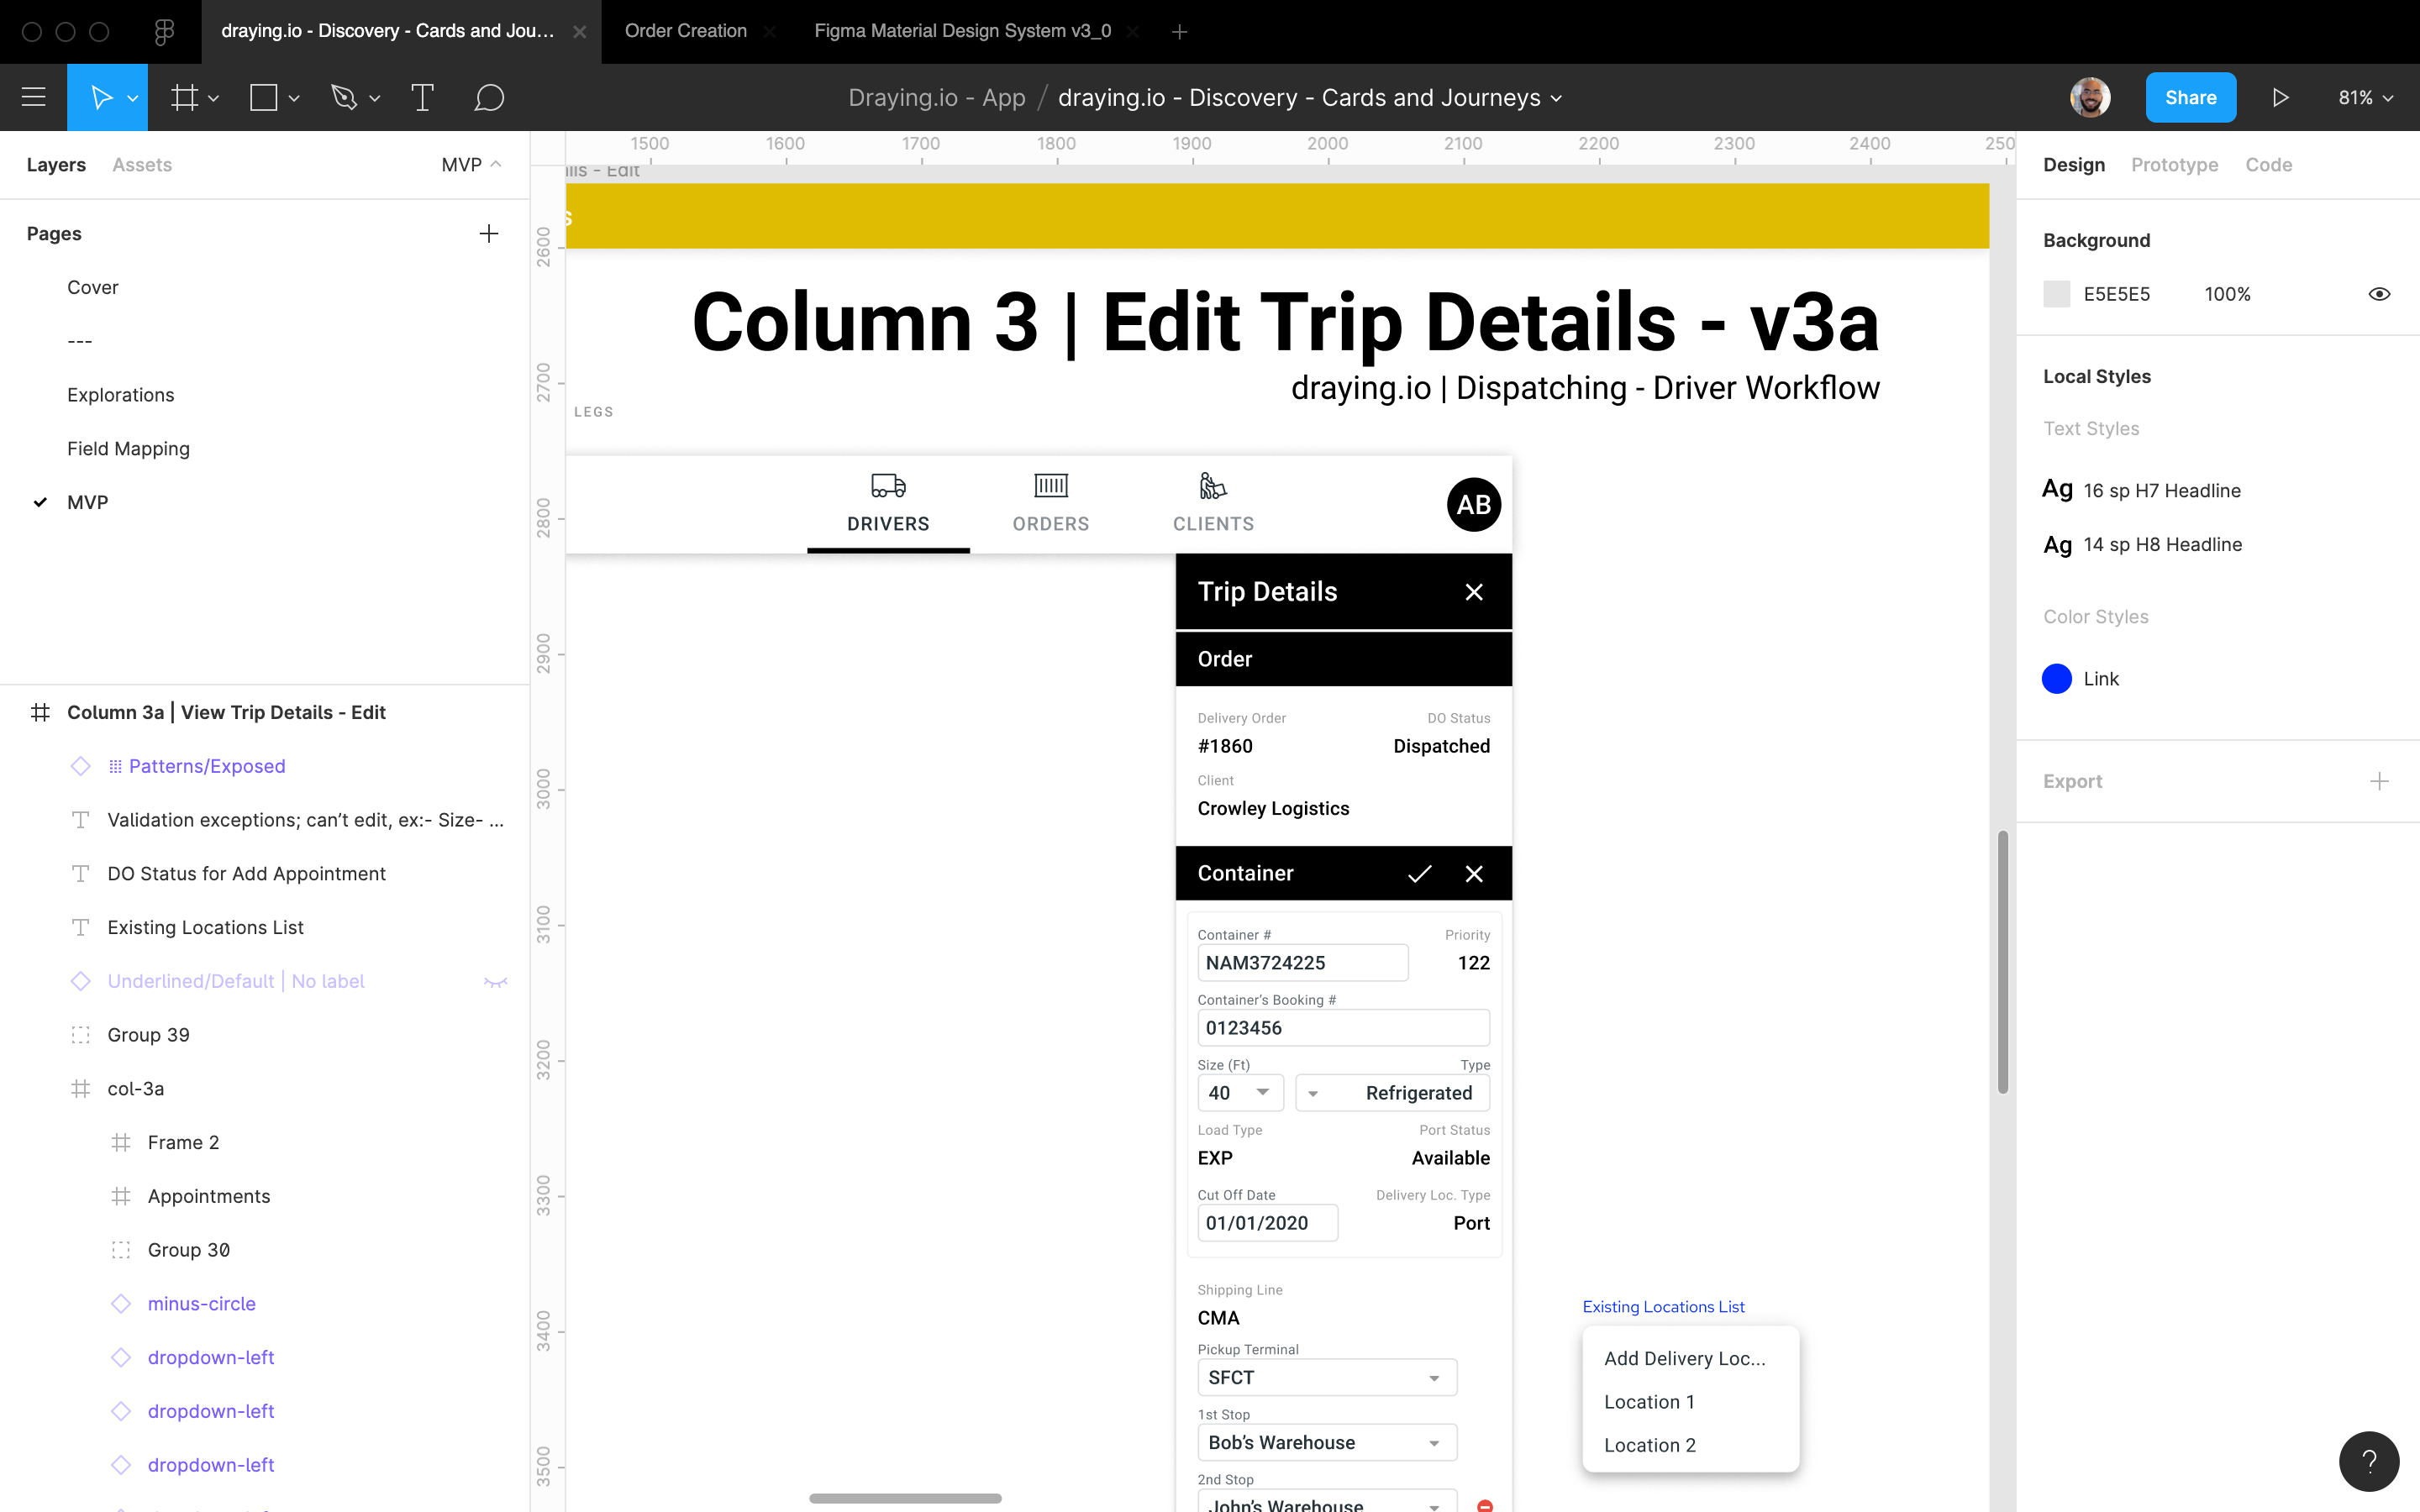
Visual Design in Figma
Now it was time to build out the visual design, starting with the overall visual direction already established by my colleague Marcelo.
How did I get here?
Here’s a quick hand-sketch I did to help make sure the new visual design incorporated Richard’s wireframes and interactions while also including all of the features and nuance of the existing product and data structure:
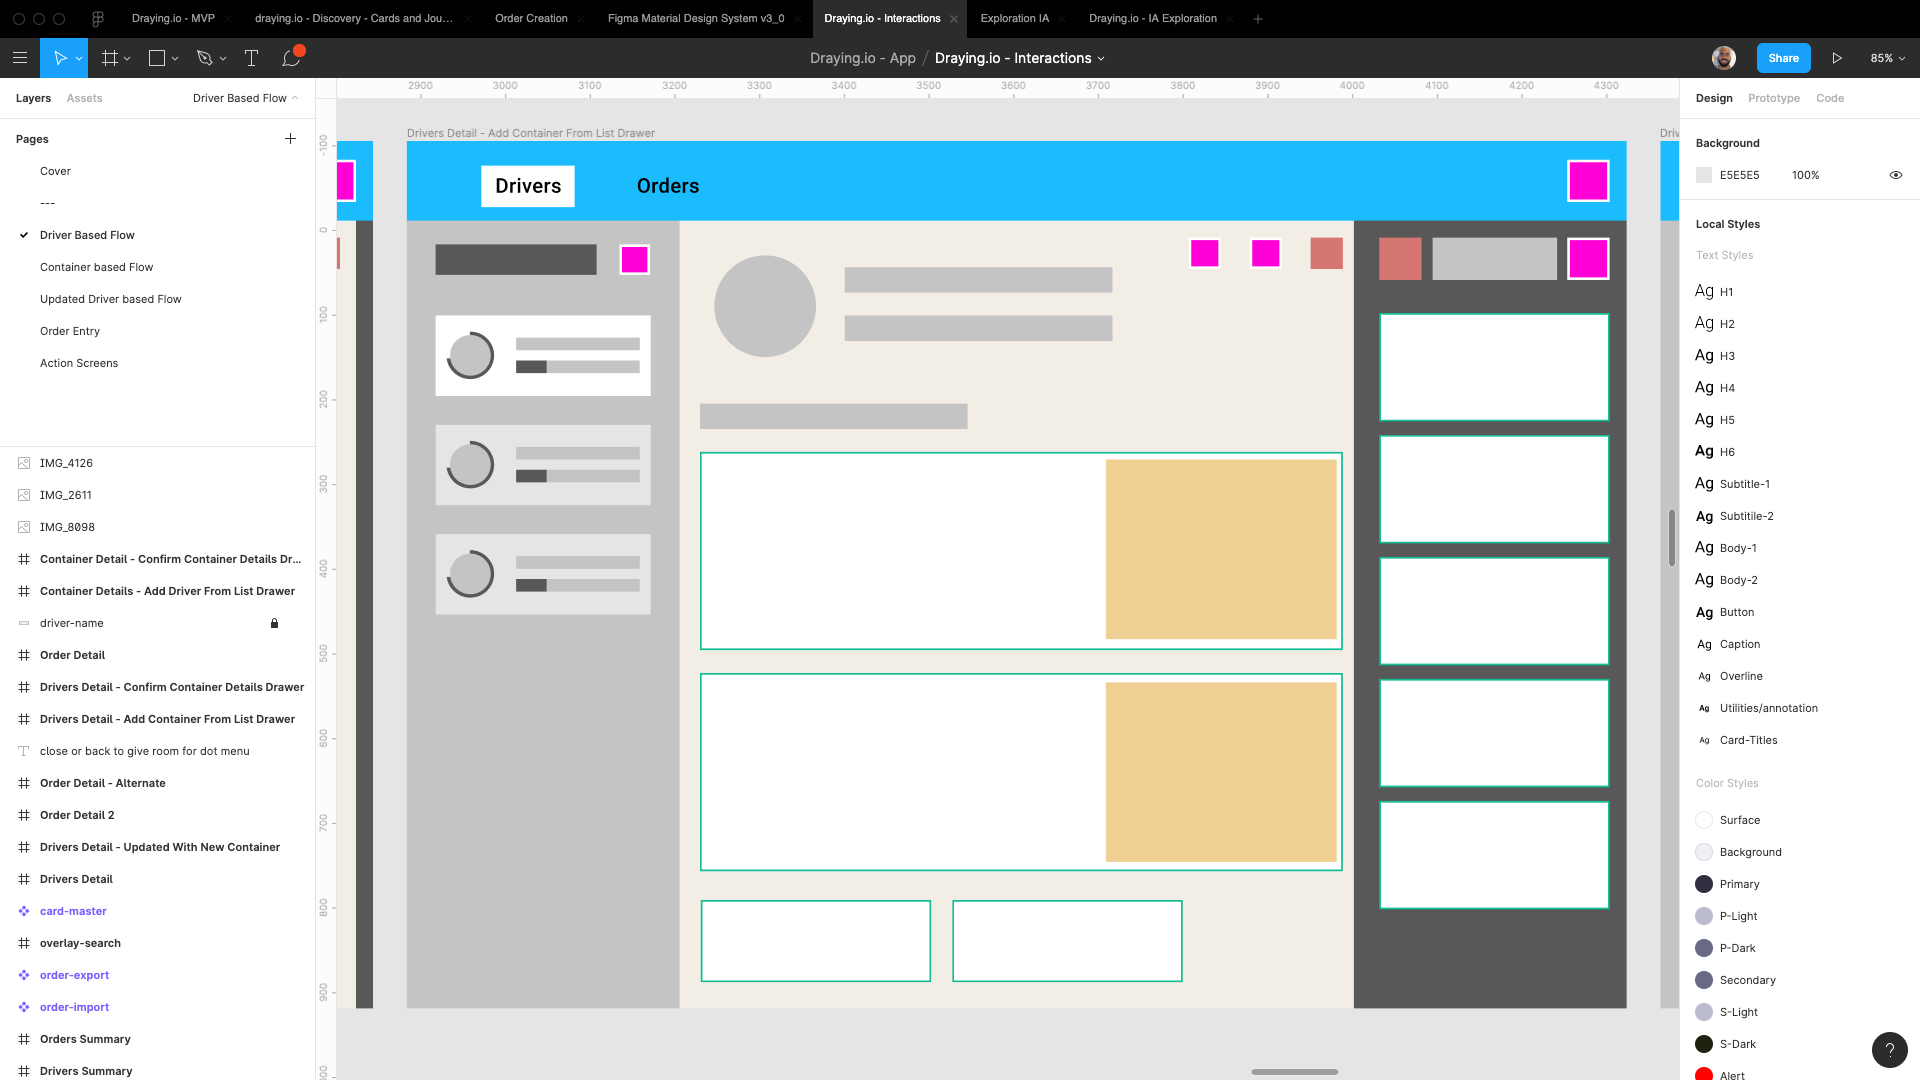
I then began building the UI, keeping the developer’s needs close at mind:
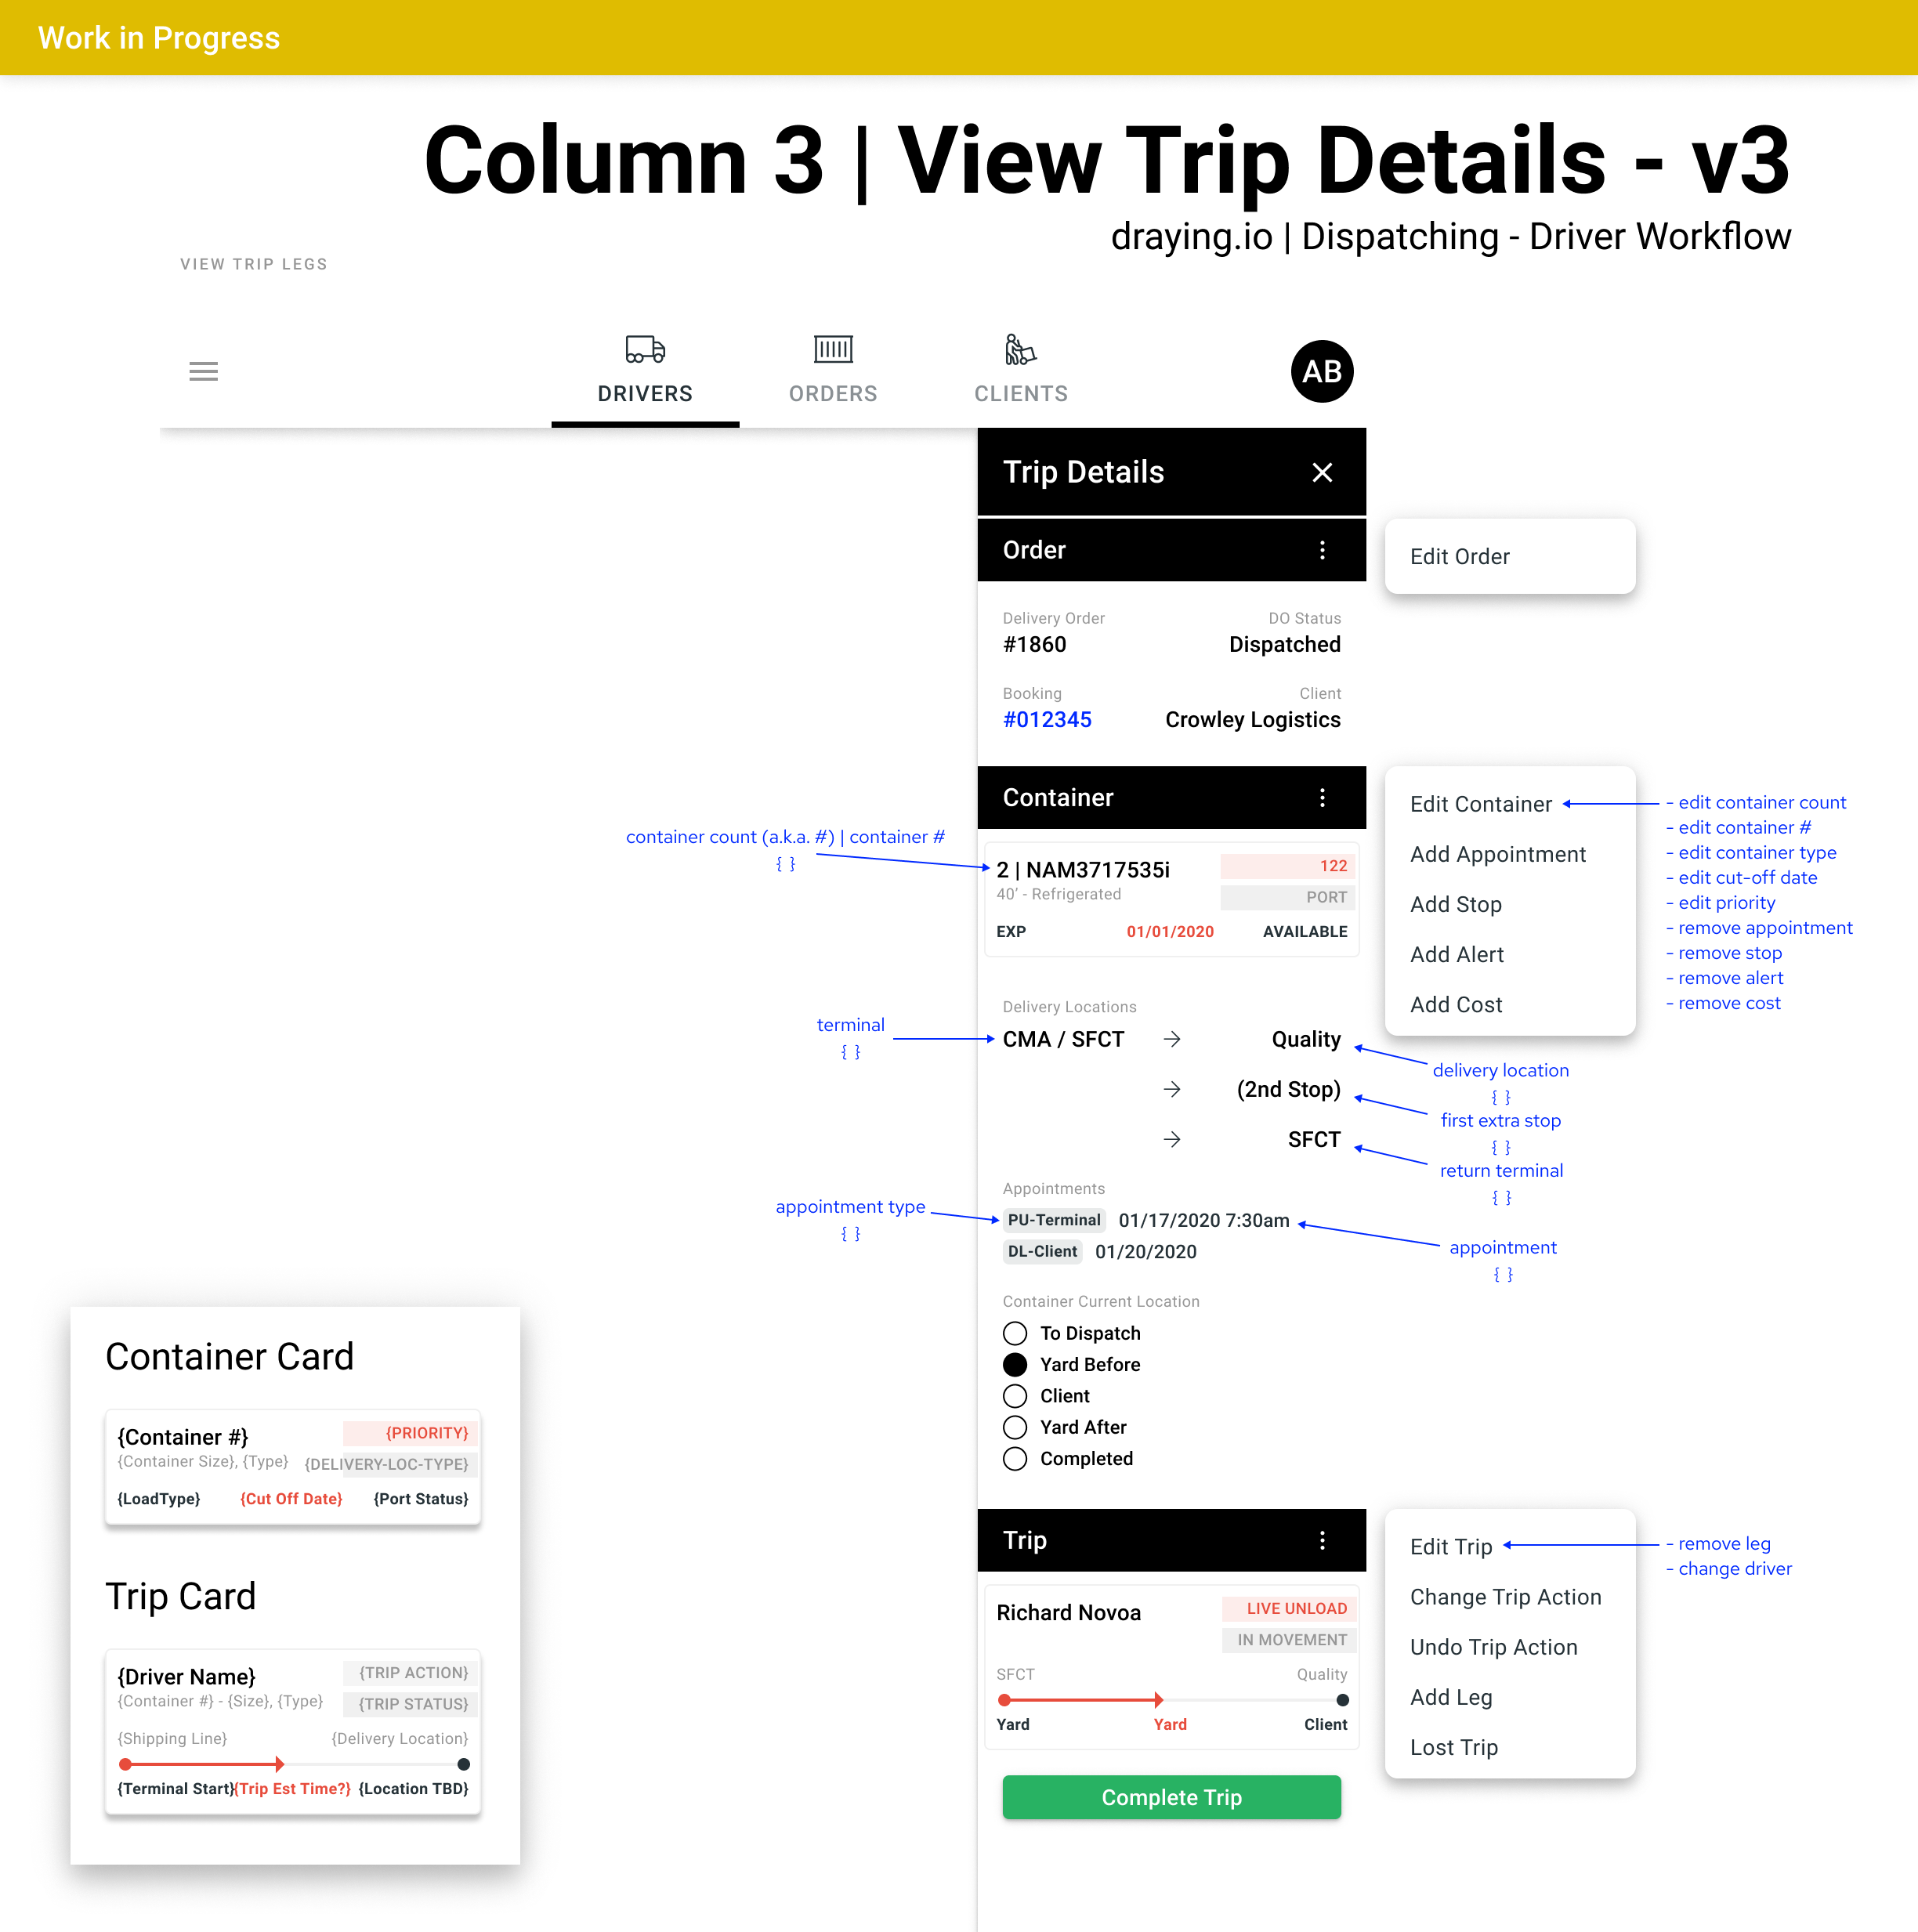
Using material design conventions, we began to build out the secondary screens necessary for all of the interactions:
Here’s a close-up of one:
Field Mapping & Working with Development
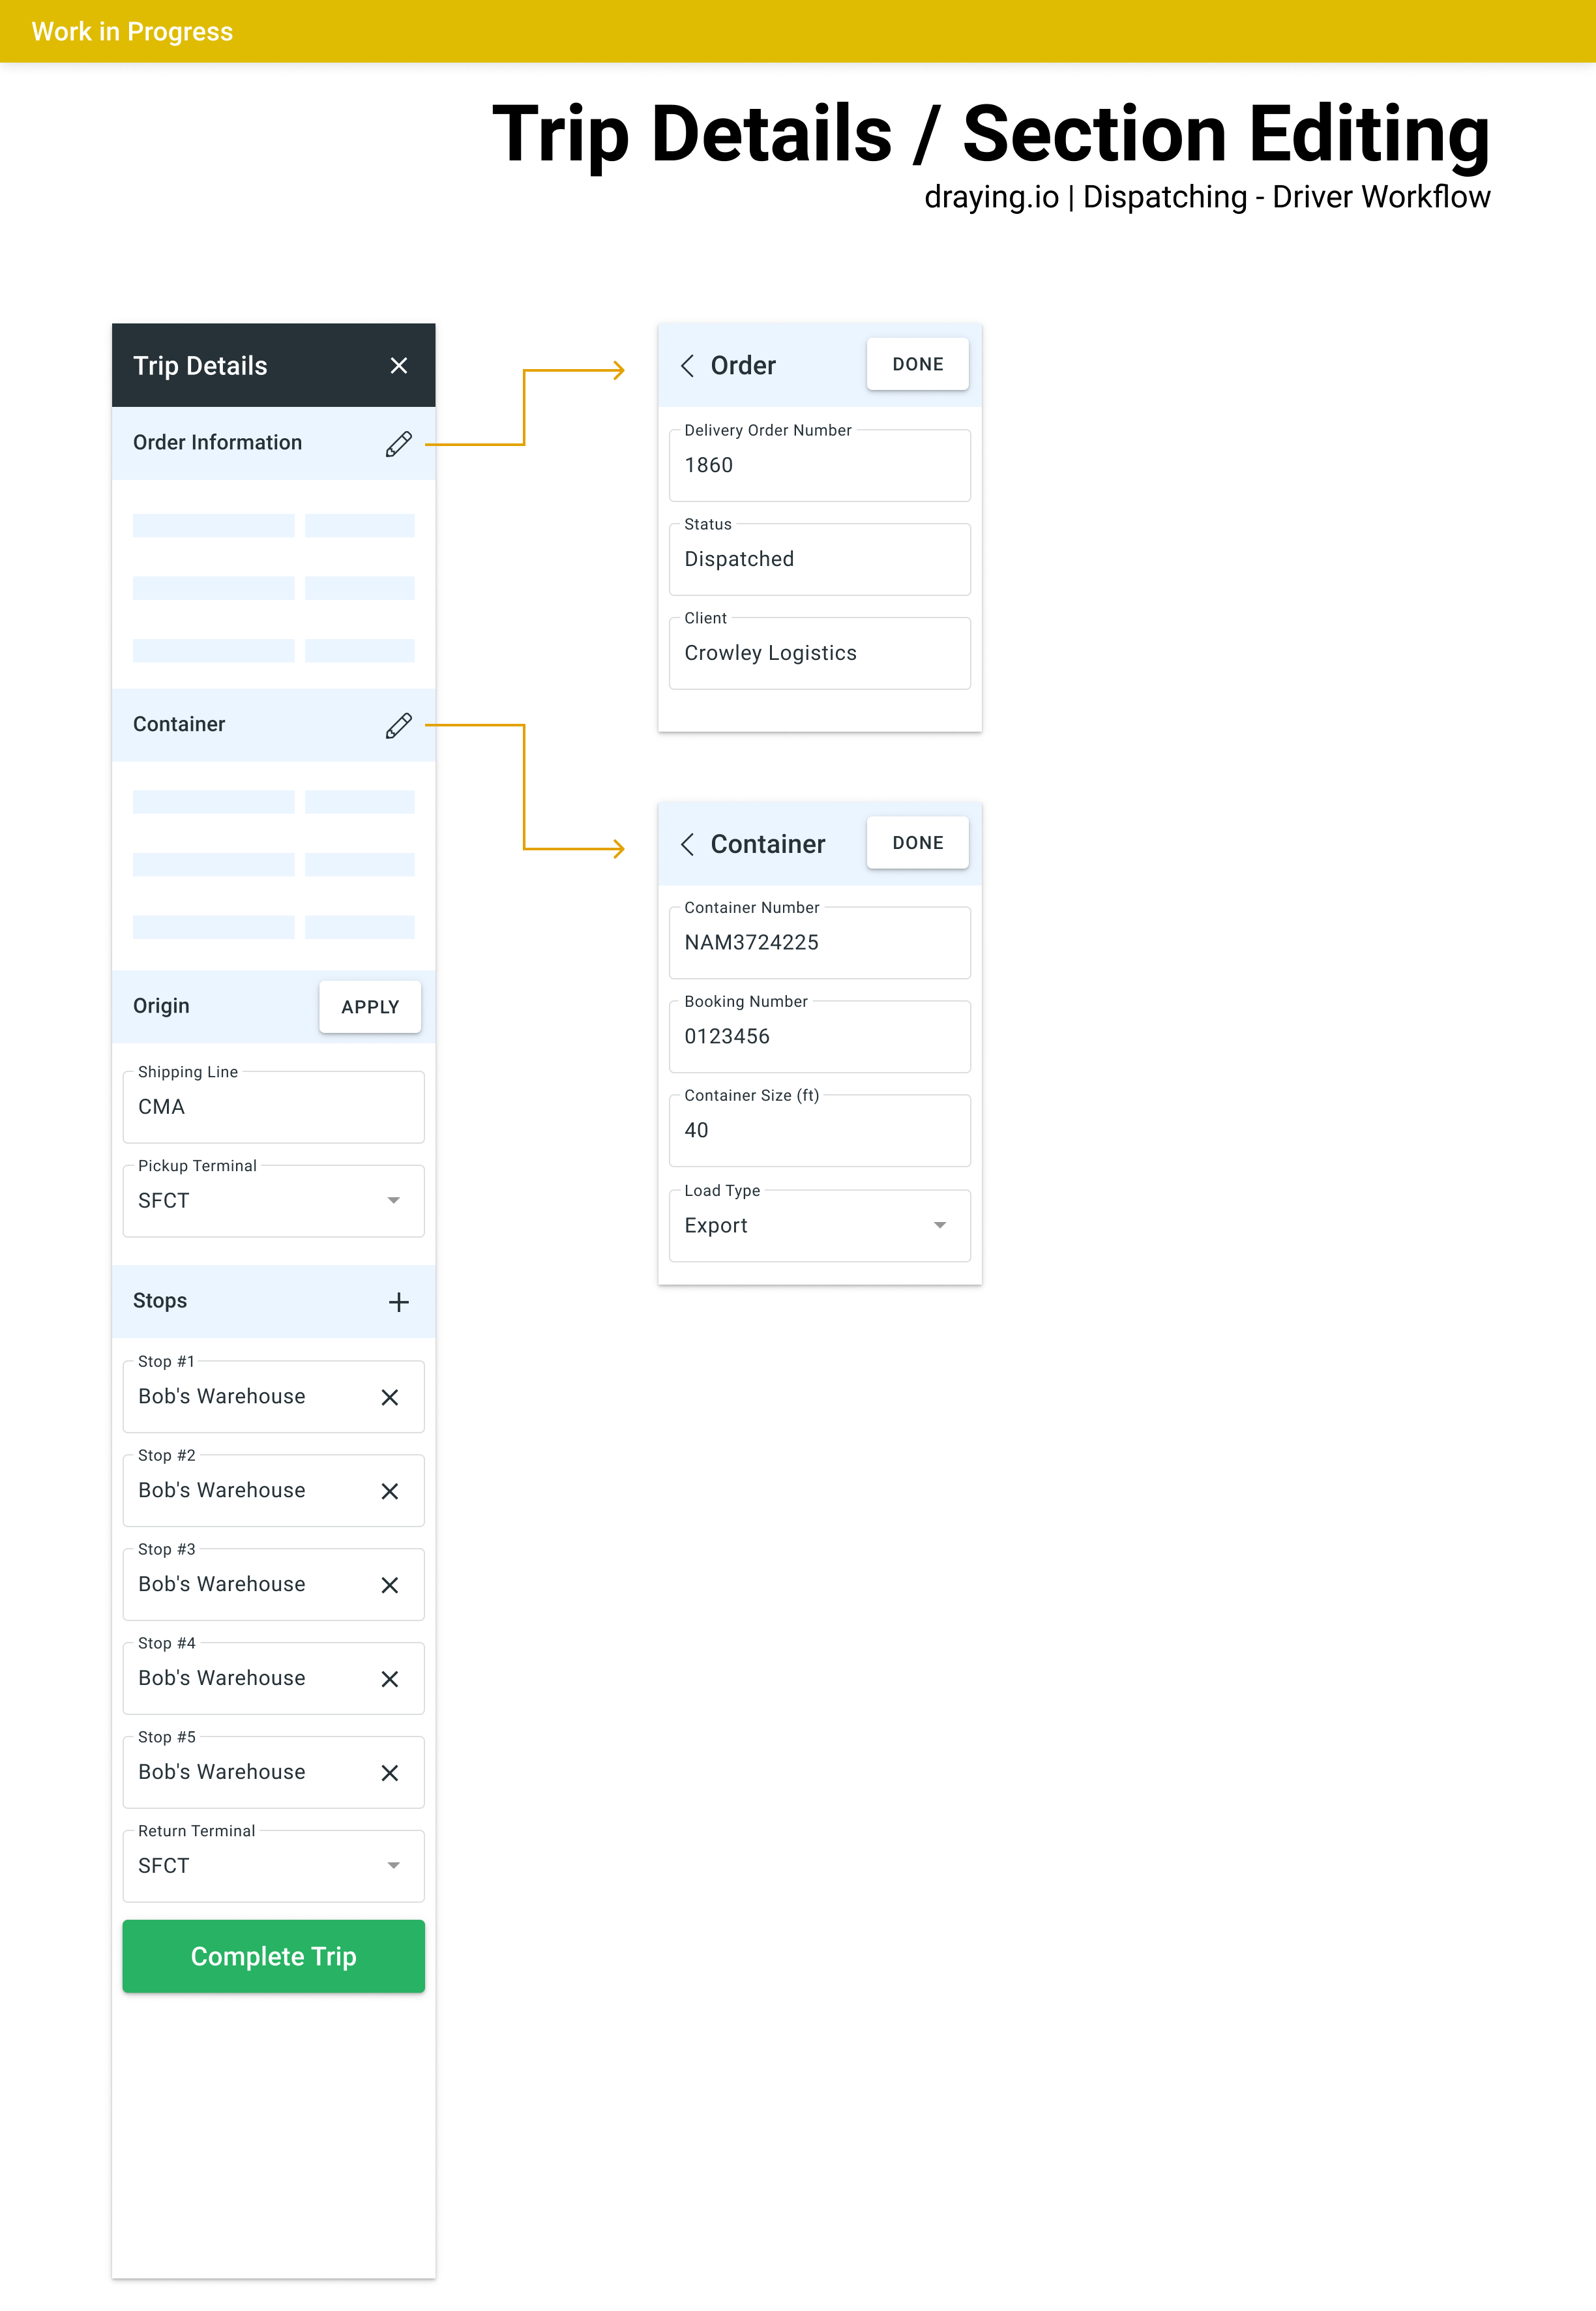
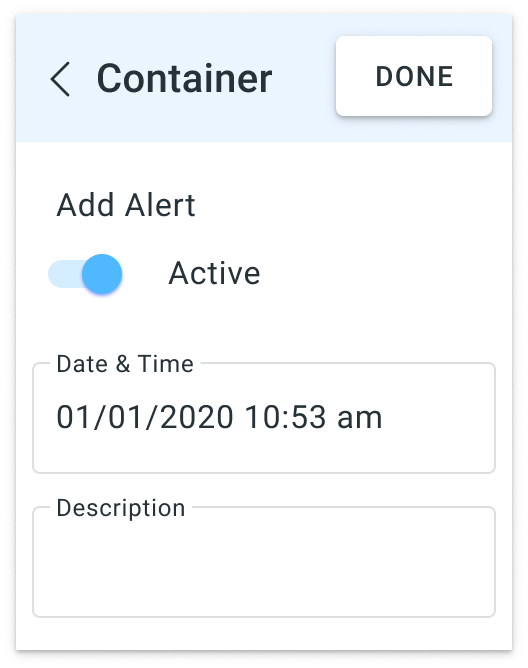
As design and development progressed and we came into questions of nuance that needed to be clarified, I further defined the UI as needed:
Our development approach was the build the UI with ‘vanilla’ material-ui components, which we would then style in high fidelity later on the project.
Here’s an early version of the new UI in react:
This allowed us to move more quickly in development as we focused heavily on data integration without getting muddled down in UI refinement.
Quick UI Exercise
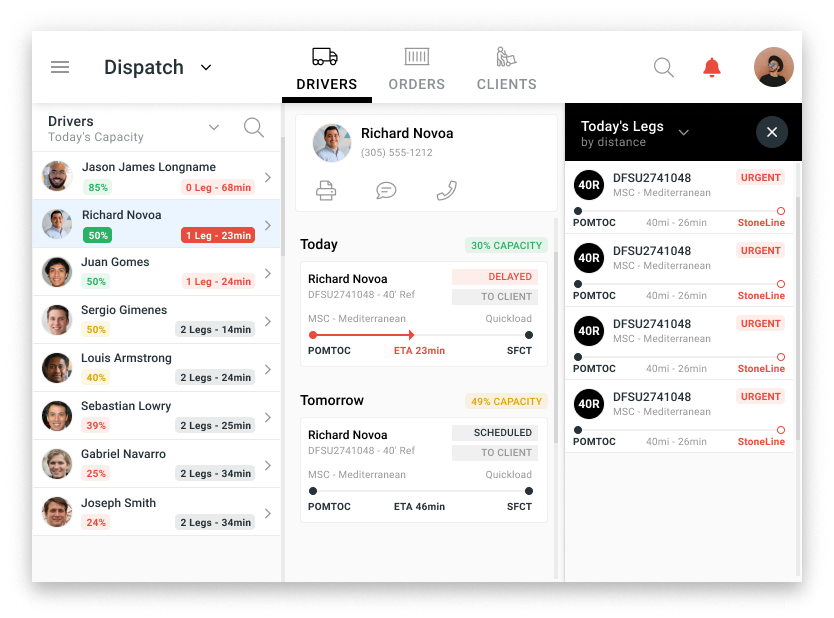
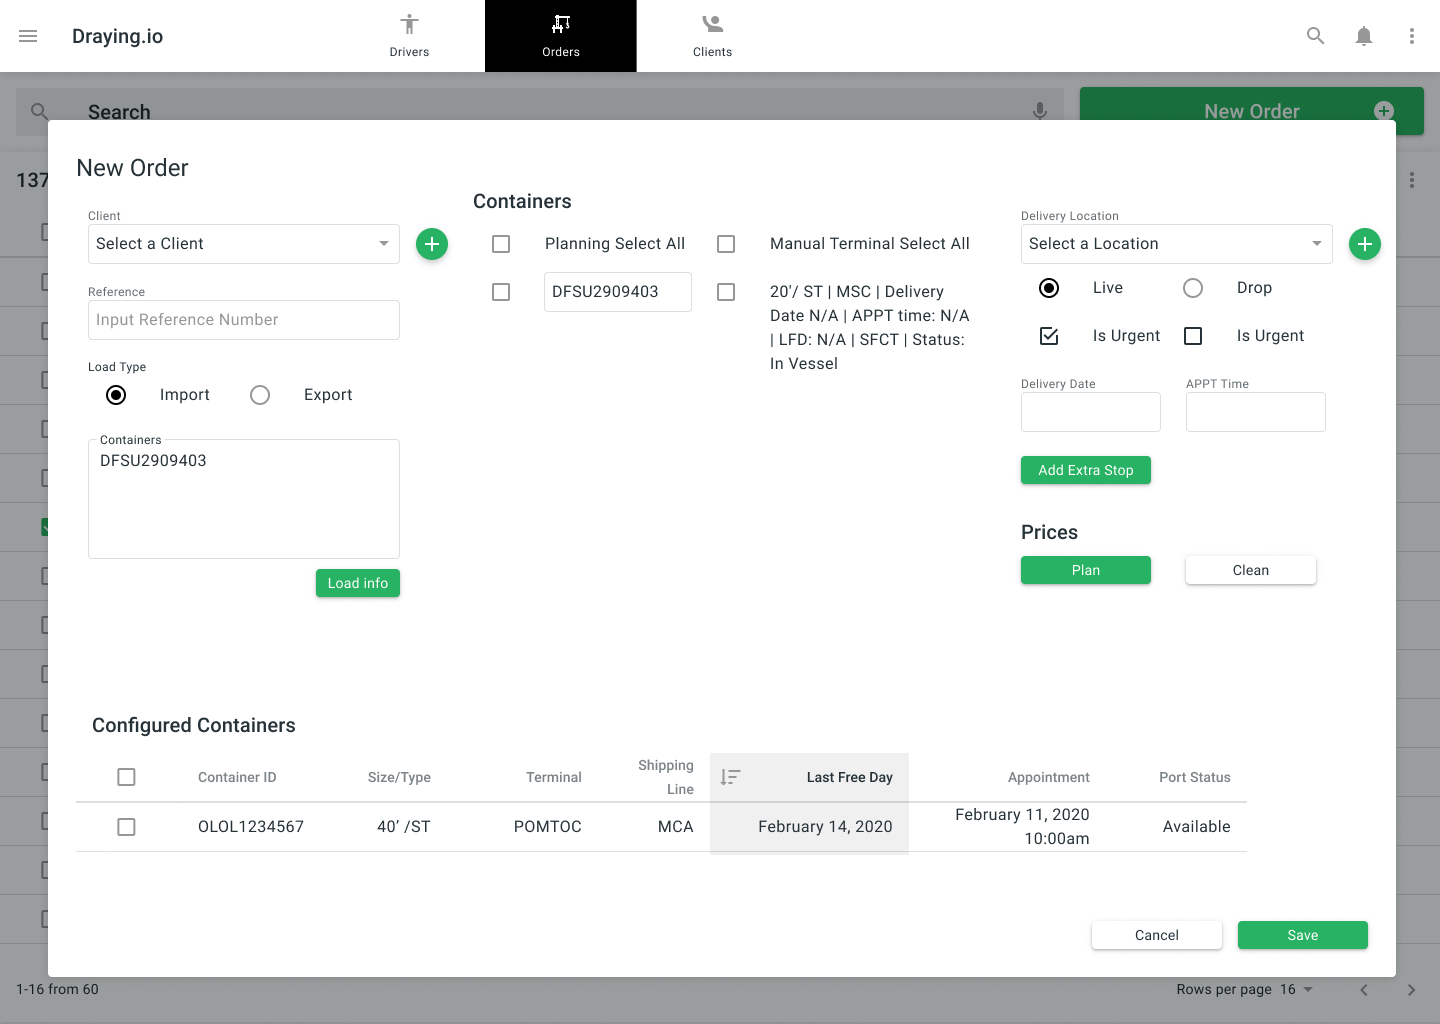
In some cases, at the request of the client, we designed the new UI to more closely match the existing UI.
Here’s a quick prototype I created in Figma over an afternoon with material components:
Next Steps
Before a decision to halt design and development due to business concerns, the next steps of the project would be to:
- continue to design and develop secondary and tertiary views to build all of the requested major and minor product features
- once views were built, restyle the UI into high fidelity
Conclusion
I hope this gave you a brief overview of how we approached the challenge of developing a product quickly, yet robustly, while facilitating clear communication about a complicated product.
I’m happy to answer any questions you may have as this was a brief overview of many aspects of the project.